
Introduction
JV Facelink is a Joomla module which allows you to create a fan page like box or live stream in your Joomla site
The module workflow :
- Download & install the module
- Configure parameters for the module
- Get APP ID if you would like to show live stream
- Get it done, check your result
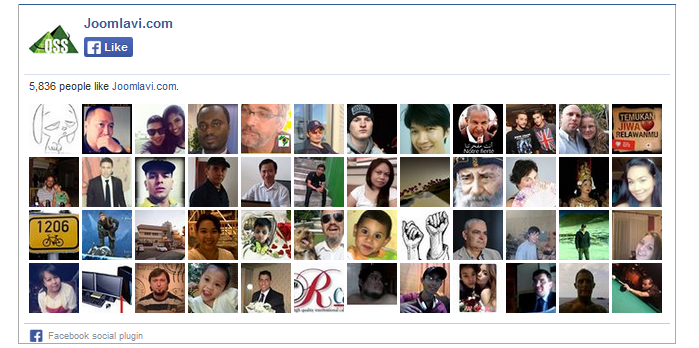
I am showing you the front-end result of the module after configuration as shown in the image below:
Downloading
JV Facelinker is completely free, you need to sign up for a membership account (free or paid) download the extension.
After logging into your account, visit JV Facelinker download page to download the extension.
Installation
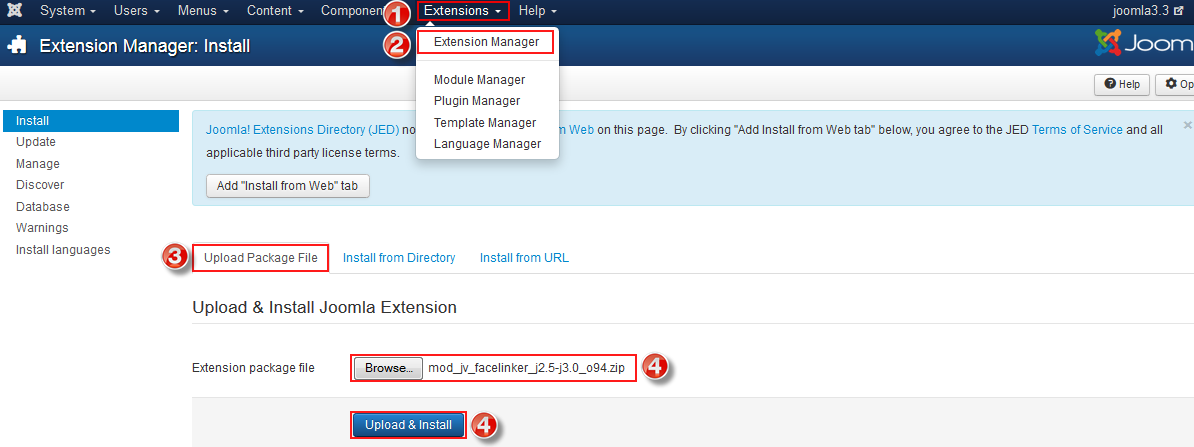
Once you get the packaged downloaded on your computer, now you can install the extension via administration area.
Go to Extensions >> Extension Manager >> Browse the package >> Click upload & Install
Configuration
After you successfully installed the module, next you need to enable and config the module.
Navigate to Extensions >> Module Manager , you will see a list of module, click on JV Facelinker to access the module manager

After accessing to JV Facelinker module manager, you can see 4 tabs: Module, Menu Assignment, Module Permissions, Advanced. We will go through each tab to config its parameters
1. Tab Module
This tab contains most of parameters in the module, there are important fields and parameters you need to notice: Position, Status, Facebook Page URL, APP ID.
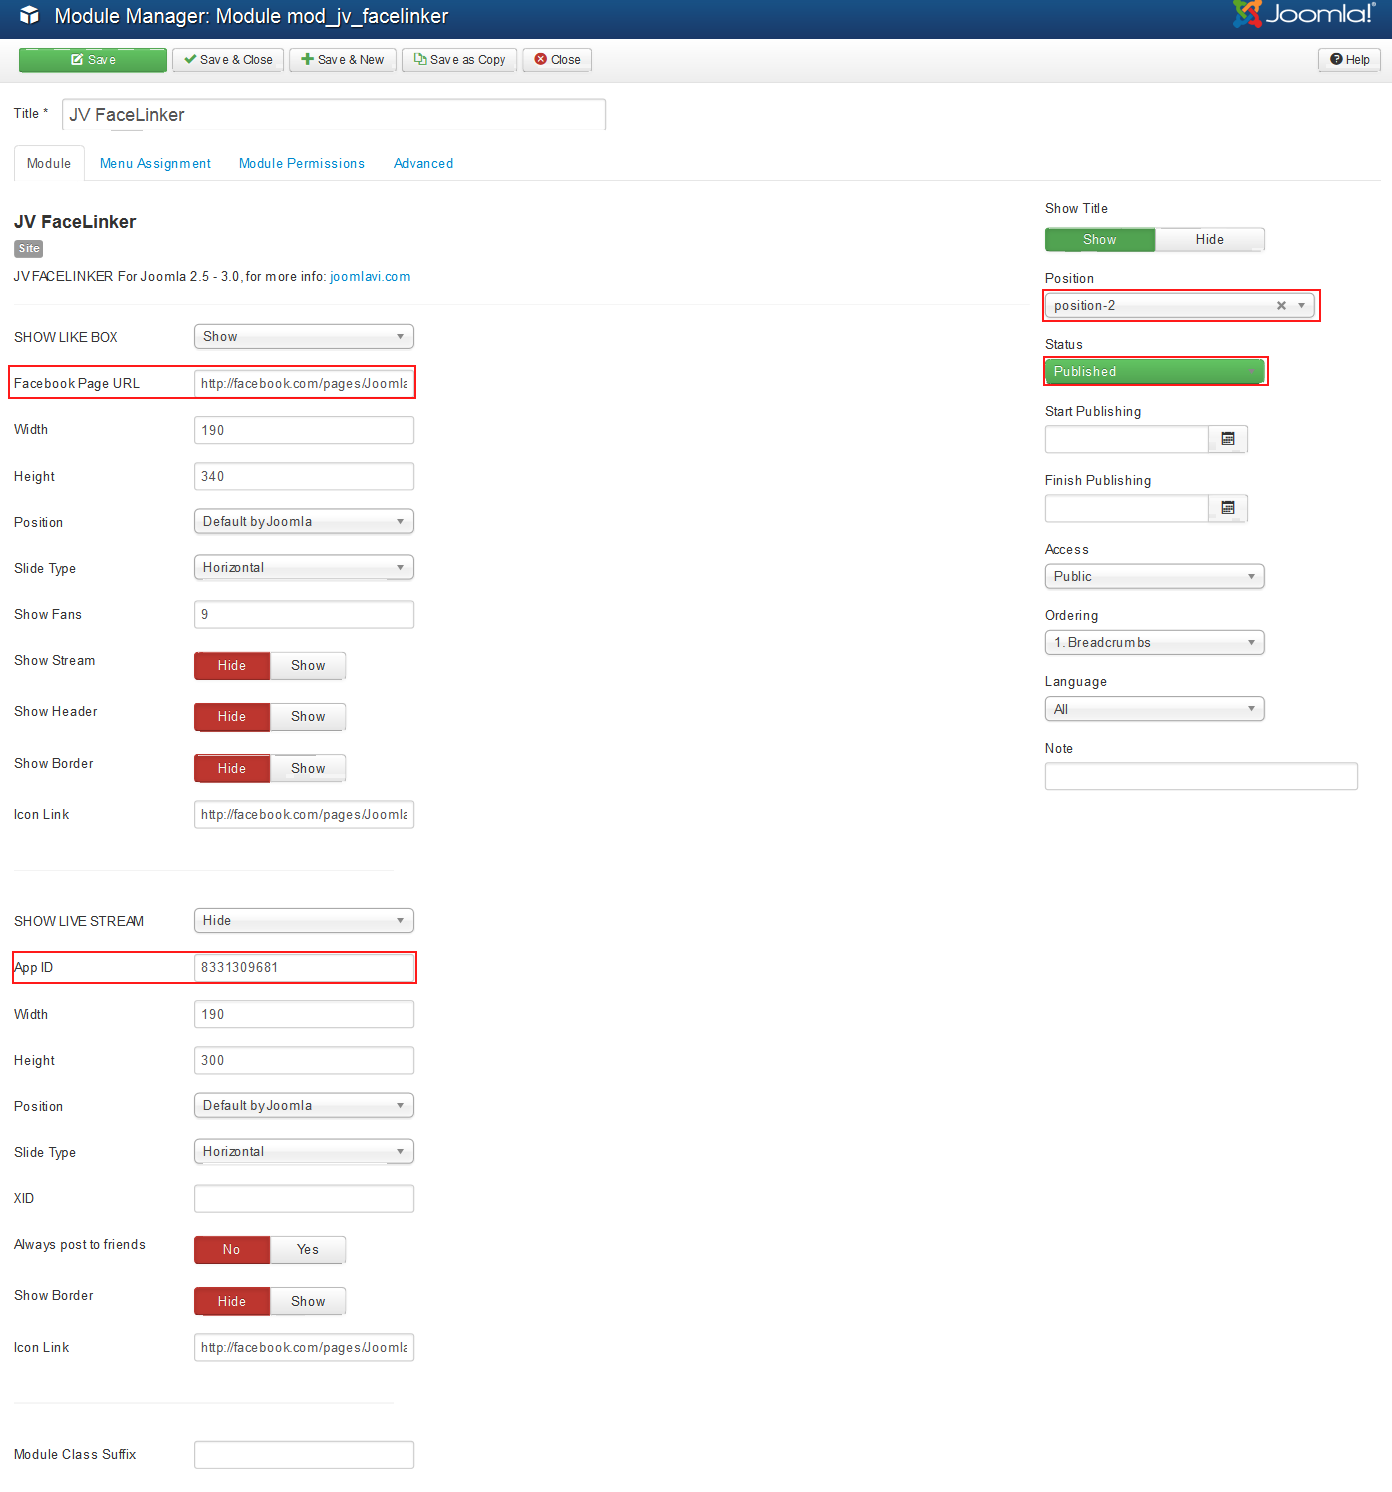
Important parameter and field explanation
- Position: select position to display the module
- Status: publish/unpublish/trash the module
- Show Like Box: Show/hide Facebook like box
- Facebook Page URL: enter fan page url
- Width: set suitable width for the module (in pixel)
- Height: set suitable height for the module (in pixel)
- Show Fan: show the number of fan
- Show live stream: show/hide live stream
- APP ID: enter your App ID for Facebook live steam
Tab Module Assignment
This tab allows you to assign the module on pages. You can assign on all pages, no pages, only on the pages selected or on all pages except those selected. 4 choices for you convenience.
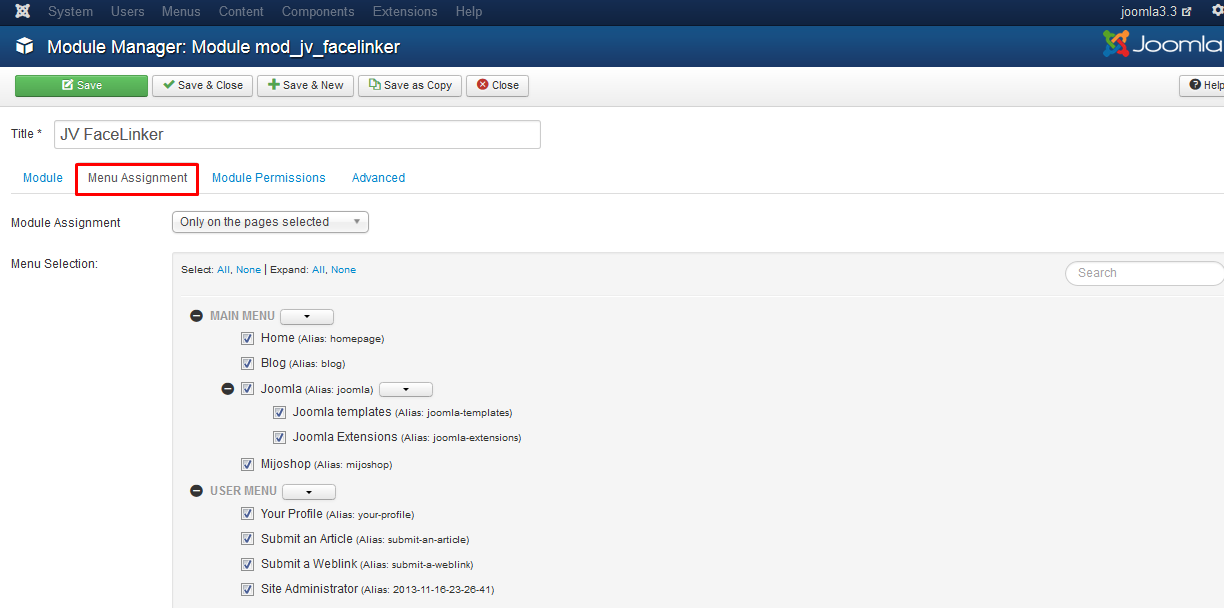
- On all pages: the module will be shown on all pages
- No pages: the module will be shown on no pages
- Only the pages selected: the module will be shown on the pages selected, tick the box on the right to select pages
- On all pages except those selected: the module will be shown on all pages except those selected, tick the box on the right to select pages
Note: To make sure the module is published, do not forget to select position, published, and assign the module to specific menu item
Tab Module Permission
This tab helps you to set permission for groups to delete/edit/edit state the module
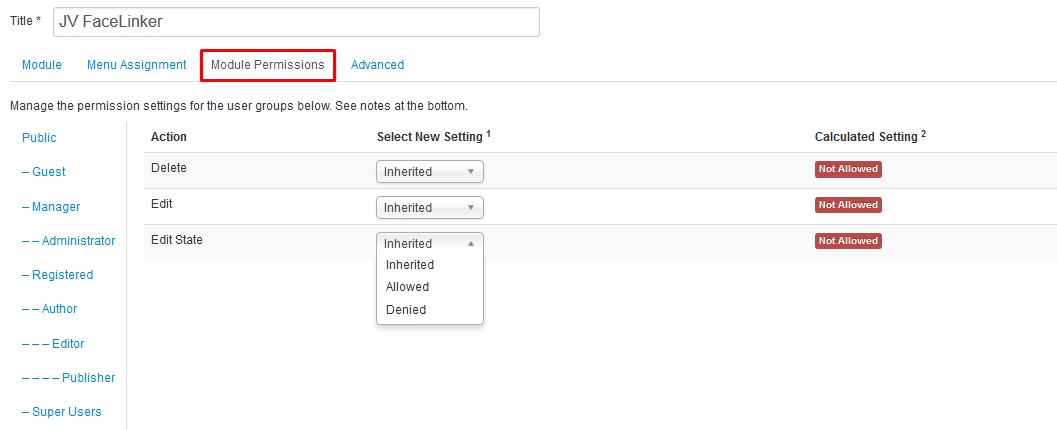
Delete: selected group is allowed/denied/inherited (from parent) to delete the module
Edit: (Inherited/Allowed/Denied): selected group is allowed/denied/inherited (from parent) to edit the module
Edit State: (Inherited/Allowed/Denied). selected group is allowed/denied/inherited (from parent) to edit state of the module
Tab Advanced
This a default tab in Joomla module that helps you to futher custom the module
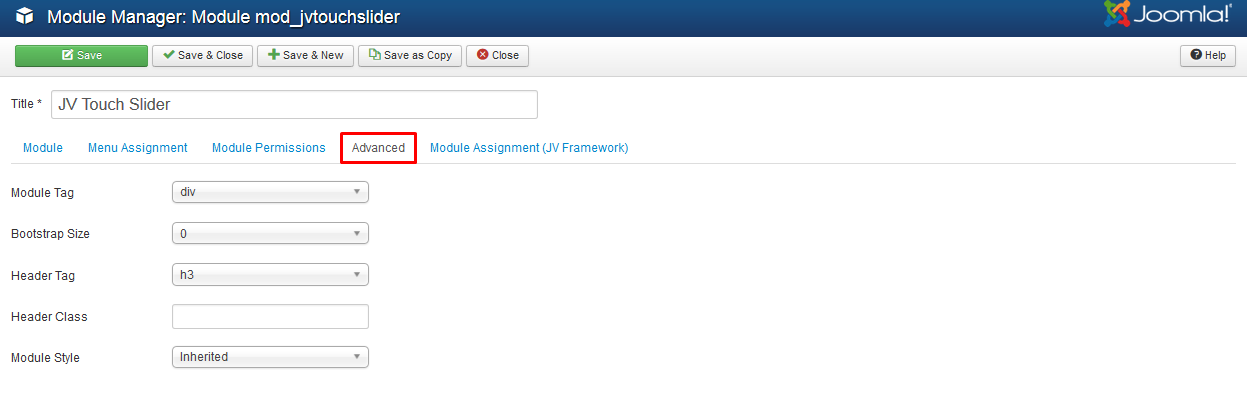
Parameter explanation:
- Module Tag: The HTML tag for the module to be placed in. By default this is a div tag but other HTML5 elements can also be used.
- Bootstrap Size: (Values 0 to 12) This allows you to choose the width of the module via the span element built into bootstrap. For more information see the bootstrap documentation.
- Header Tag: The HTML tag to use for the modules header or title this can be either a h1-h6 tag or a p tag.
- Header Class: Here you can add optional CSS classes to add to the modules header or title element.
- Module Style: You can use this option to override the templates style for its position.
Obtain APP ID
You need to get APP ID to be able to show live stream. You can get one of these by setting up a new application in the Facebook developer’s area. To obtain App ID:
Go to Facebook developer’s area and you need to register there. Once you register you will get a button visible on the dashboard call "Create new app".
Give the application a name and agree to the terms of service.Continue to click "Create Application"
Facebook will create an app with App ID which you can use in your website.