Downloading JV login
This extension is free but you need to sign up for free membership to get privilege to download this extension.
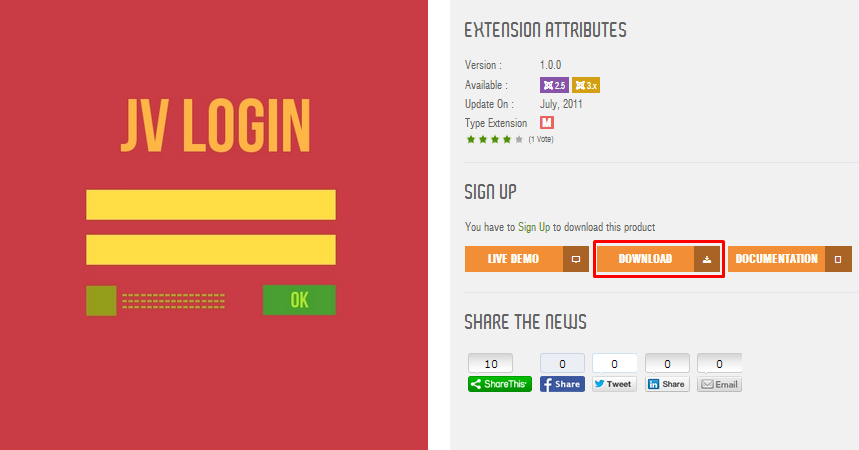
After signing up, log in to you account, open JV Login overview page. In the page, you can have a general look of the template with some information such as Joomla version supported, download button, link to view demo, documentation...
Click on the download button to download area
installation
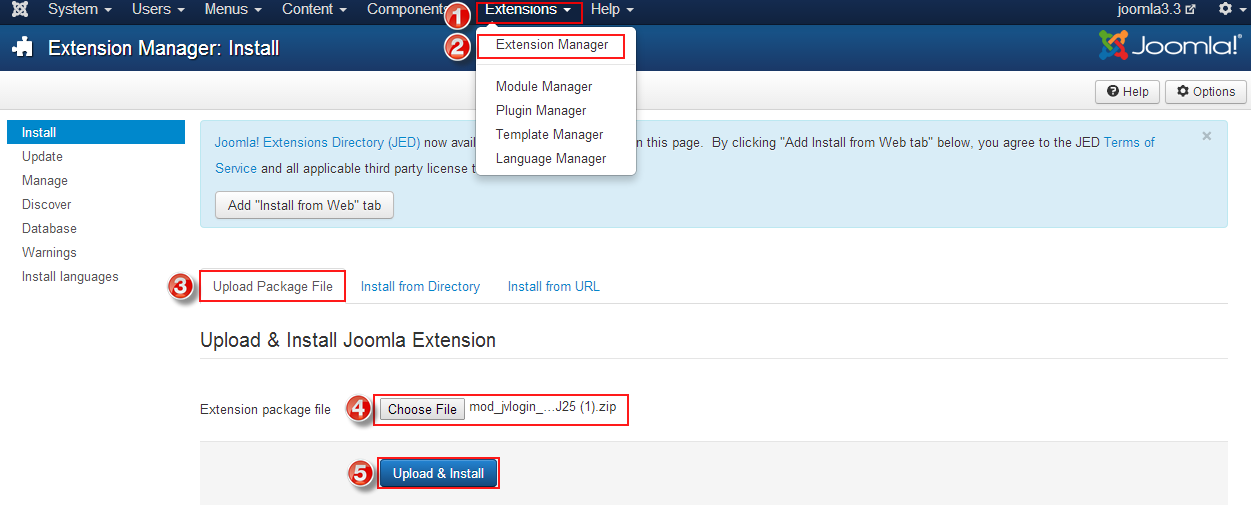
Once you have JV Login downloaded on your computer, navigate to Extensions => Extension Manager to install JV Login
You can install the extensions by 3 ways, but I am choosing the first one - "Upload Package file", this is the quickest way to install extension on Joomla!,
Browse the package you downloaded, then click Upload & Install. JV Login installation is now sucessfully completed.
In case you are not familiar with extension installation or want to find out more about 3 ways of installation on both Joomla 2.5 and 3x, view the following link :
Enable the module
This is a very important section to make sure the module displayed in front-end.
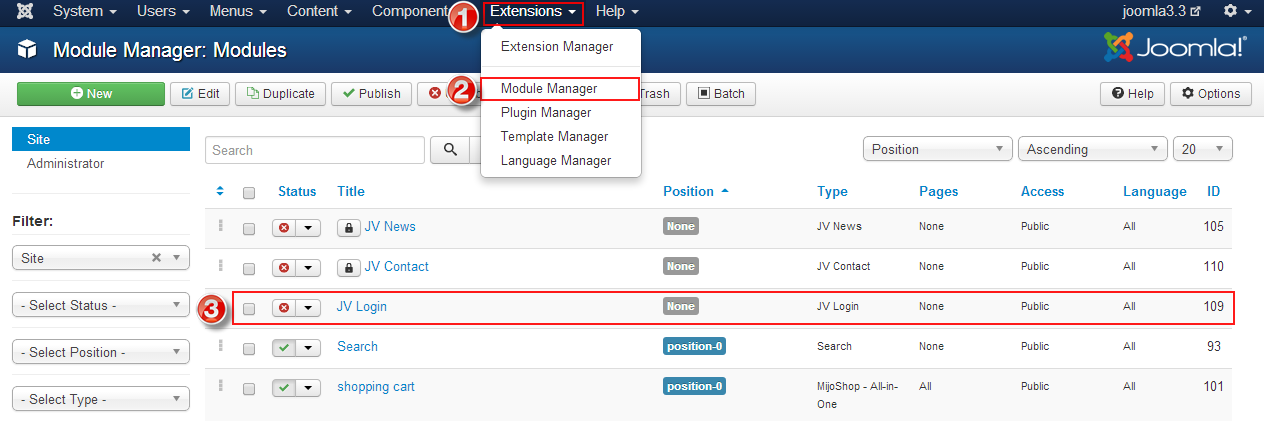
To successfully enable the module, first, navigate to Extensions >> Module Manager, Click on JV Login
Then you must not forget three things:
- Publish the module
- Select a position for the module
- Assign the module to specific page(s)/menu item(s)
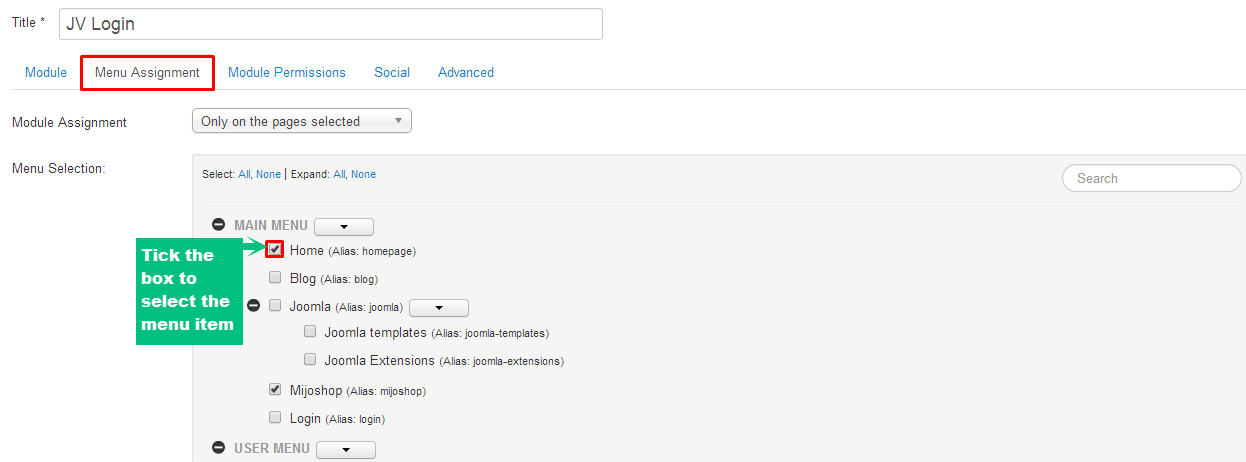
Select tab Menu Assignment in the bar below the module title. In this tab, there for assign the module: On all pages, No pages, Only the pages selected, On all pages except those selected.
New installed module will be assigned on No pages by default, so you need to assign the module to specific pages/menu items.
Configuration
Also in the backend, go to Extension >> Module Manager, Select JV Login. You will see 5 tabs: Module, Menu Assignment, Module Permissions, Social, Advanced. The tab Menu Assignment was mentioned when enabling the module. Now we will only go to 4 tabs to configure and find out their parameters
1. Tab Module
This is always the most important tab when you manage the module, it contains most of important parameters.
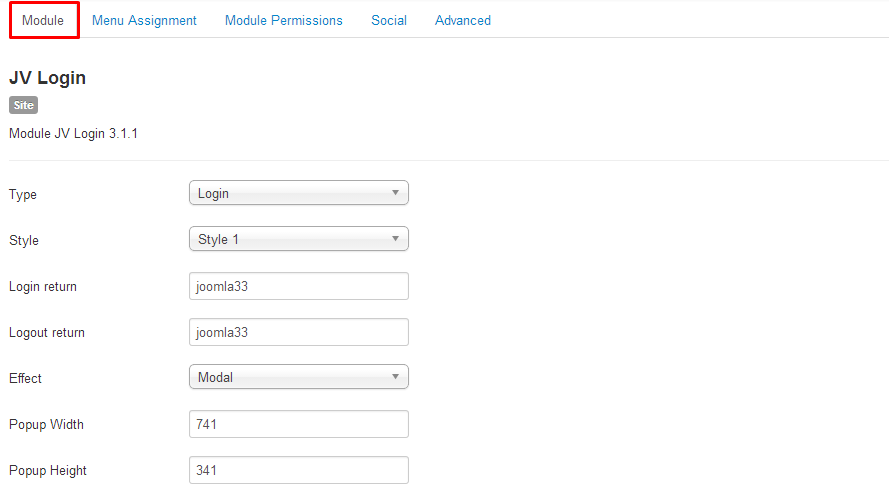
- Type: select type of module (login/register)
- Style: select style for the module
- Login return: enter url that redirects the user after logging in
- Logout return:enter url that redirects the user after logging out
- Effect: select an effect for module (modal popup/none)
- Popup Width: enter modal login/register popup width (in pixel)
- Popup Height: enter modal login/register popup height (in pixel)
2. Tab Module Permissions
This tab helps you to set permission for groups to delete/edit/change state any content of the extension
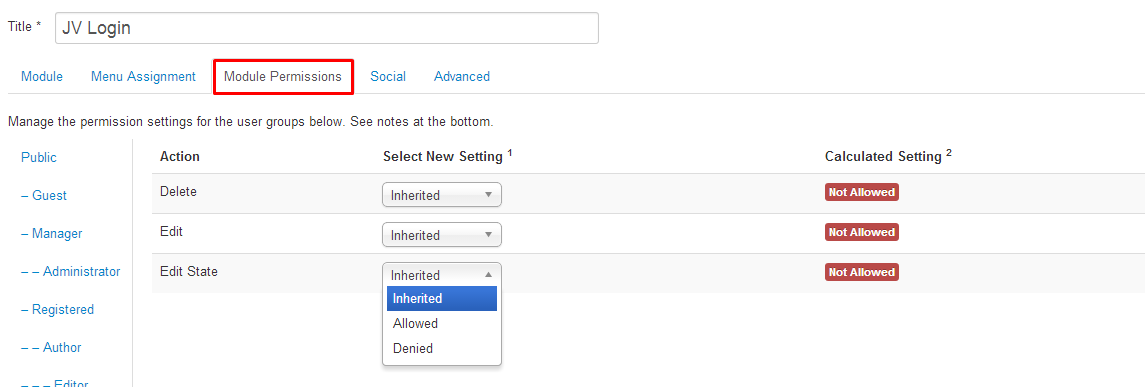
Delete (Inherited/Allowed/Denied): Allow or deny Delete for users in the Public group. Delete Allows users in the group to delete any content in this extension.
Edit (Inherited/Allowed/Denied): Allow or deny Edit for users in the Public group. Edit Allows users in the group to edit any content in this extension.
Edit State (Inherited/Allowed/Denied): Allow or deny Edit State for users in the Public group. Edit State Allows users in the group to change the state of any content in this extension.
3. Tab Social
This tab allows you to config JV login with social network
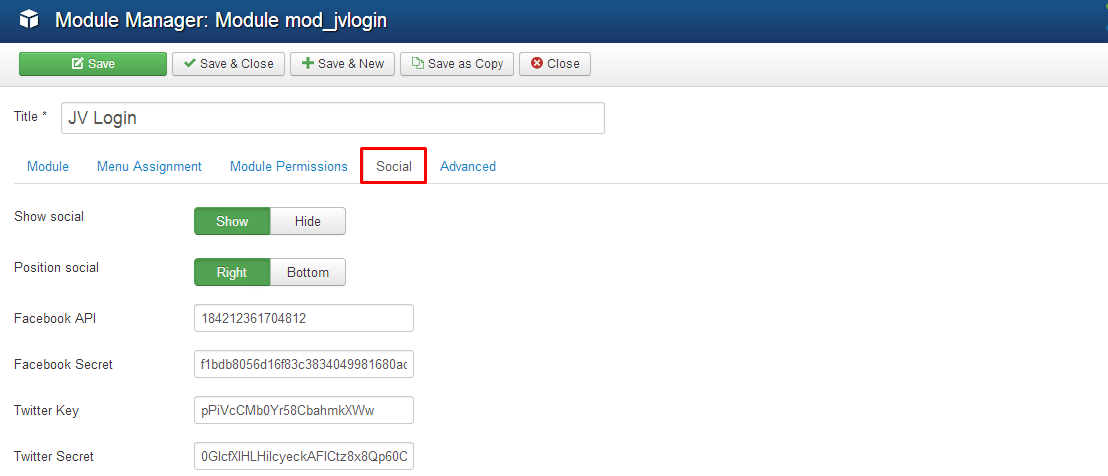
Parameters explanations:
- Show Social: show/hide social buttons
- Position Social: select position for social buttons (right/bottom)
- Facebook API: enter Facebook API key
- Facebook Secret: enter Facebook API key
- Twitter Key: enter Twitter key
- Twitter Secret: enter Twitter secret
To get Facebook API, Secret and Twitter Key, Secret, please view below
4. Tab Advanced
Within this tab to you can configure advanced parameters for the module

- Module Class Suffix: you can add CSS class for the module to apply
- Caching: select whether to cache the content of this module
- Cache Time: enter time before the module is recached
- Module Tag: The HTML tag for the module to be placed in. By default this is a div tag but other HTML5 elements can also be used.
- Bootstrap Size: (Values 0 to 12) This allows you to choose the width of the module via the span element built into bootstrap. For more information see the bootstrap documentation.
- Header Tag: The HTML tag to use for the modules header or title this can be either a h1-h6 tag or a p tag.
- Header Class: Here you can add optional CSS classes to add to the modules header or title element.
- Module Style: You can use this option to override the templates style for its position.
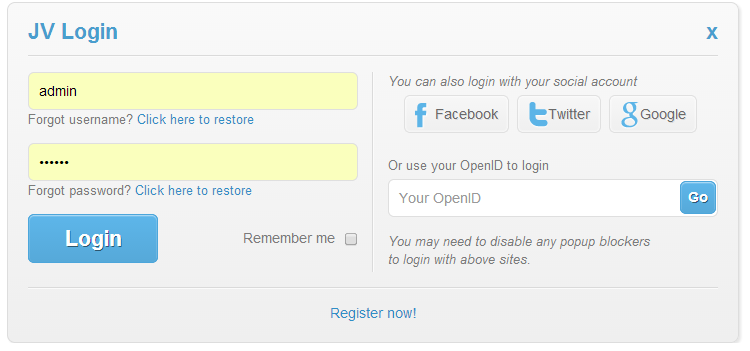
Front-end results:
1. Type login
Let's check the login popup in front-end with social buttons enabled:
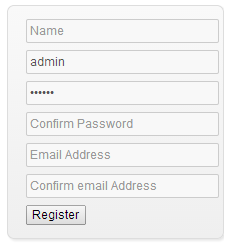
2. Register type
Modal popup in frontend after selecting register type in backend: