
Introduction
JV Override Scroll is a plugin which allows you to create a scroller in your articles, texts or any element...
JV Override Scroll workflow :
- Determine which element(s) you would like to create scroller
- Inspect the element on the page to find ID or Class of the element
- Add the ID or Class to selector in Plugin Manager Page.
- Config parameters, get done, check on front end
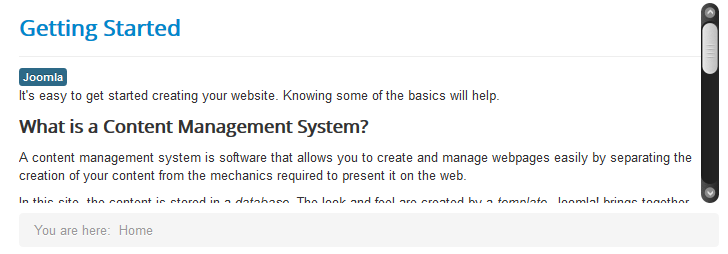
Please view the image below to know how it looks:
Downloading
This extension is completely free, you need to sign up for a free membership account to download it.
After logging into your account, visit JV Override Scroll download page to download the extension.
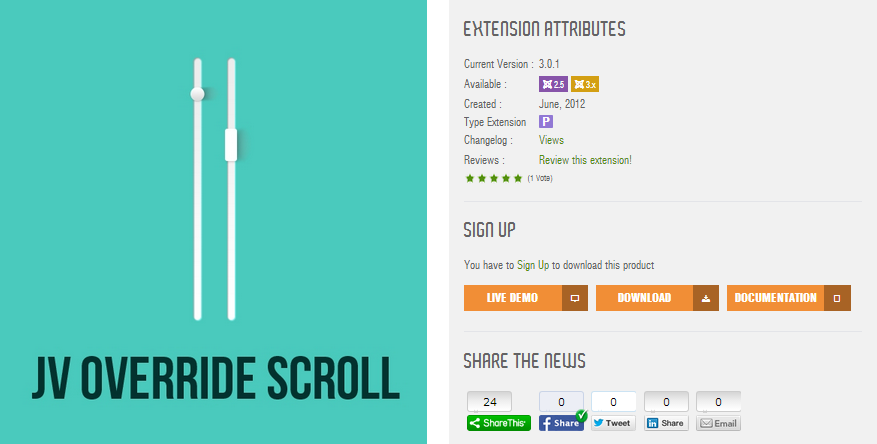
Note: the package you download includes JV Query Library and JV Override Scroll plugin
Installation
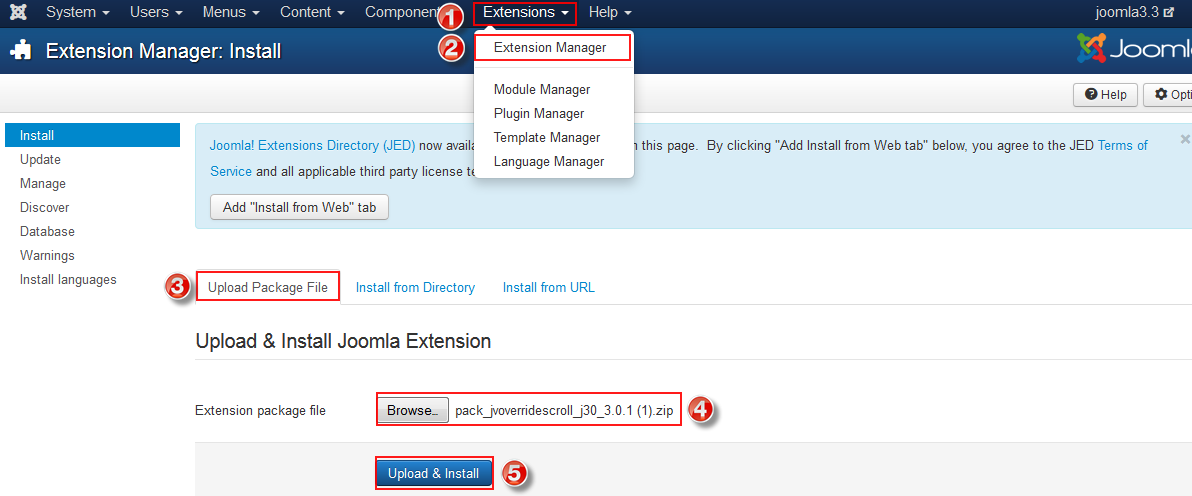
Once you have the packaged downloaded on your computer, now you can install the extension through back-end area:
Go to Extensions >> Extension Manager >> Browse the package >> Click upload & Install
Enable the Plugin
JV Override Scroll Plugin is not enabled itself by default, so you need to manually enable the plugin to make sure it work. Go to Extensions >> Plugin Manager, search for the plugin and enable it

Inspecting elements
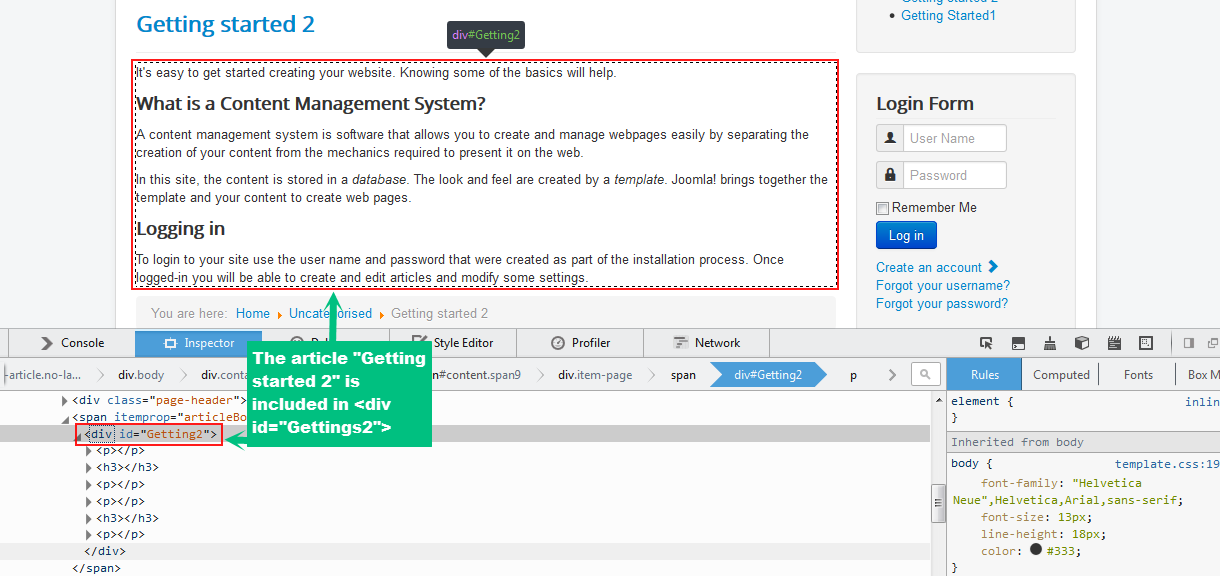
You need to "Inspect element" to find "class" or "id" of the element that you would like to apply scroller.
You can inspect page element by pressing F12 as usual or using Firebug add-on.
In the picture below, I inspected and found id="getting2" for article "Getting Started 2"
Configuration
After getting the "class" or "id" of the element.
Access to JV Override Plugin manager, Click on "Add"
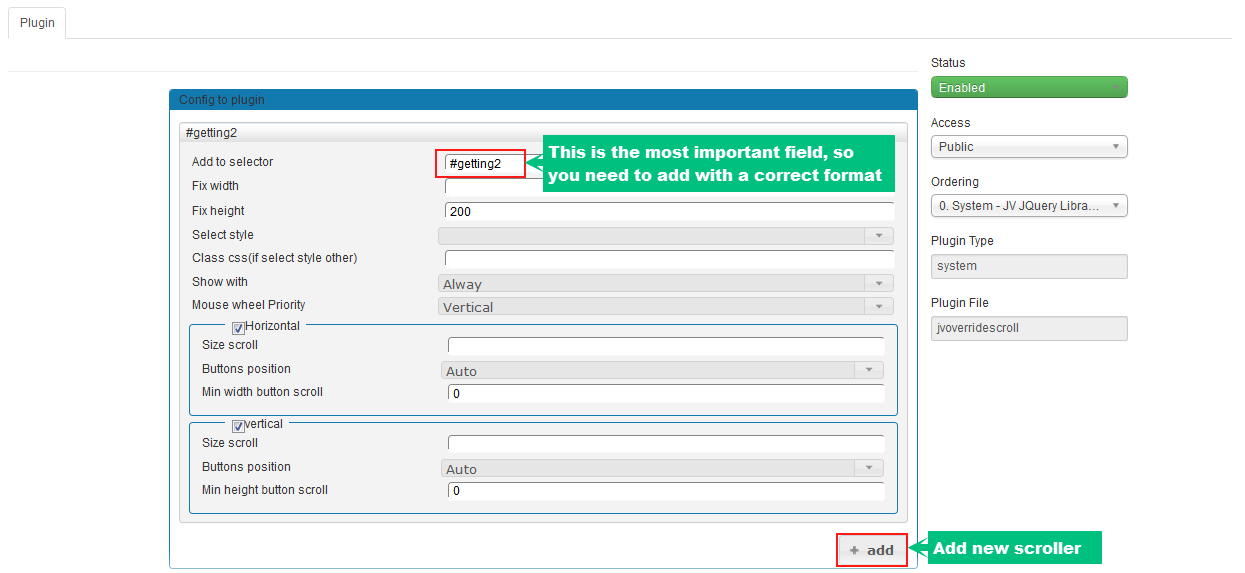
You will see the parameters show up, enter the "class" or "id" you found in "Inspecting element" step into “Add to selector” using the format #id or .class .
As you can see in the image below, I added the "id" of the article "Getting started 2":
Parameter explanations
- Fix width: the width of the section after it was turned into a scroll. Leaving this field blank means default css width.
- Fix height: the height of the section after it was turned into a scroll. Leaving this field blank means default css height.
- Select style: select pre-created style for the scroll. Select ‘other’ if you want to use css style.
- Class Css (if select style other): If you selected ‘other’ in ‘select style’, this is the field where you enter the css class you want to use.
- Show with: ‘Always’ means the scroll bar will always be visible, ‘Hover’ means the scroll bar will be invisible until you hover the mouse over the affected section.
- Mouse wheel priority: when the section have both vertical and horizontal scroll bar, this parameter allows you to set which bar will be affected by the mouse wheel.
- Horizontal: its parameters affect the horizontal scroll bar
- Vertical: its parameters affect the vertical scroll bar
- Size scroll: The size of the scroll bar
- Button position: The position of the direction button on scroll bar.
- Min width button scroll: the minimum width of the slide button when the affected section is too wide.
Recommendation
I recommend you using Firebug to inspect the elements more easily. This is one of the most popular tools used by web developers, if you are new, you should learn how to use it. You can visit https://getfirebug.com/ to find out more about the add-on.
Using JV Override Scroll requires you to be familiar with ID and Class. You should notice 2 lines below before using the extension.
- ID's are unique, therefore if you only want to create scroller for only one element, you should manually add ID to the element. For example, in this guide, I only want to apply scroller to the article "Getting started 2" so I added the unique ID "Getting2" to this article.
- Classes are not unique, if you add class to "Selector" in plugin configuration, the scroller will be applied into all elements containing the class. So you need to be careful while doing this.