
Introduction
If your online store needs a modern & balmy looking, elegant & flat design. You can’t go wrong with this stylish Responsive Fashion E-Commerce Joomla template exclusive for a shopping site. We’ve happened to see many e-commerce websites with confusing images, and not sufficient customer usability. While your site is the face of your business, not only does it have to be convenient but it has to look good.
So the concept of Flatize is simple, and balmy looking, but still constitutes sufficient features of an e-commerce site with products, carts, advanced search,…
There’s lots of ways to make Flatize your own too; predefined styles, offer several colors choices, two different header layout, 3 Homepage layout variations, menus optimized for desktop and mobile users, and our JV Framework includes support for Boostrap 3
With Hikashop support, this online shop template carries multiple commercial choices for managing your products.Our product-display module produces eye-catching showcases based on your chosen categories.
No wait further, give your sales a boost with Flatize!
1. Features
 Fully responsive
3 Homepage layout variations
2 Contact versions
Valid HTML5 & CSS3
Bootstrap 3 integration
Joomla 3 support
RTL support
7 Preset colors
Powerful shopping cart Hikashop
Typography and various module variations
Mega Menu
Fonts icomon
Support Retina
2. JV and third party extensions supported
JV Slide Pro
JV Contact
JV News Letter
JV Latest News
JV Tabs
JV Ajax Search Hikashop
Hikashop
K2
References
This guide is not intended to cover everything you need to know to build a Joomla site. As you know, Joomla and third party extension configuration knowledge is extremely wide, so you can refer following links:
Joomla FAQs
Video Tutorials
Joomla! Forum
Joomla! 3.x Installation guide
Joomla! default Modules
Technical requirements
Hikashop documentation
Menu management in Joomla 3.x
K2 Documentation
System requirements
1. Browser compatibility
All In One was tested to be ready for seamless display on the following web browsers
Firefox 4+
IE (Internet Explorer) 9+
Google Chrome 14+
Opera 12+
Safari 5+
2. Joomla 3 requirements
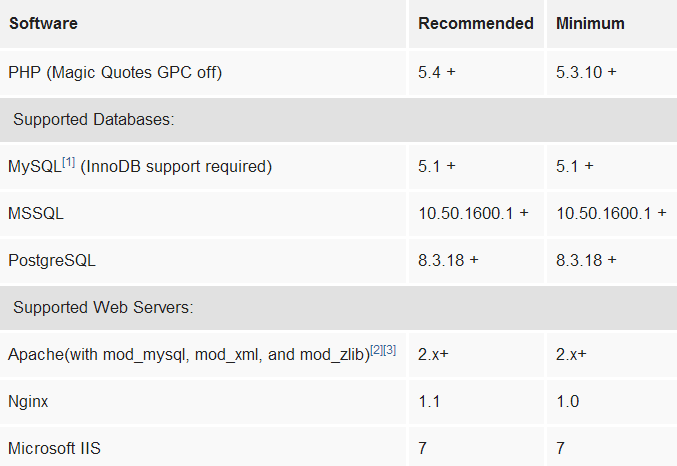
3. Development requirement
We recommend you using Localhost for development process. The following servers are preferred:
Windows:
WAMP
XAMPP for windows
Linux:
LAMP Buddle
XAMPP for Linux
Mac OS
MAMP & MAMP Pro
XAMPP fo Mac OS
Installation
1. Quickstart Installation
Choosing quickstart package to install helps you quickly create an entire Joomla site site which includes Joomla! CSM, Flatize template, extensions, sample articles, default Joomla! modules.
After finishing this quickstart installation, you only need to edit or add text, logo, product images and information, menu, new articles... in the back-end administrative area.
To install quickstart package, take the followings steps:
✔ STEP 1: EXTRACT QUICKSTART PACKAGE:
The first step you need to do is locate the quickstart package zip file and extract extract it to a folder, which contains all necessary files for installation.
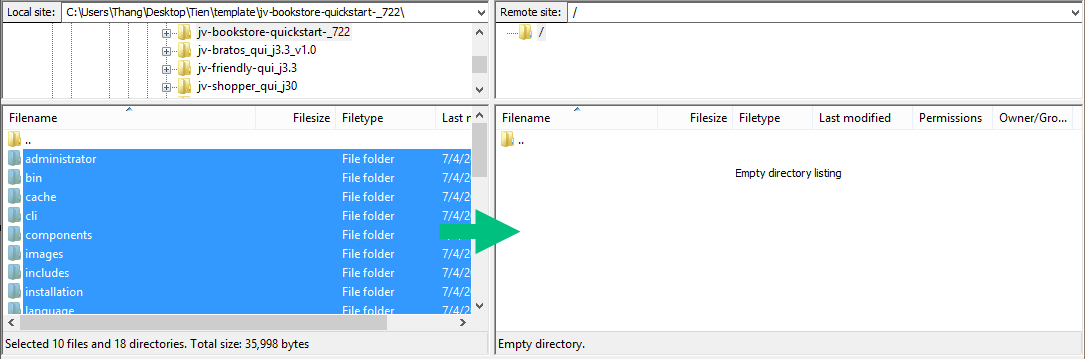
✔ STEP 2: UPLOAD FOLDER TO YOUR SEVER:
- If you install Flatize on your localhost for testing or development: just copy the folder to …\xampp\htdocs (If you are using XAMPP) or….\wamp\www (If you are using WAMP)
- If you install Flatize on your actual server:
You can upload files via FTP using a client application like Filezilla or via cPanel -> File Manager -> Upload file(s).
If you want your Joomla! to be the main installation on your account and to be accessed through your main domain (i.e. www.yourdomain.com), you need to upload the extracted files to your public_html folder. (Though some host severs have a different structure, in most cases, the root folder is "public_html."). However, you can always create a sub-folder (i.e. public_html/flatize) if you want to run installation through www.yourdomain.com/flatize
✔ STEP 3: CREATE DATABSE FOR YOUR JOOMLA SITE
Now, you need to create a Database name and a user account (username and password) to it with full permissions to control database. Once you created your Database and User, make sure you remember the database name, database username and password you've just created, because they will be used in installation process.
While you are uploading the files to your server, it is time to create your MySQL database. The database is where your Joomla! files and images for your site are stored. You need to login to your hosting account cPanel to create your database. Normally you would use phpMyAdmin to create the database. Be sure to save your information from your database because you will need it when you install Joomla!
✔ STEP 4: RUN INSTALLATION
Now it's time to start with the installation process. If you have uploaded installation files in your root directory you just need to go to https://yourdomain.com or subdomain (i.e https://yourdomain.com/petstore) in your browser and get started.
You will see the first screen where you enter necessary information:
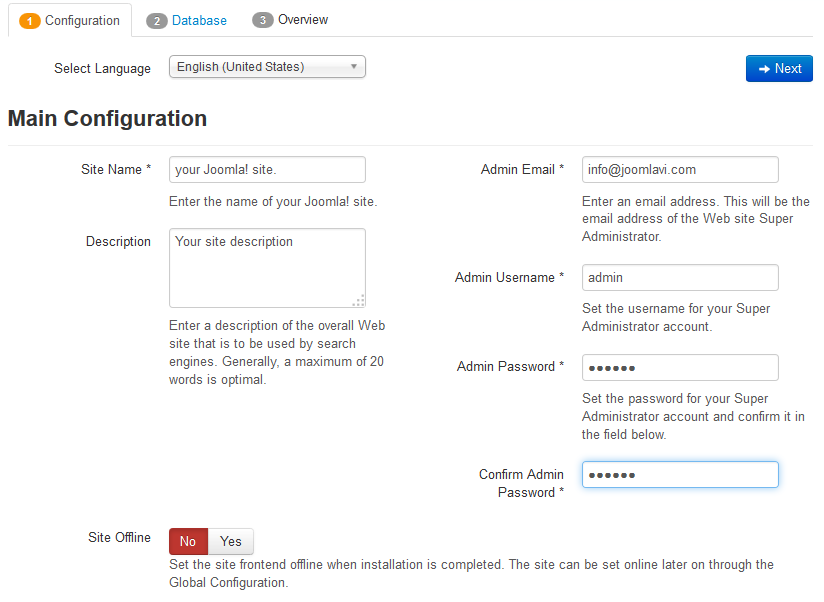
- Site Name: Enter the your site's name. This for the first heading of your index.
- Description: Enter a short description of your website.
- Admin Email: Enter a valid email address for system messages and password recovery.
- Admin Username: Enter admin username.
- Admin Password: Enter a password.
-Site Offline: Select whether your site should be taken offline after installation process is completed.
Click "Next" to continue the installation process.
The next screen you will see is about Database Configuration:
- Database Type: By default this value is set to MySQLi, but you can select MySQL
- Host Name: Leave the default localhost value.
- Username: Enter the database username, which you created in step 3.
- Password: Enter the password for the database username, which you created in step 3.
- Database Name: Enter the database name, which you created in step 3.
- Table Prefix: This is used to add to all of database tables. If you want to host many Joomla sites on a single database. You should leave the default value.
- Old Database Process: If you have any existing databases. You can select "remove" or "backup" any existing data. You should leave this option "Backup" since it is the safest choice
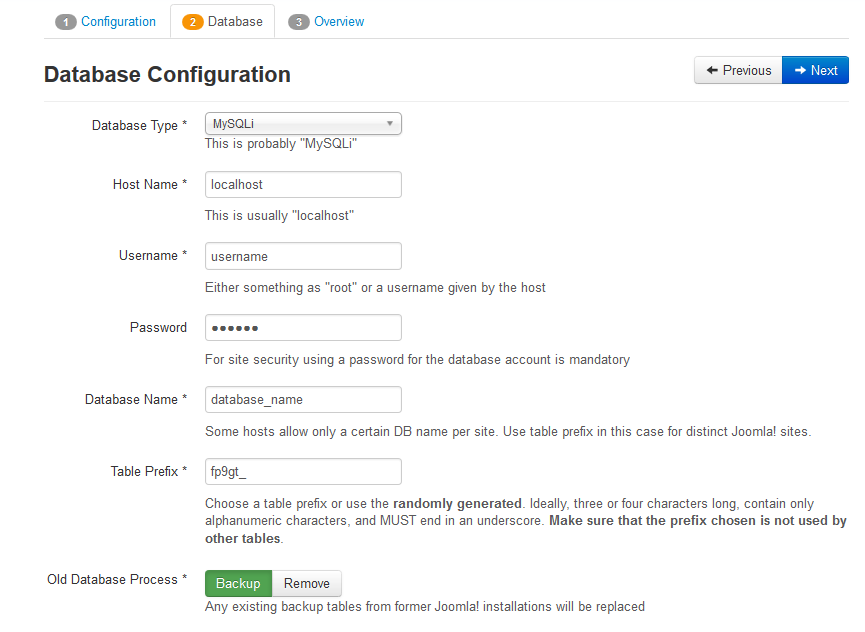
Click "Next" to proceed installation.
The next screen you will see is "Overview". In the first part, you can specify if you want install sample data on your server. We recommend you to choose the Default Sample data option, which helps build your actual website cloning Flatize Demo.The second part of the page will show you all pre-installation checks.

Click "Install" to start the real Joomla installation.
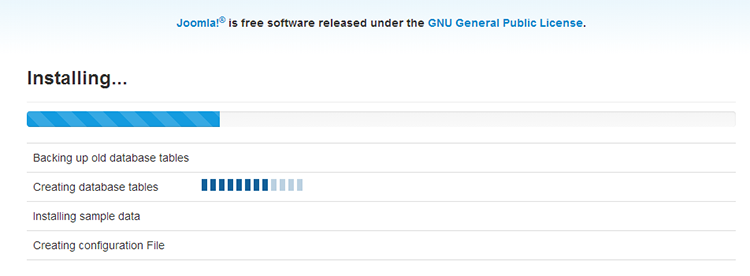
In the next screen, you will see Joomla Web Installer is installing....
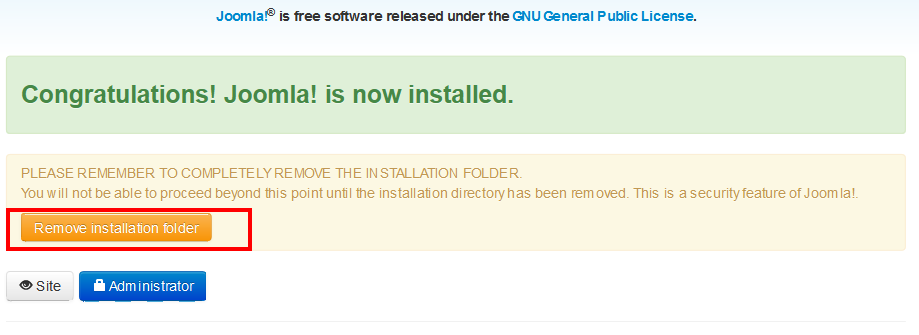
On the last screen of the installation process you need to press Remove installation folder button or you can rename the installation folder. Note that you can't use your site unless you remove this folder completely!
2. Install All In One on your existing Joomla site
Another way to build Flatize is installing each separate part: JV Framework 3.3, All In One template, Extensions, and then add new default Joomla! and custom HTML modules to your site.
Note: please view the next section to know how to configure the default Joomla! and custom HTML modules.
To install All In One on your Joomla, take the following steps:
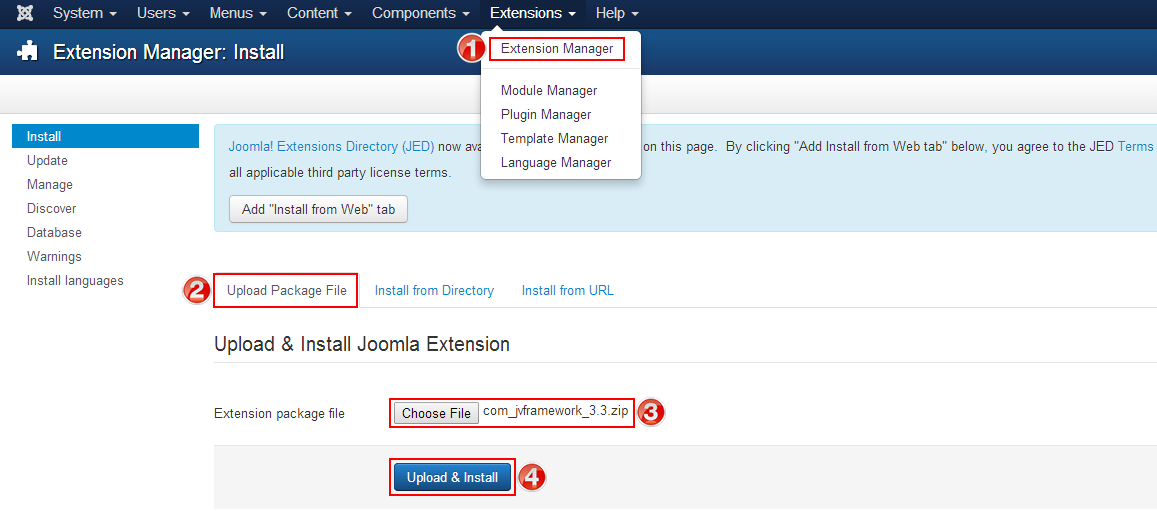
✔ Step 1: Install JV Framework 3.3 component by selecting Extensions >> Extension Manager, browse JV Framework 3.3 zip package and click upload and install as shown in the picture below:
✔ Step 2: By the same way, install All In One template and other extensions on your Joomla site
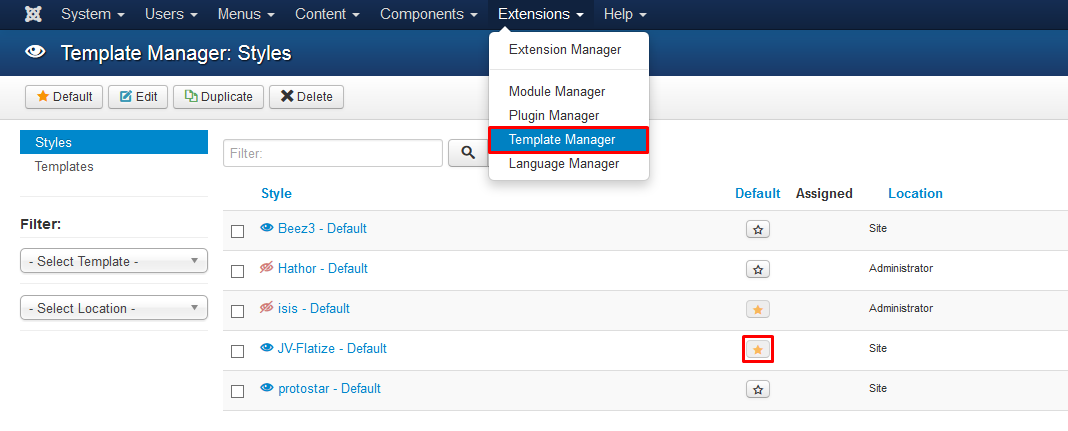
✔ Step 3 Once you have All In One Template installed. Go to Extensions >> Template Manager, set Flatize as default for front-end
Template Customization
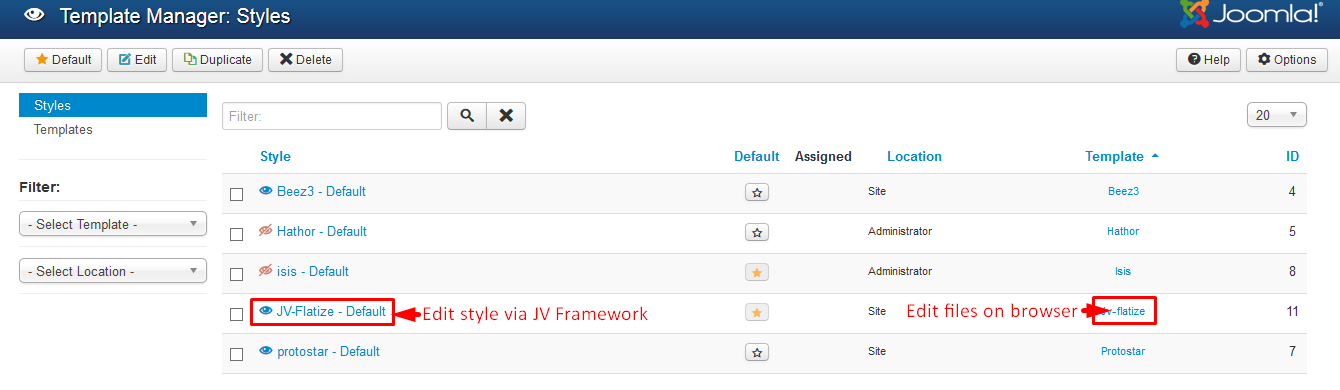
You can manage the template by Navigating to Extensions >> Template Manager
Click on the name of the template in the Style column to edit style with our powerful JV Framework 3.3
Click on the name of the template in the Template column to edit core files
Styles column refers to changing the available parameters of a template, such as color, font-color, logo, etc. These are dependent on the parameters a template maker made available and are a convenience for quick changes. Template - column refers to editing the actual template files.
1. Edit Style via JV Framework 3.3
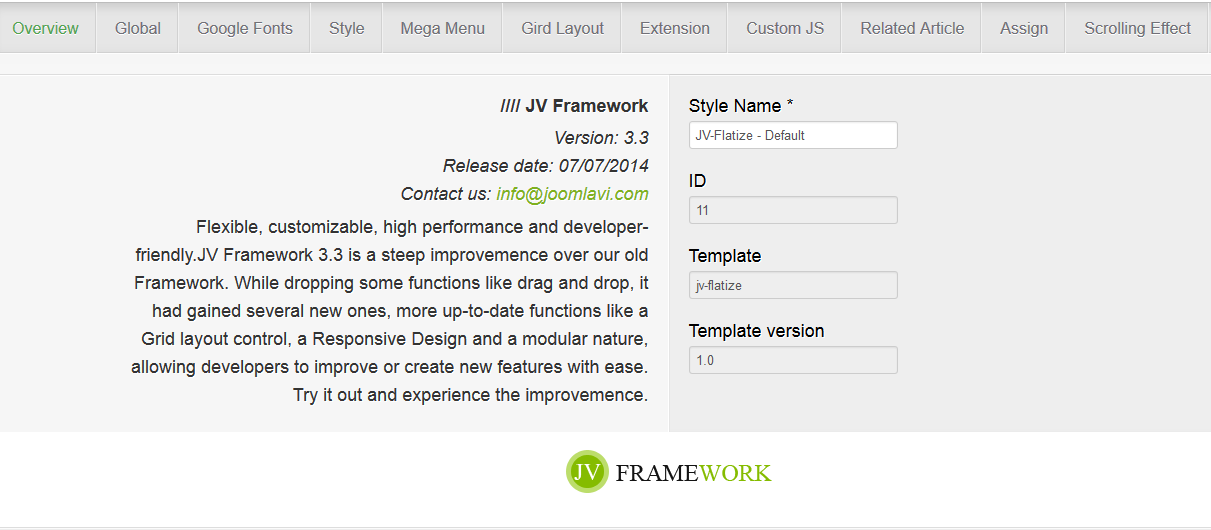
Accessing to Edit Style you can edit All In Onestyle with JV Framework. This area includes 10 tabs: Overview, Global, Google Fonts, Style, Megamenu, Grid Layout, Extension, Custom JS, Related Article, Assign. Scrolling Effect You can reset all settings to default by click on"Reset to default" in the top right corner.
1.1. OVERVIEW:
This tab contains general information of JV Framework 3.3 and the template .
1.2. GLOBAL
This tab contains a collection of general parameters that affect the entire site.
The sets of parameters that can be found in this tab are:
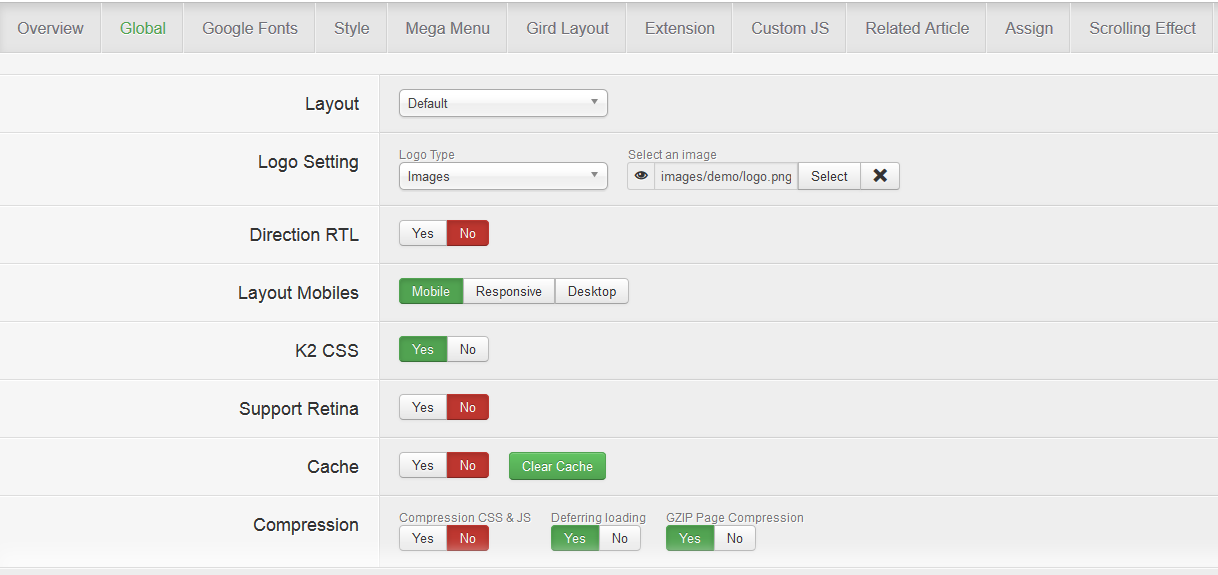
- Layout: Select layout for the template ( default/Left-Right-Main/Main-Left-Right/Mobile).
- Logo Setting: choose logo type (images/type). You can upload your own logo, add Logo text, slogan
- Direction RTL: enable/disable RTL mode
- Layout Mobiles: Allow you to select the type of layout that will be used when accessed from a mobile device
- Full HD: Enable/disable Full HD mode.
- Cache: This is where you enable/disable the cache function for JV Framework’s extensions or clear the cache.
- Compression: Allow you to optimize the site performance by utilizing various types of compression.
- Go to top: Enable/disable Go to top button
- Copyright: Allow you to enable/disable and modify copyright information.
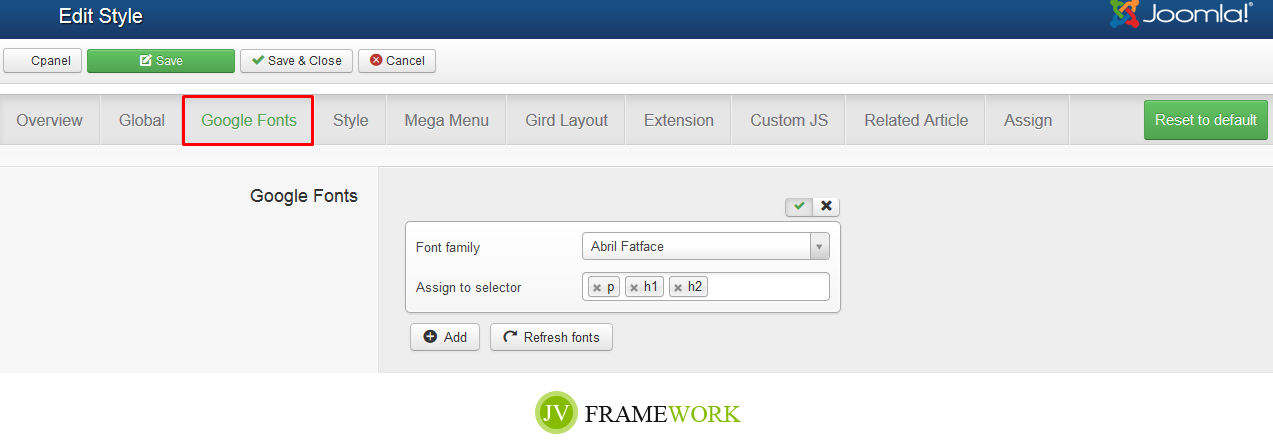
1.3. GOOGLE FONT
In this tab, you can easily apply google font to your contents.
Click add, the choose a font type, then assign the font type to heading or paragraph tags as you can see below:
1.4. STYLE
This tab allows you to edit template color
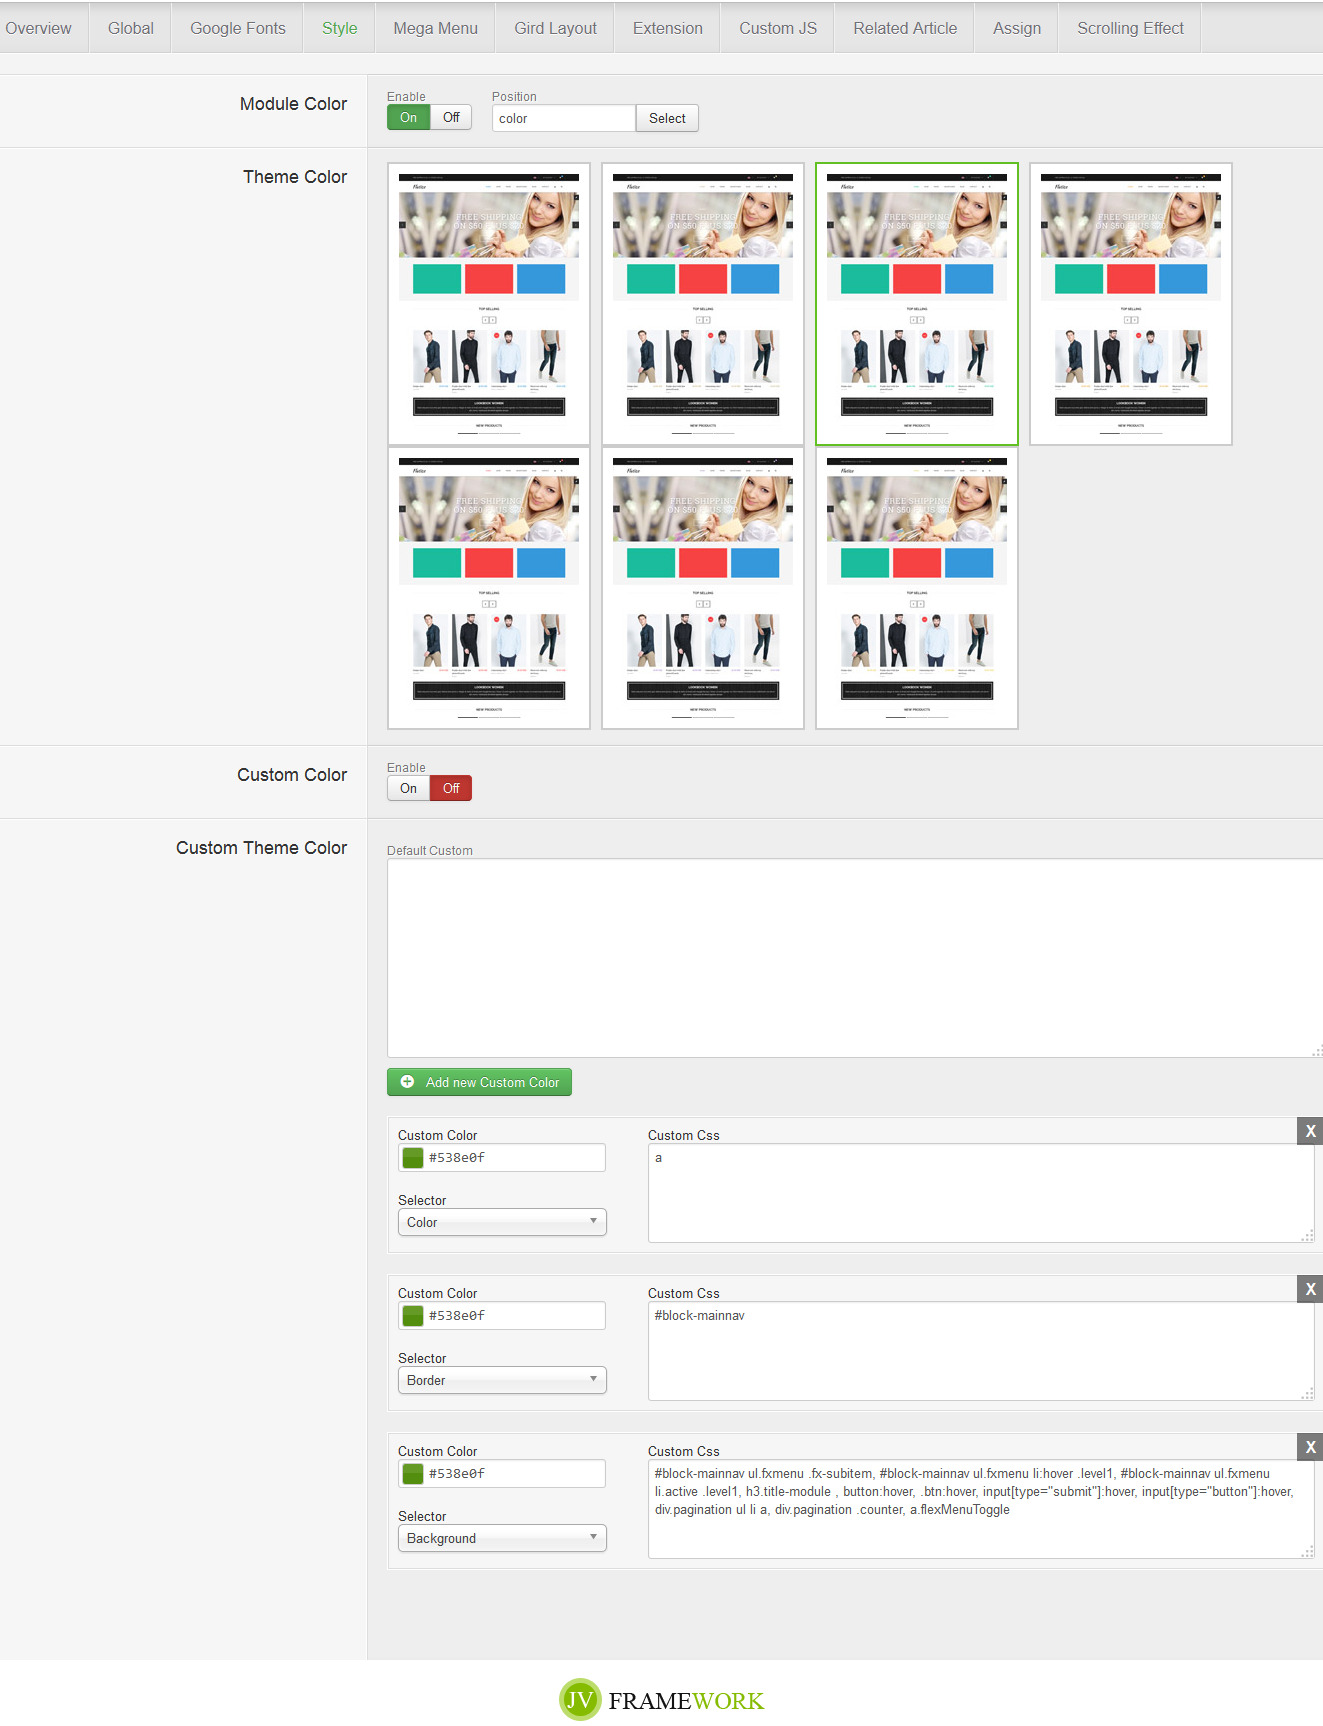
- Module color: this module is use to show for color selection demo. You should turn if off.
- Theme color: simply select a theme color
- Custom color: enable/disable custom theme color mode
- Custom theme color:
If enabled, you can easily add your own color to classes, ids, heading, paragraph... Simply edit colors with color box and assign selector: background or border or color. You can also edit classes, ids... in the Custom Css box
Click "on add new Custom color" to add and style new classes, ids...
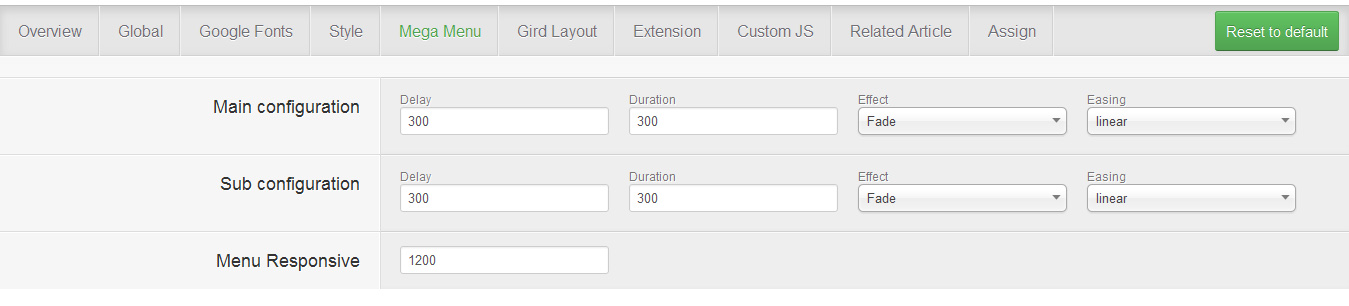
1.5. MEGA MENU
This tab allows the user to configure the Megamenus and their sub-menus used in All In One, as well as the menu responsive
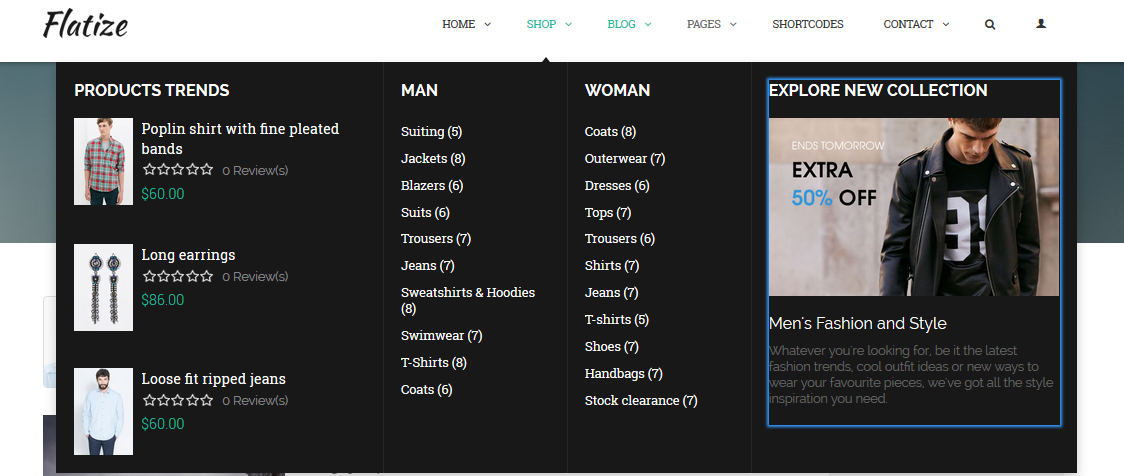
Let's view the Megamenu in front-end:
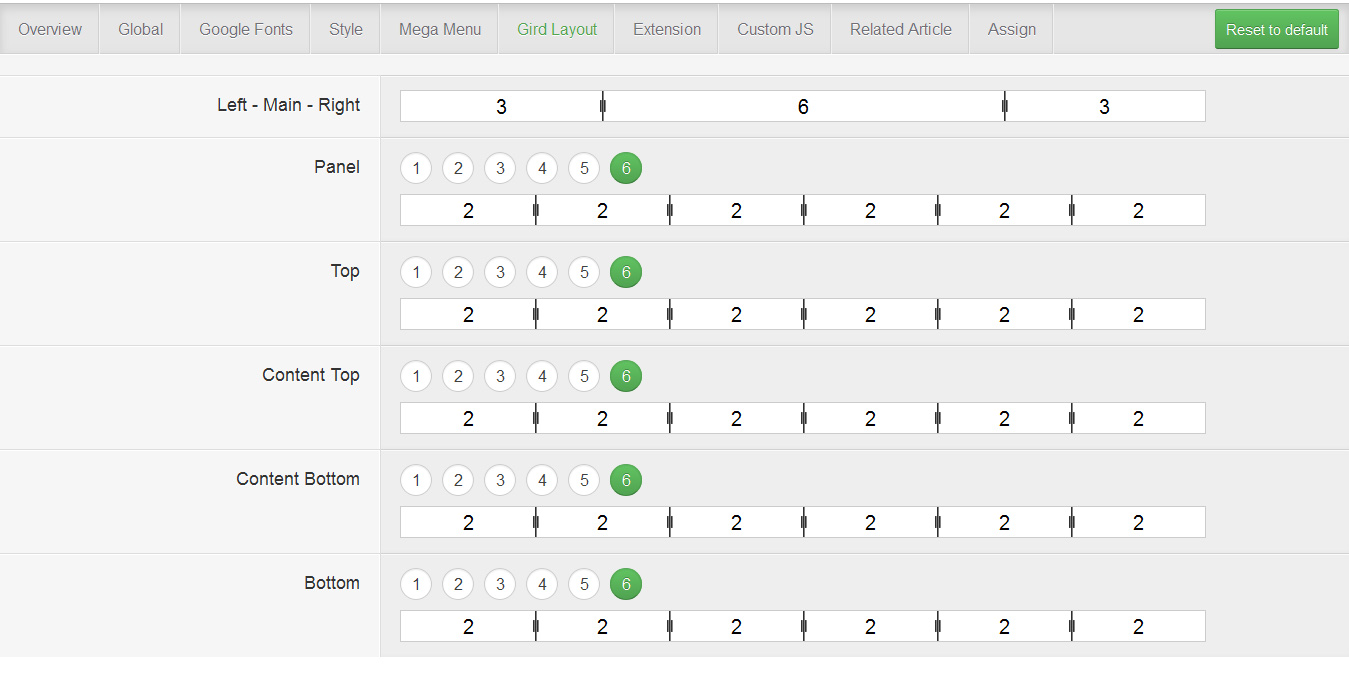
1.6. GRID LAYOUT
This tab allows you to adjust the size ratio of the grid layout.
1.7. EXTENSION
This tabs contains several sets of parameters that enhance or support the Framework .
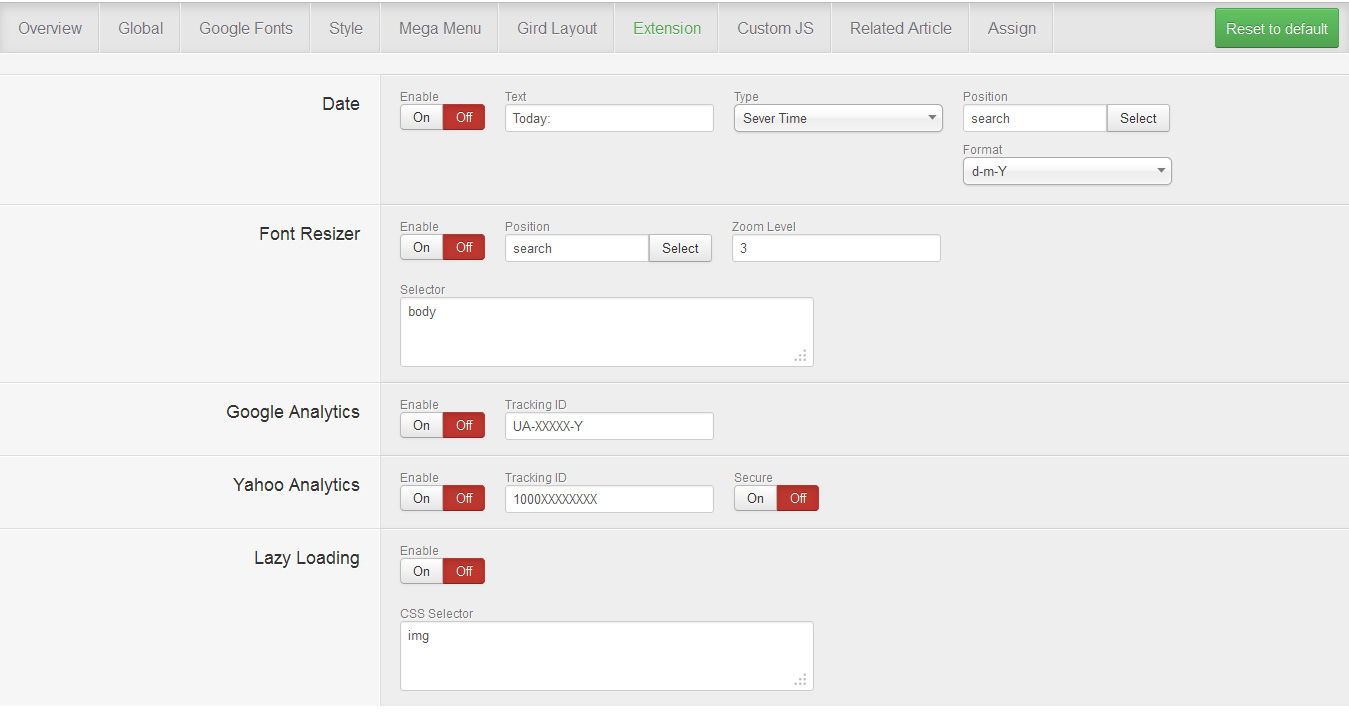
- Date: enable/disable the date indicator, as well as configure it.
- Font Resizer: enable/disable the font resizer.
- Google Analytics: enable/disable Google Analytic.
- Yahoo Analytics: enable/disable Yahoo Analytic.
- Lazy Loading: enable/disable lazy loading mode.
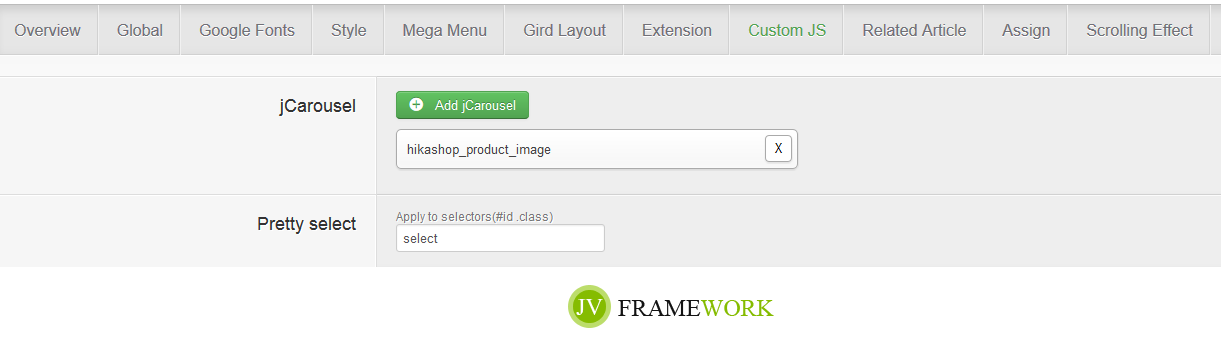
1.8. CUSTOM JS
This is where you can add custom JS to certain part of the site using class or id.
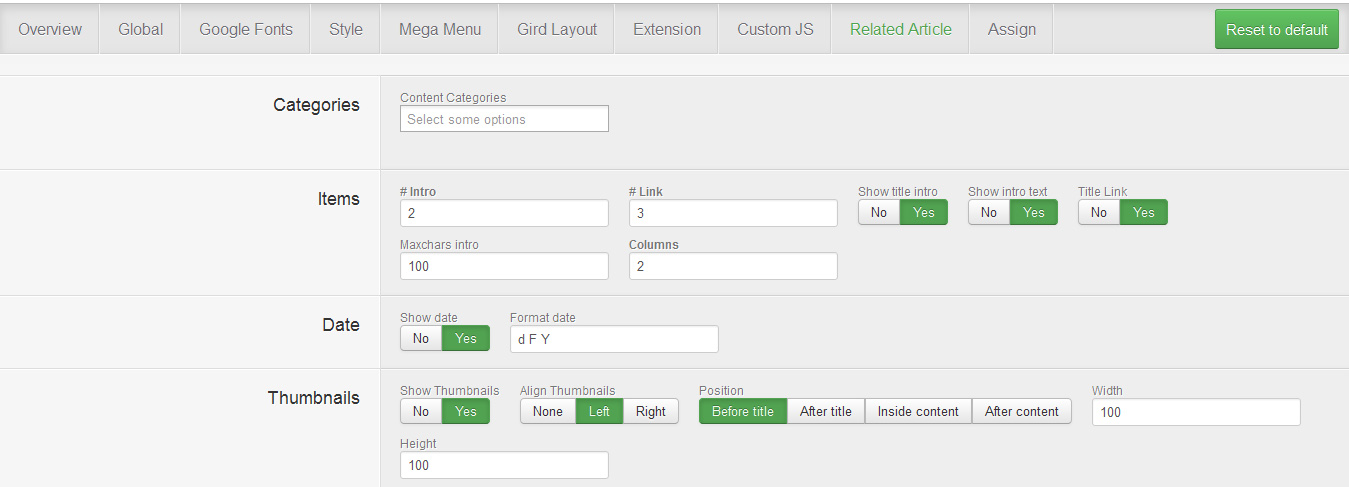
1.9. RELATED ARTICLE
This tab allows you to configure the Related Article features (show related article underneath the one being read).
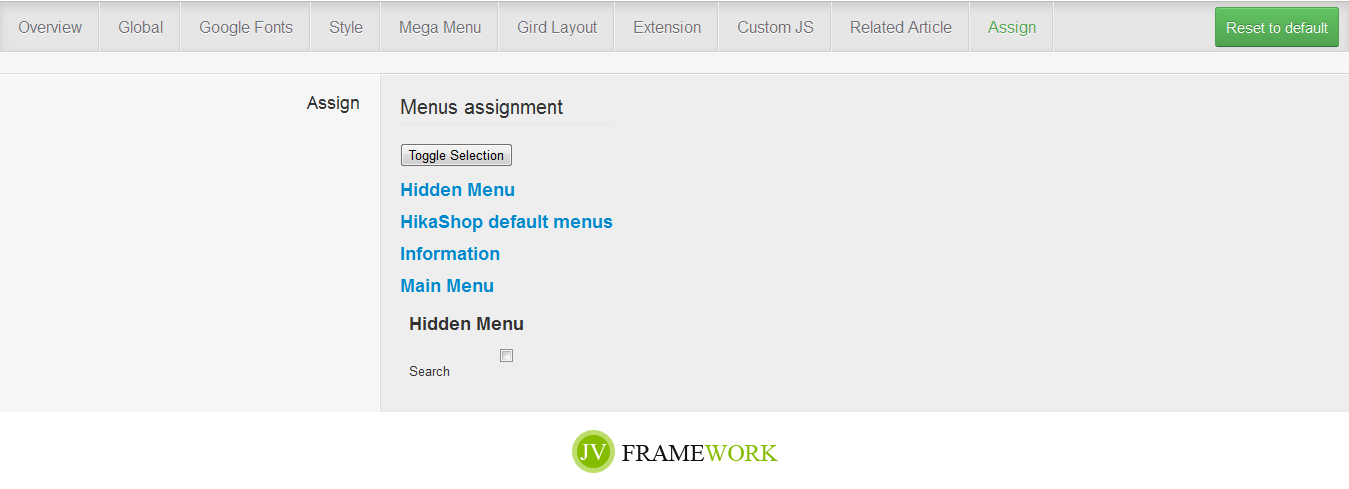
1.10. ASSIGN
If this style is not the default one, this is where you can assign which page will utilize this style instead of the default style.

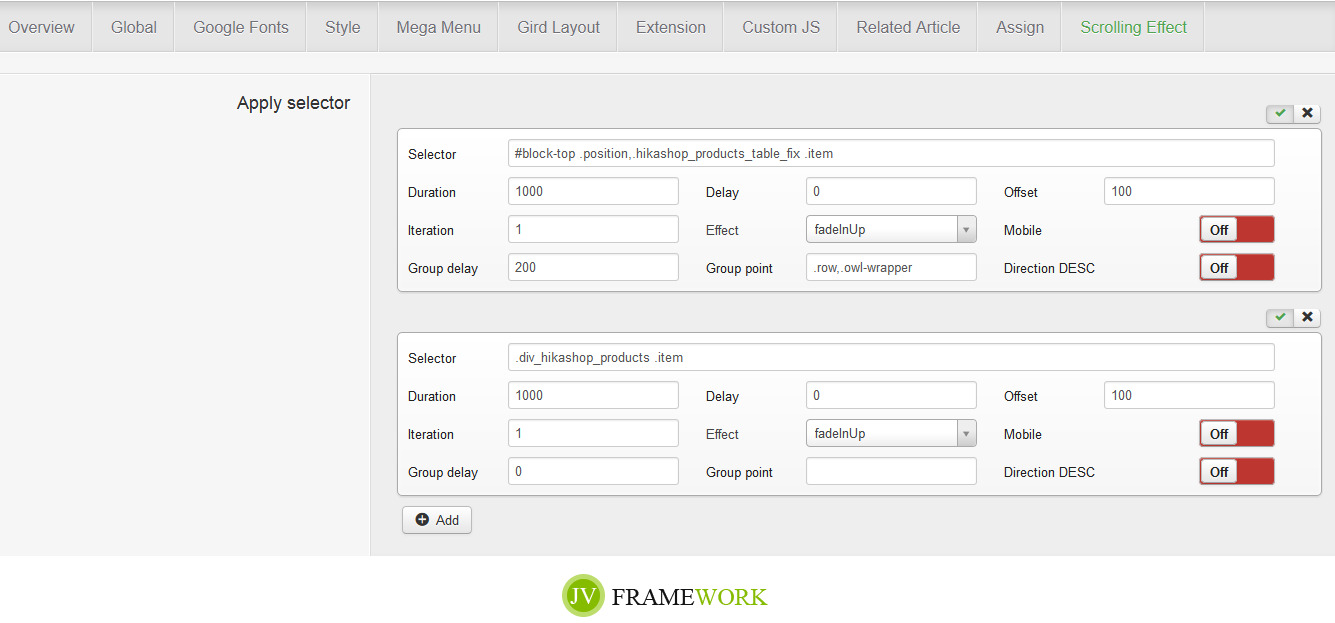
1.11. Scrolling effect
This is the new feature added in JV Framework 3.3, with this tab, you can create scroll effect for each page. Each element will appear within its relative distance from the perspective of the visitor. Simply add selectors and config parameters.
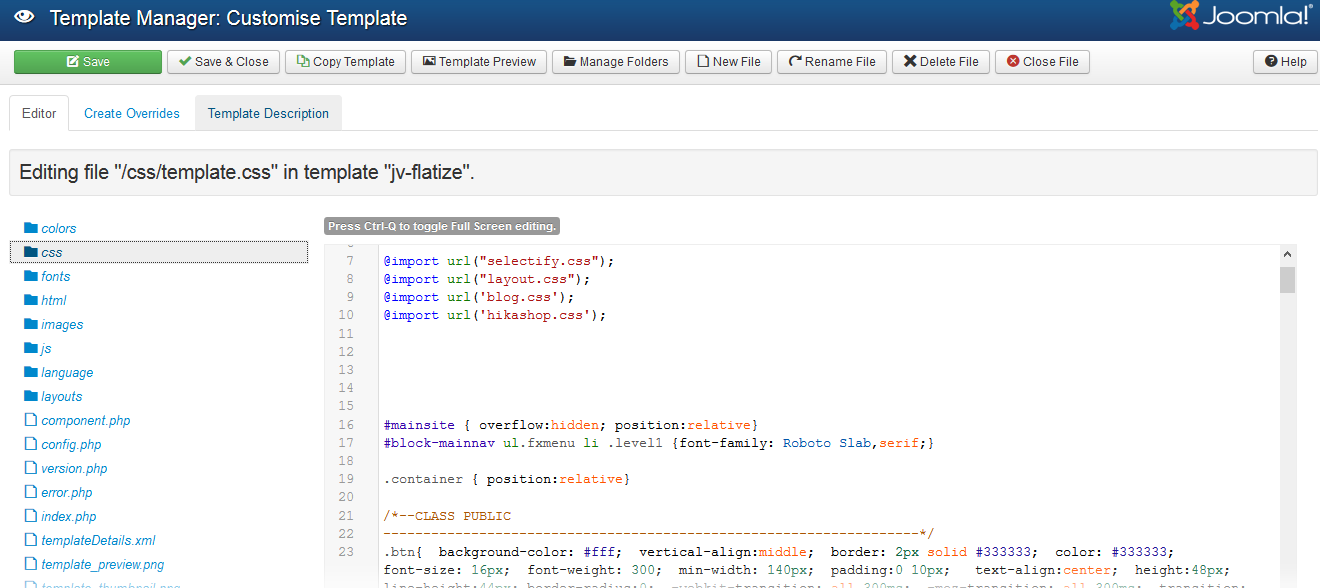
2. Edit core files
Click any file and you'll be able to edit it directly in the browser.
JV EXTENSIONS CONFIGURATION
1. JV Slide Pro
JV Slide Pro is an exclusive and professional extension designed by Joomlavi, In our demo, JV Slide Pro is used for 3 modules: OWL Slide, OWL Go Down, OWL Fade
1.1 OWL Slide
- Module assignment on Homepage
- Module position: slideshow
Backend settings:
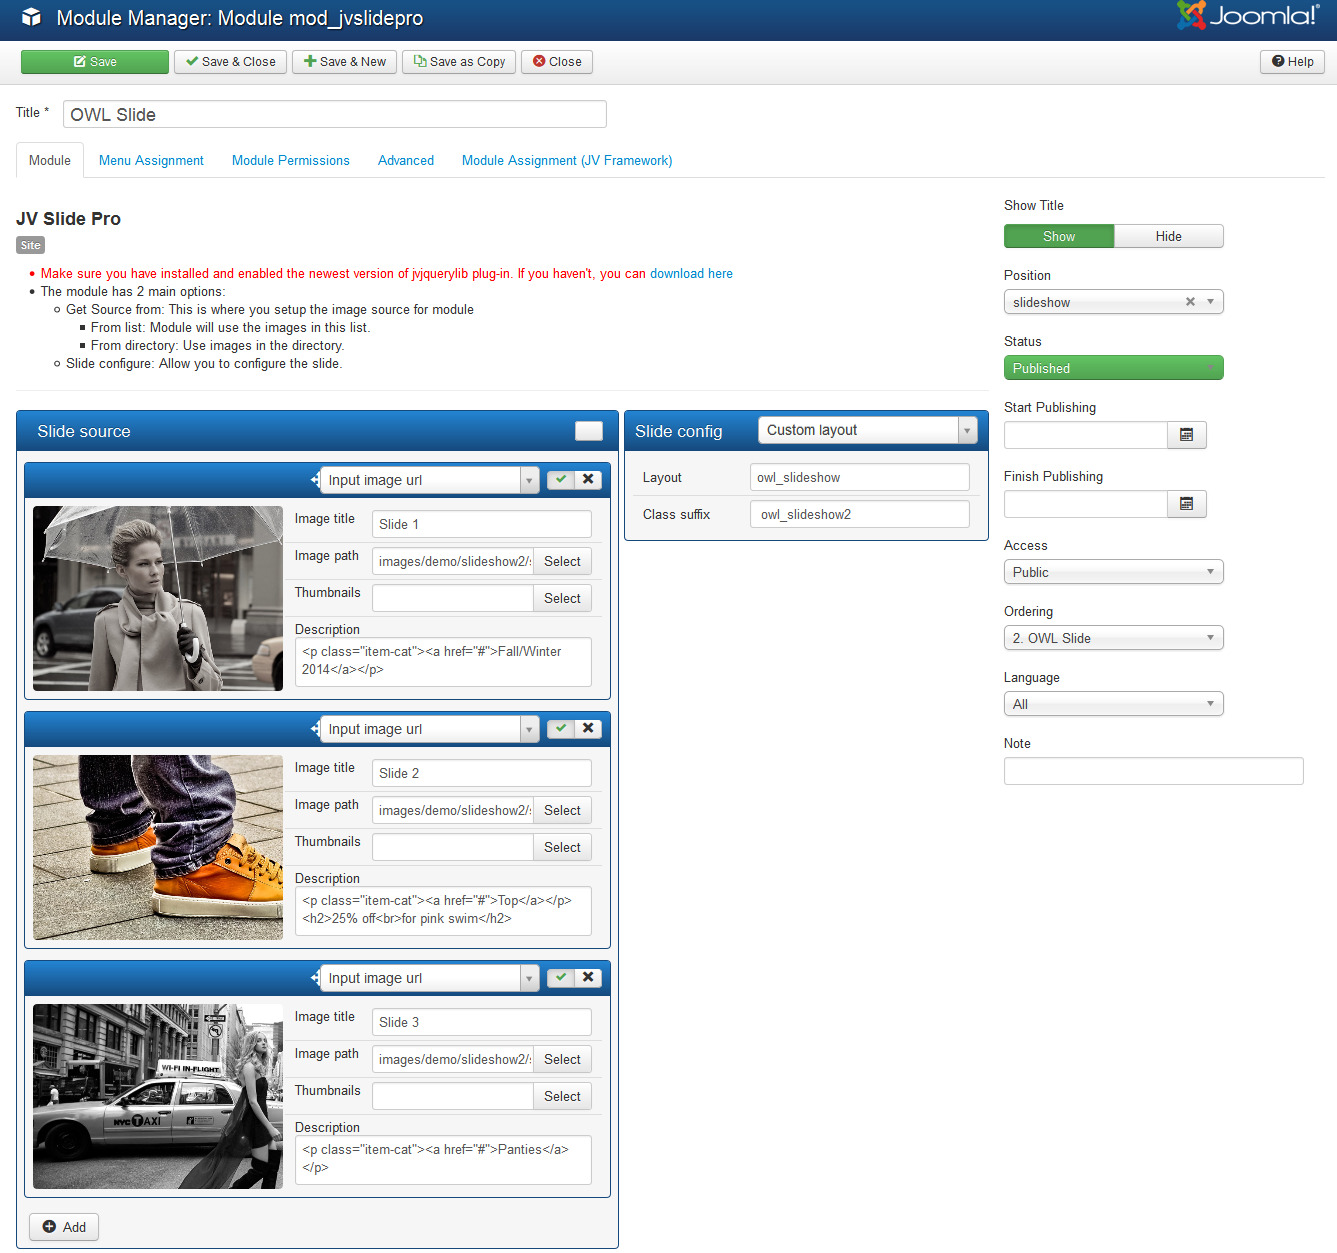
Slide source setting:
The important thing is to choose slide source type in the top, you can select: Input image URL, Youtube video, Choose article, Choose K2 article, Form folder, Query articles, Query K2 articles. Each type of slide source has different image settings. In our demo we only use slide source type. Within this type, you can select main image and description image. Let's check how to set up images and description:
- Click on "Add" in the bottom to add new slide
- Image title: you can enter title for the main image
- Image path: select main image from media Manager
- Thumbnails: select thumbnails from media Manager
- Description: in this section you can insert the path of description image, change title, heading, content, Simply replace red content with your own content!
Slide Config:
- Layout: owl_slideshow
- Class suffix: owl_slideshow2
1.2 OWL Go Down
- Module assignment: Homepage version 3
- Module position: slideshow
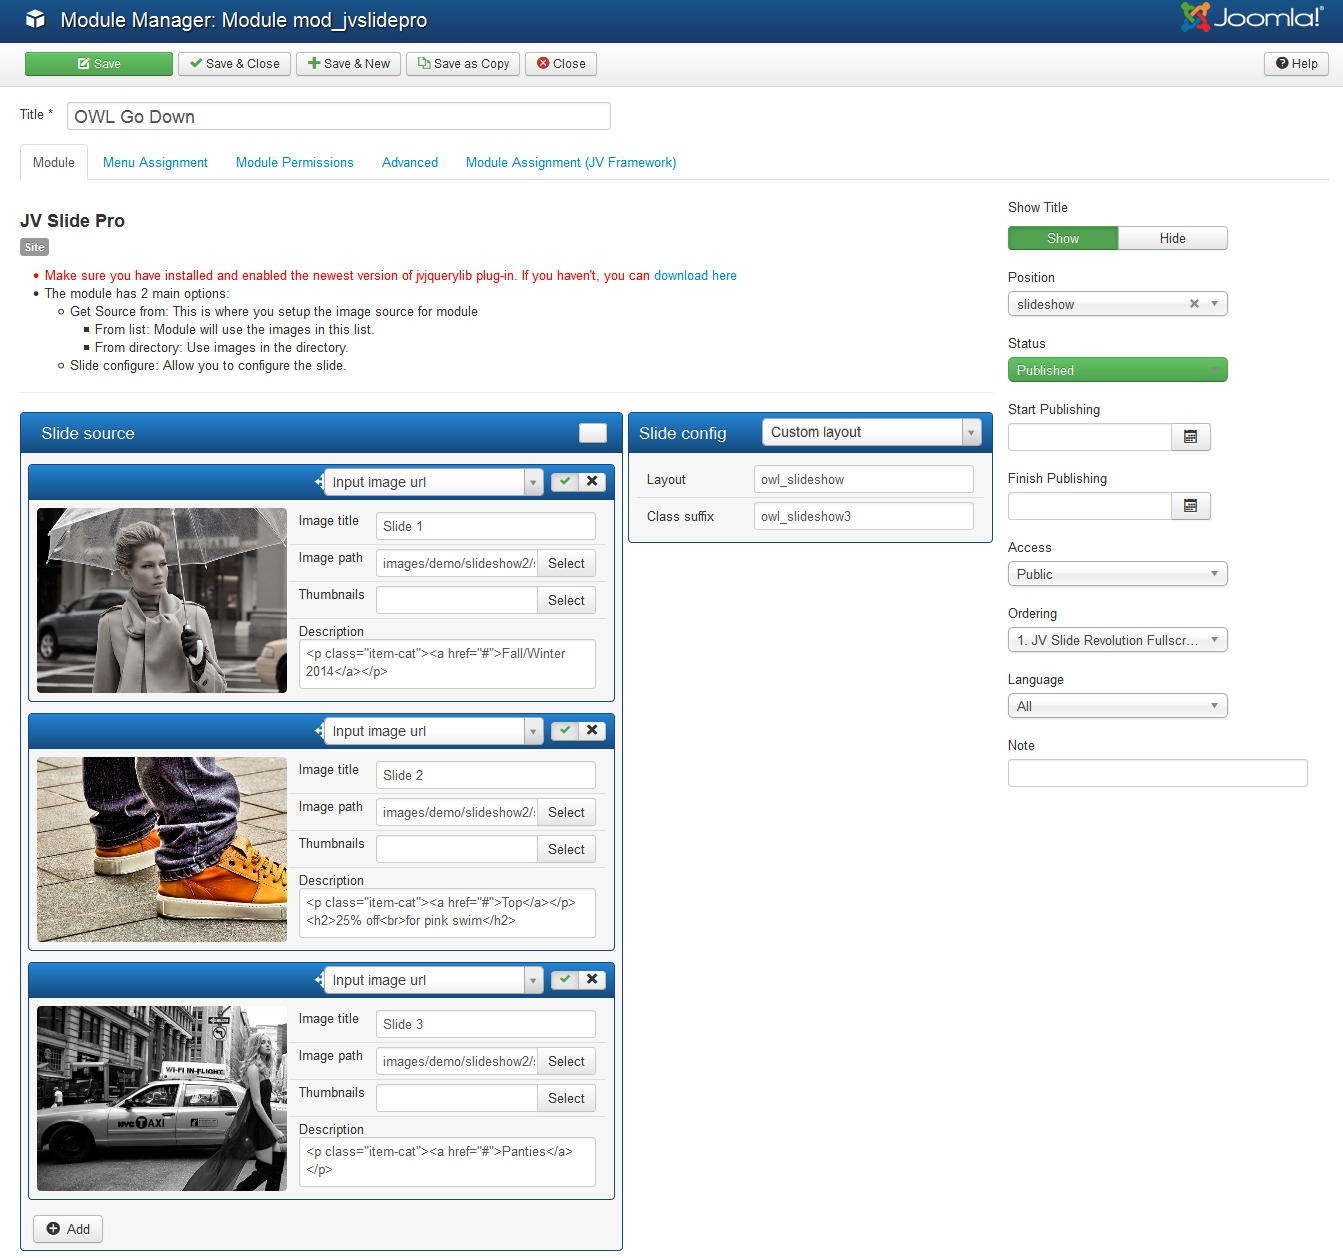
Slide source :
- Input image URL
Slide Config:
- Layout: owl_slideshow
- Class suffix: owl_slideshow3
1.3 OWL Fade
- Module assignment: on Homepage version 2
- Module position: slideshow-full
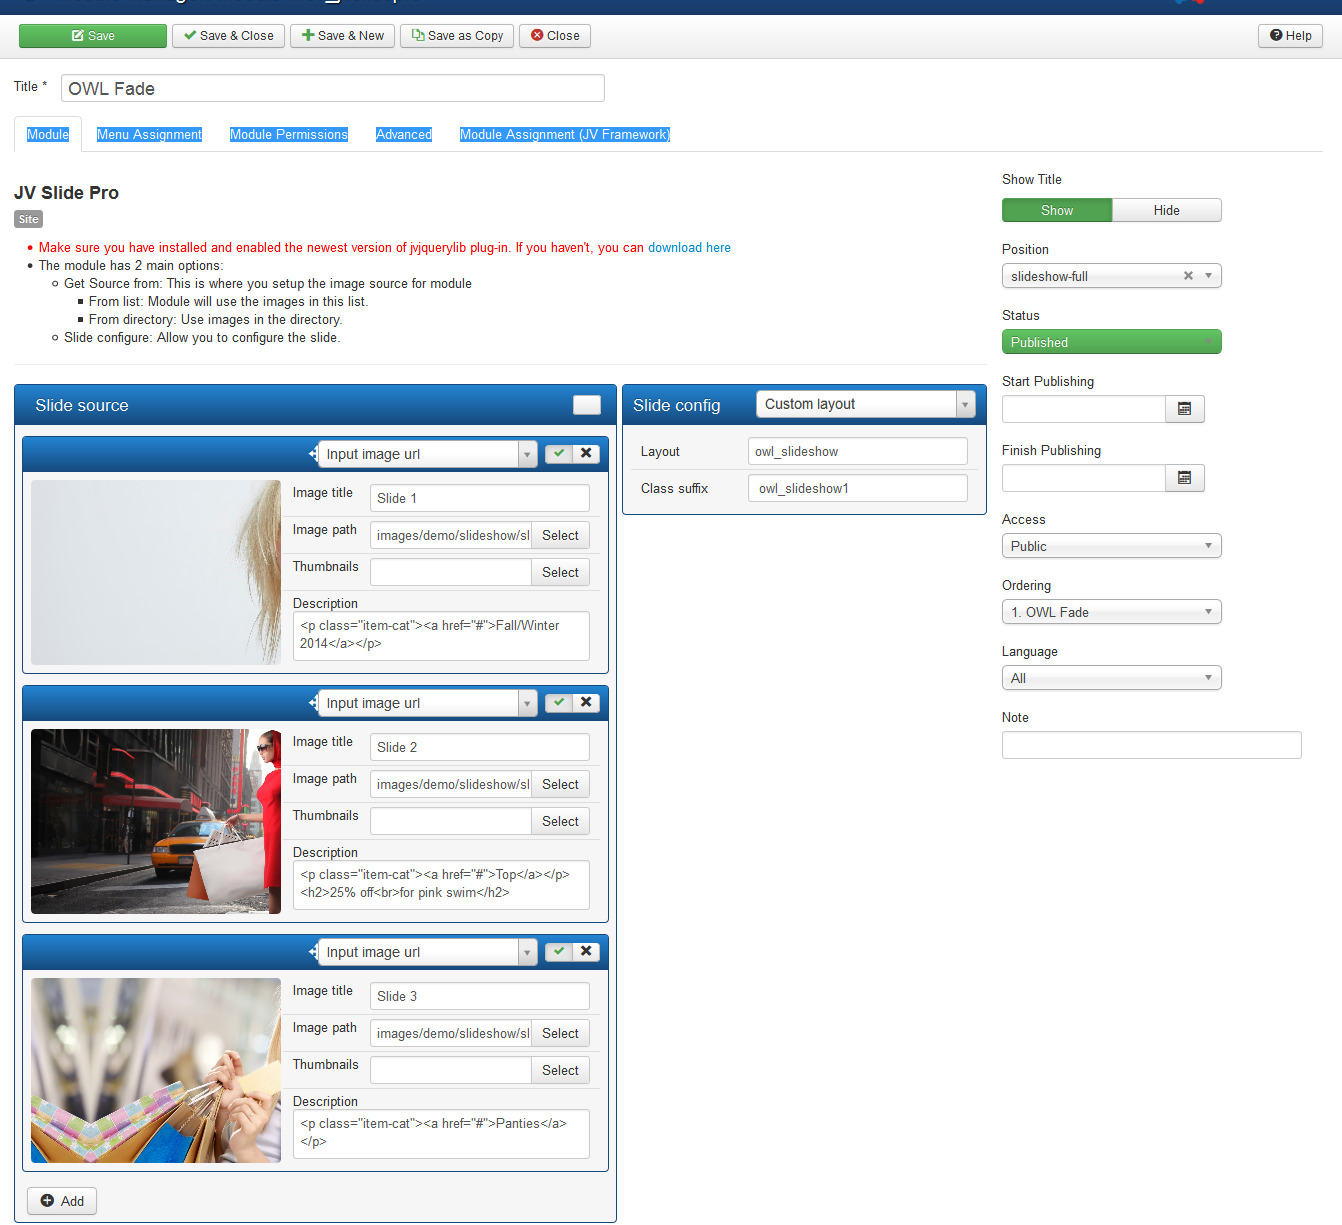
Slide source :
- Input image URL
Slide Config:
- Layout: owl_slideshow
- Class suffix: owl_slideshow1
2. JV Contact
This extension is used to show contact form, contact map, enter recipent email address, social icons, captcha.... In our demo, JV Contact is used for 3 modules: JV Contact Version 1, JV Contact Version 2, Contact Map, let check below:
2.1 JV Contact Version 1:
This module is loaded in single article "Contact Version 1"
Back-end:
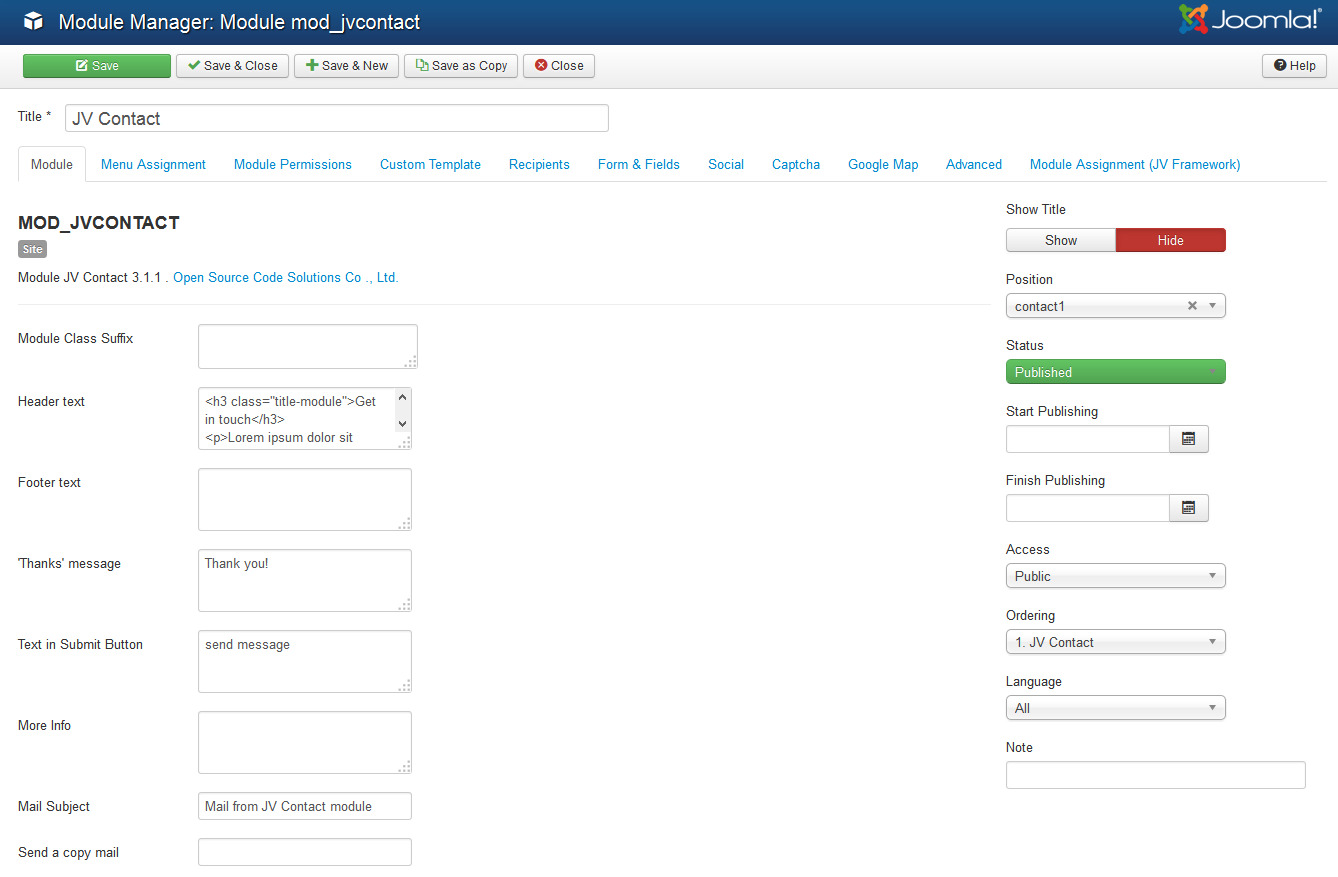
Main settings:
- Module position: contact1
- Menu assignment: on all pages
- Show Form: Yes
- Show Map: No
- Show Captcha: Yes
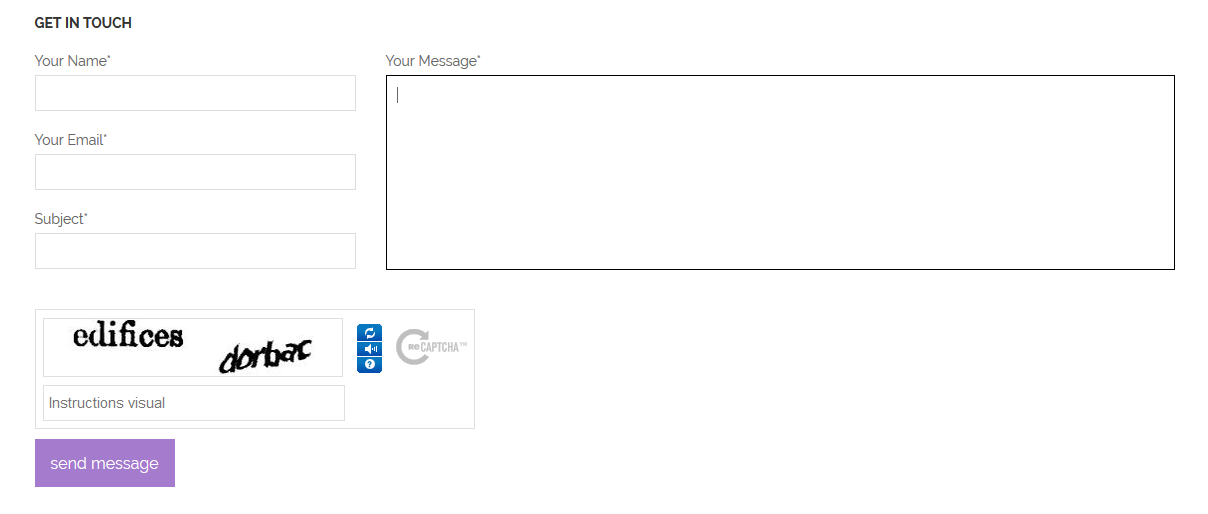
Front-end:

2.2 Module JV Contact 2:
Main settings:
- Module position: contact2
- Menu assignment: on all pages
- Show Form: Yes
- Show Map: No
- Show Captcha: Yes
Front-end:
2.3 JV Contact Map
This module shows contact Map on contact page:
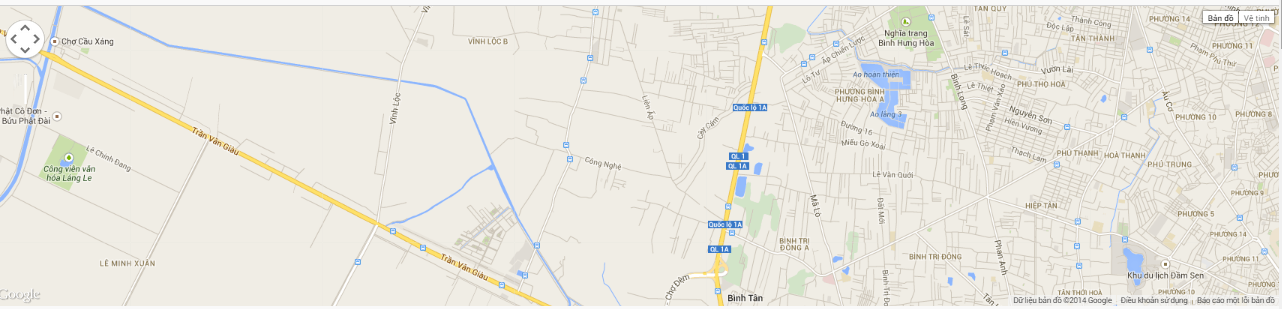
Main Settings:
- Module position: fullbottom
- Menu assignment: contact page
- Show Form: No
- Show Map: Yes
- Show Captcha: No
3. JV Latest News
Thi module is used shows latest news, you can get source from Joomla conten management component or K2.
This extension is used in 2 modules: "Latest from the shop" and "latest from the blog3"
3.1. Latest from the Shop
Main settings:
- Module position: user-1
- Module assignment: on Home Version 2
- Source: K2 items
Module in Frontend:
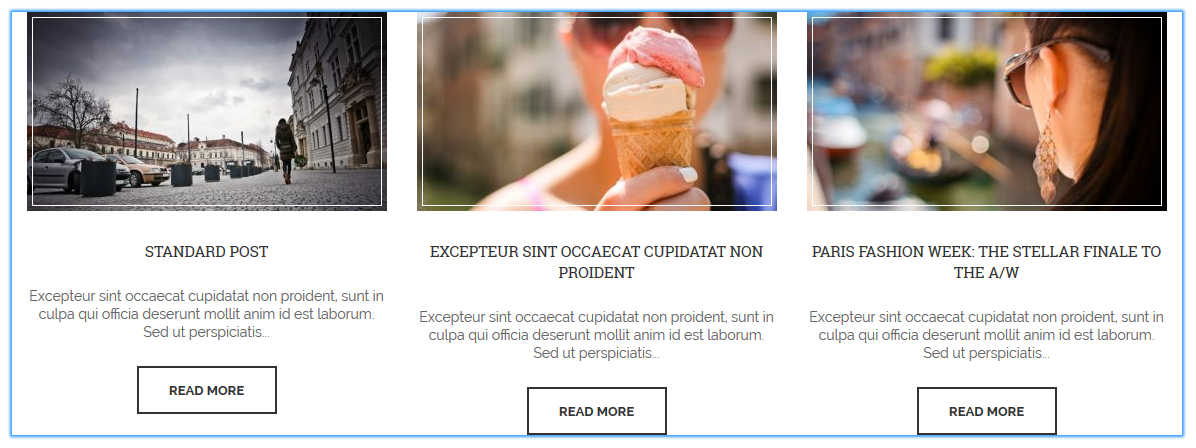
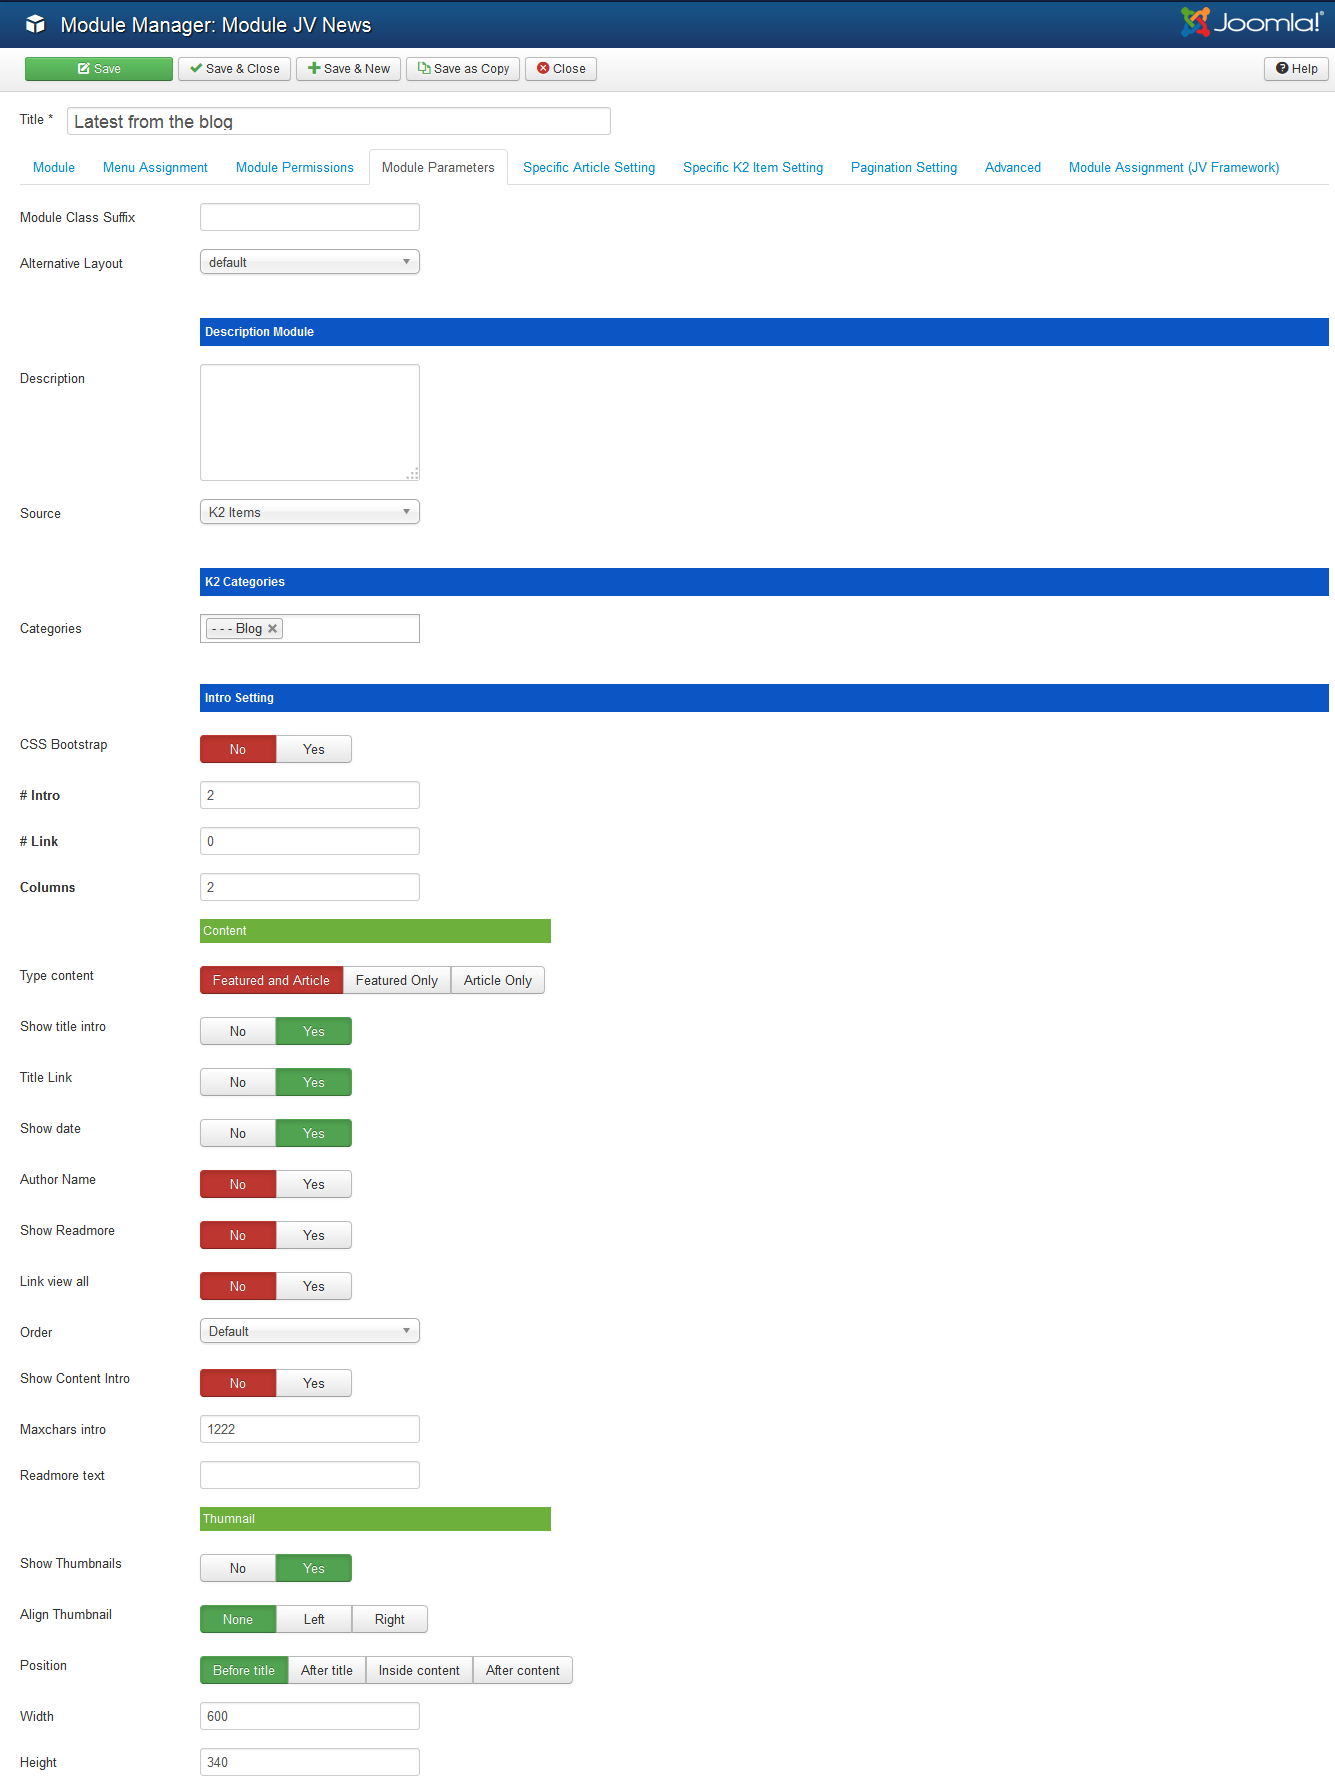
3.2. Latest from the Blog
Main settings:
- Module position: user-5
- Module assignment: on Homepage
- Source: K2 items
Module in Frontend:

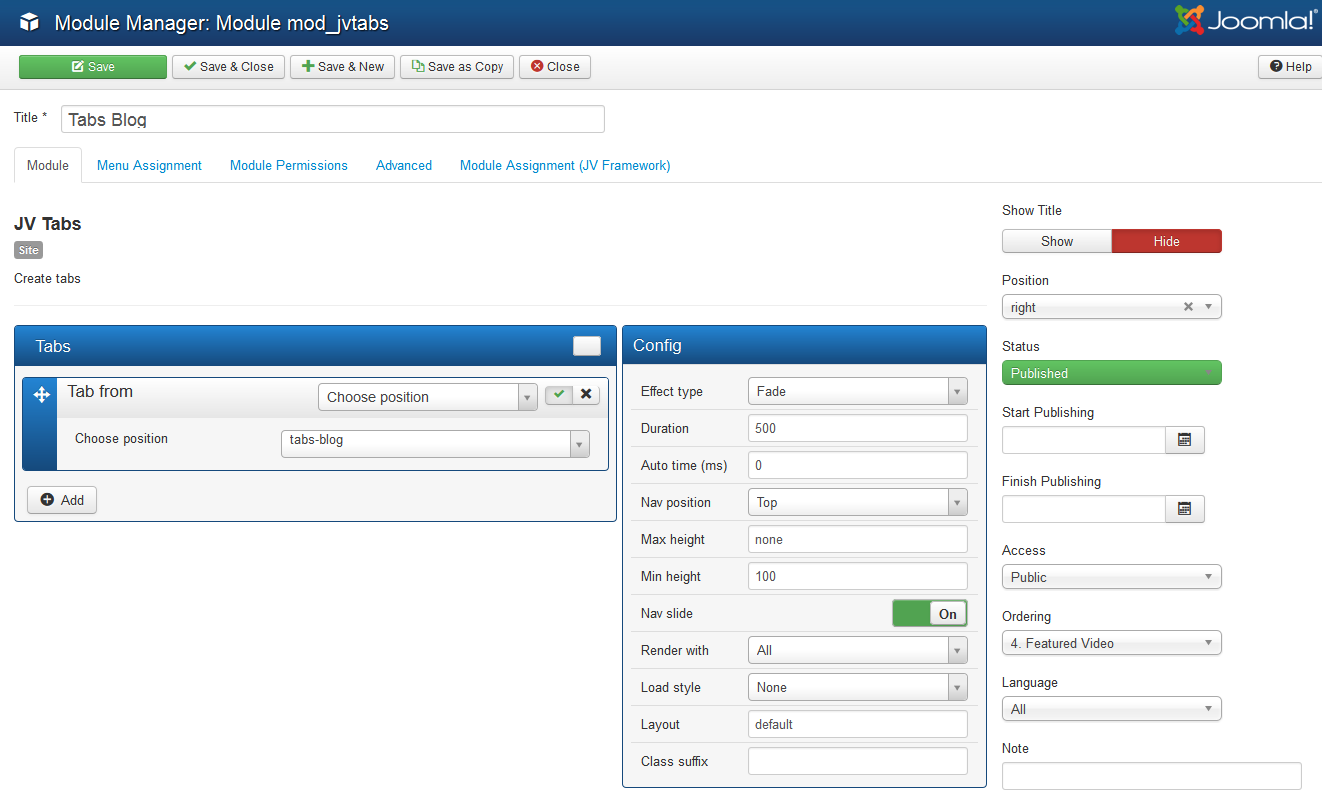
4. JV Tabs
JV Tabs is a good tool to display content in tabs style. You can get tabs from position, Articles, Query Articles, K2 items, Query K2 items. JV Tabs is used in 2 modules: Tabs Blog and New Products
4.1 Tabs Blog
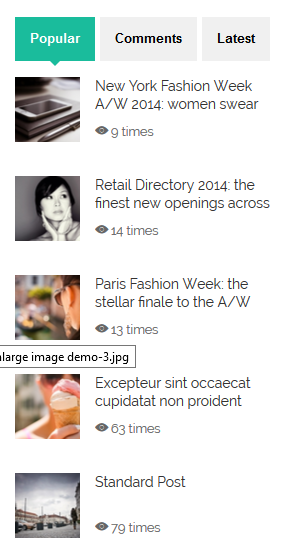
Main Settings:
- Position: right
- Menus assignment: Blog pages
- Tabs from: position tabs-blog (get tabs from 3 modules positioned tabs-blog including: Comments, Latest, Popular. )
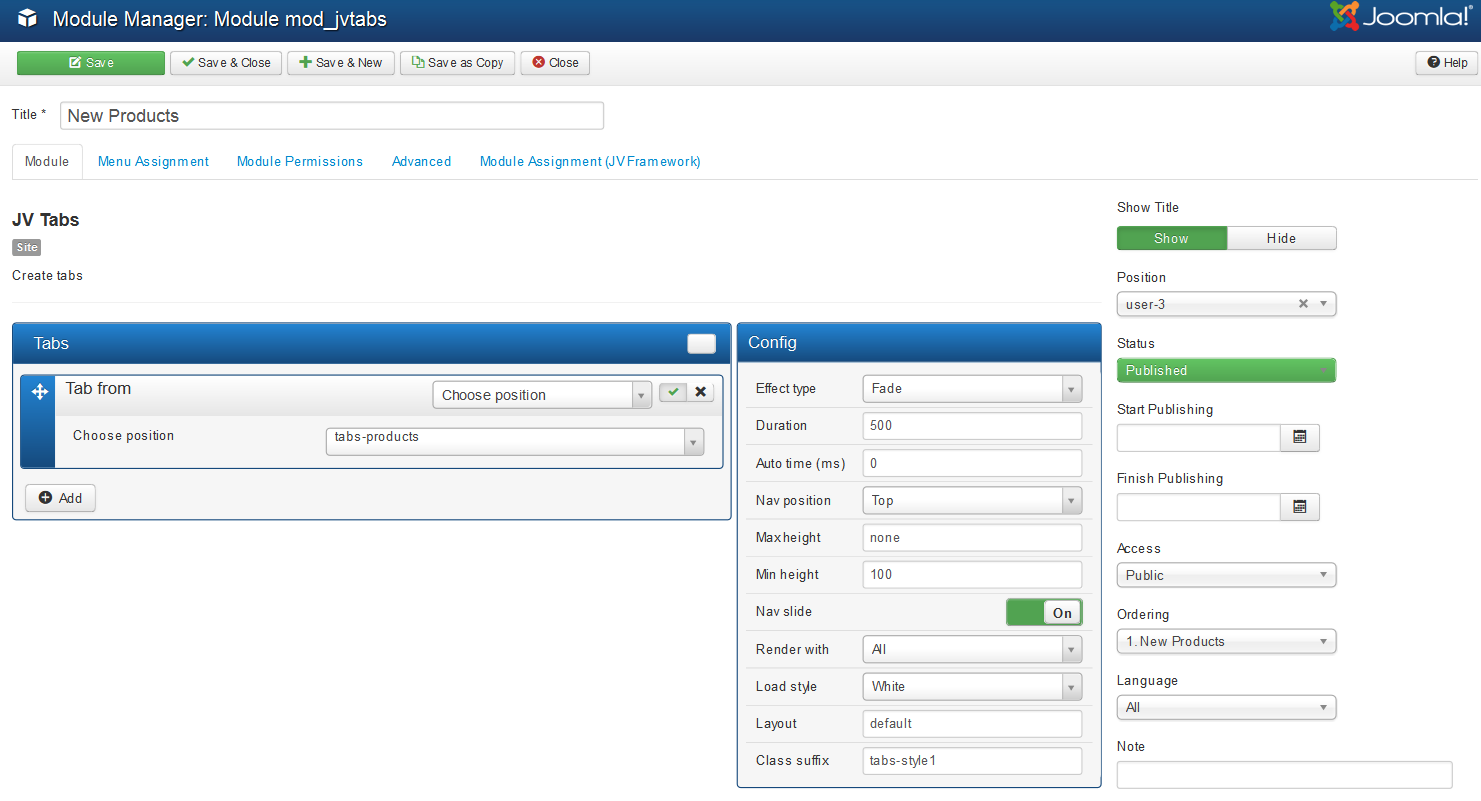
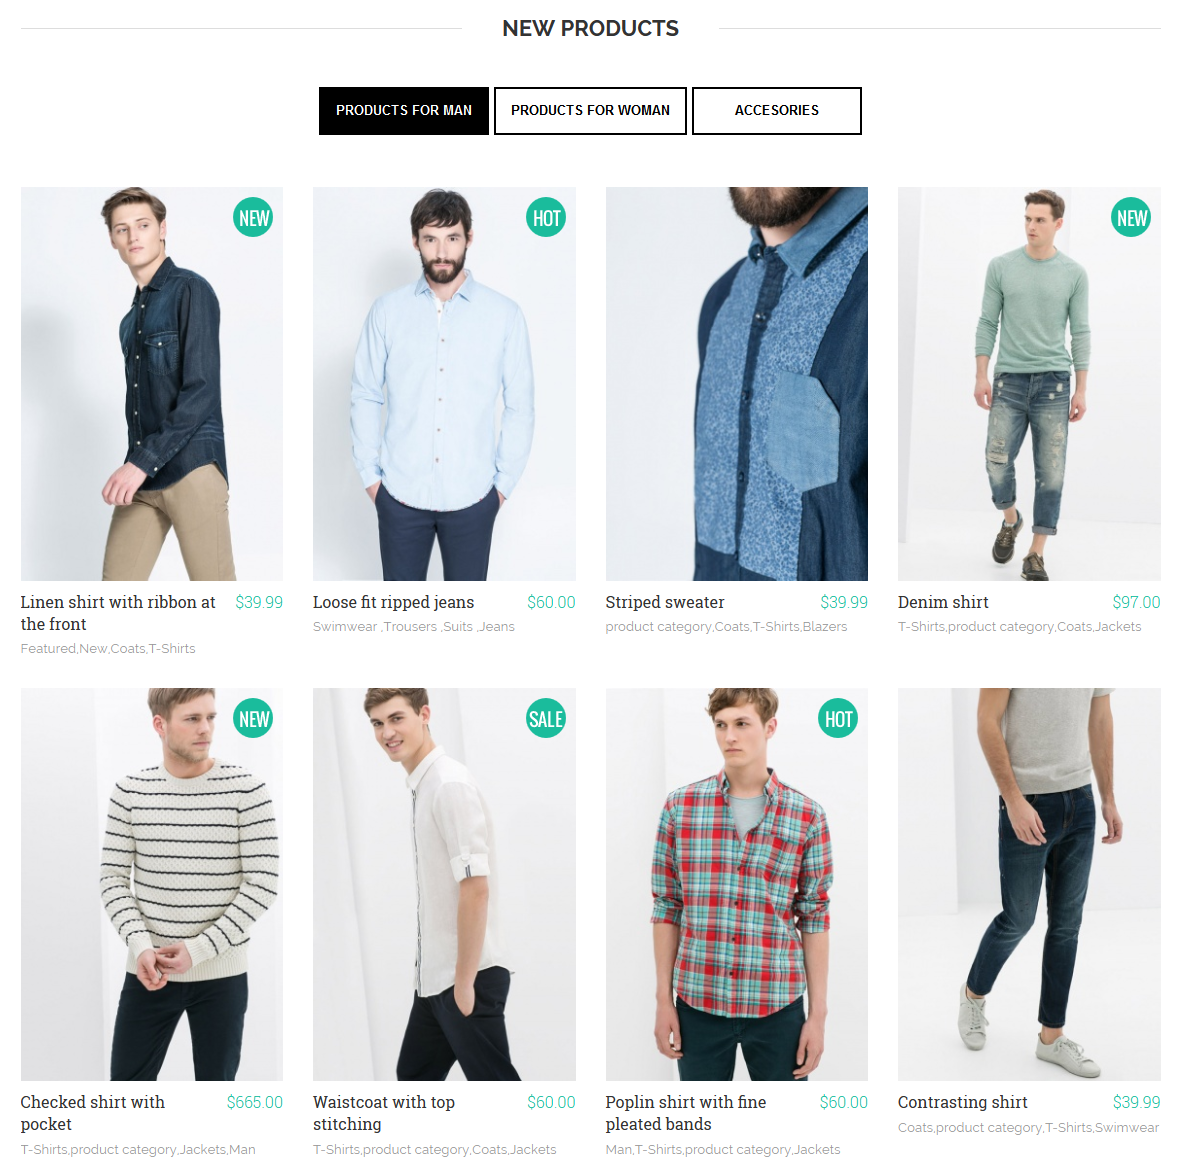
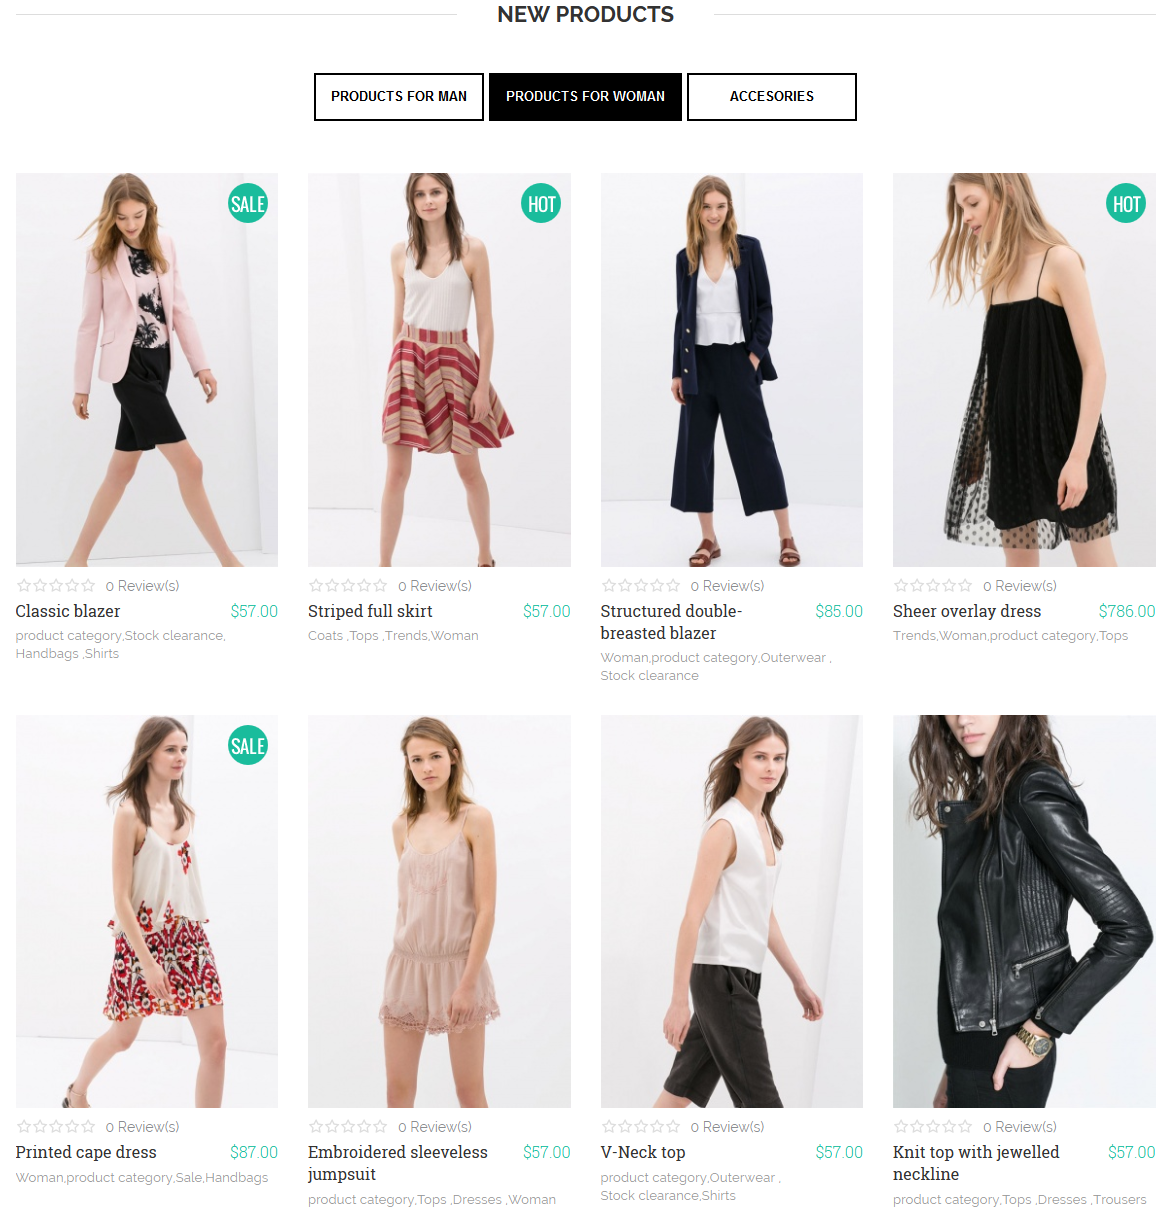
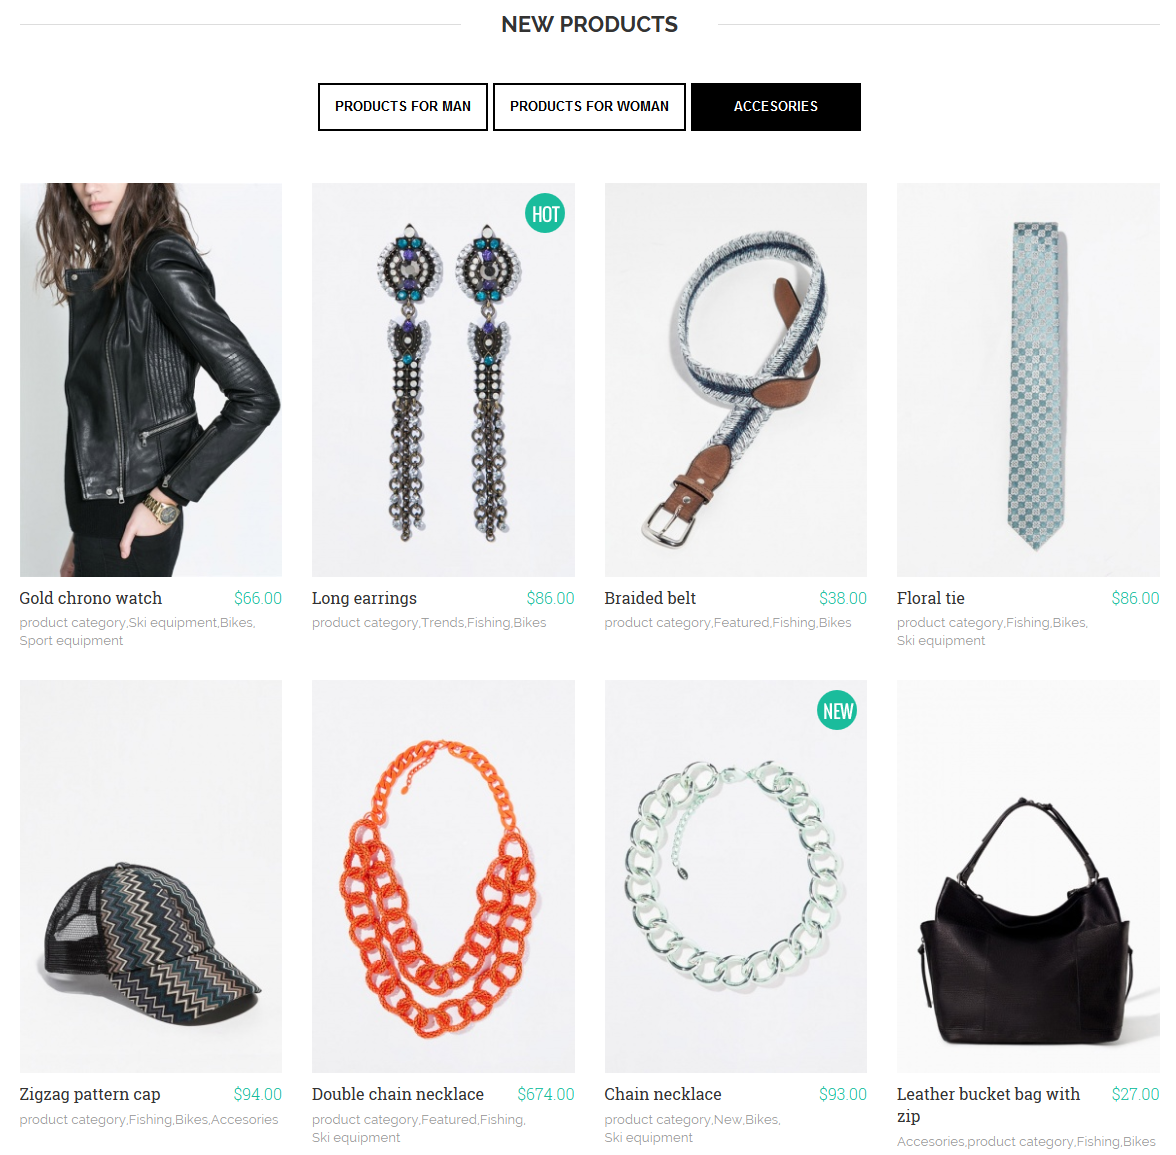
4.2. New Products
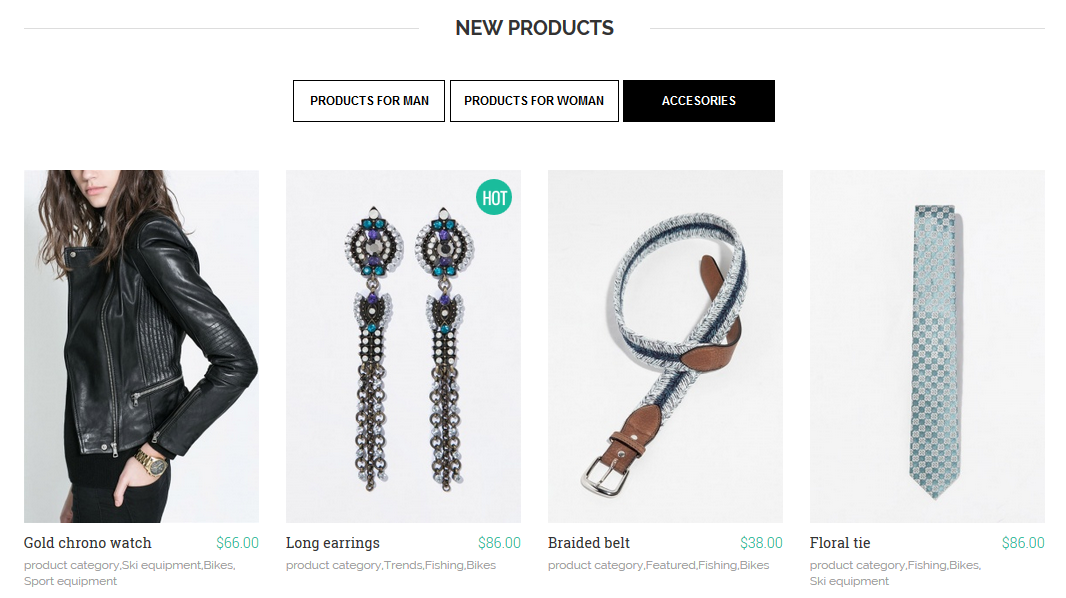
Main settings:
- Position: user-3
- Menu assignment: on Homepage
- Tabs from: Position tabs-products ( get tabs from 3 Hikashop content modules positioned tabs-products including "Products for men", "Products for women" and "Accessories".
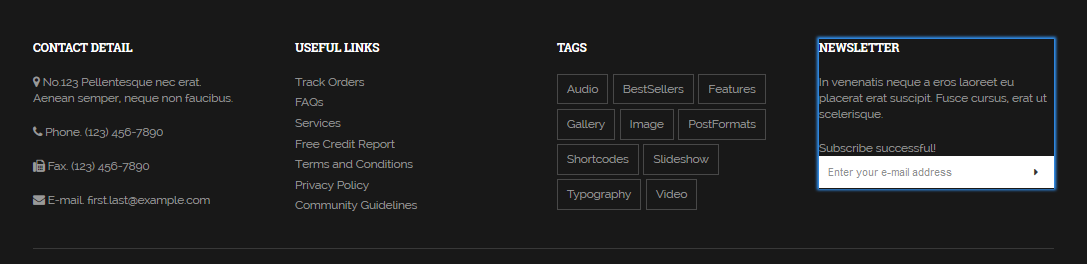
5. JV News Letter
Main settings:
Position: bottom-6
Menu assignment: on all pages
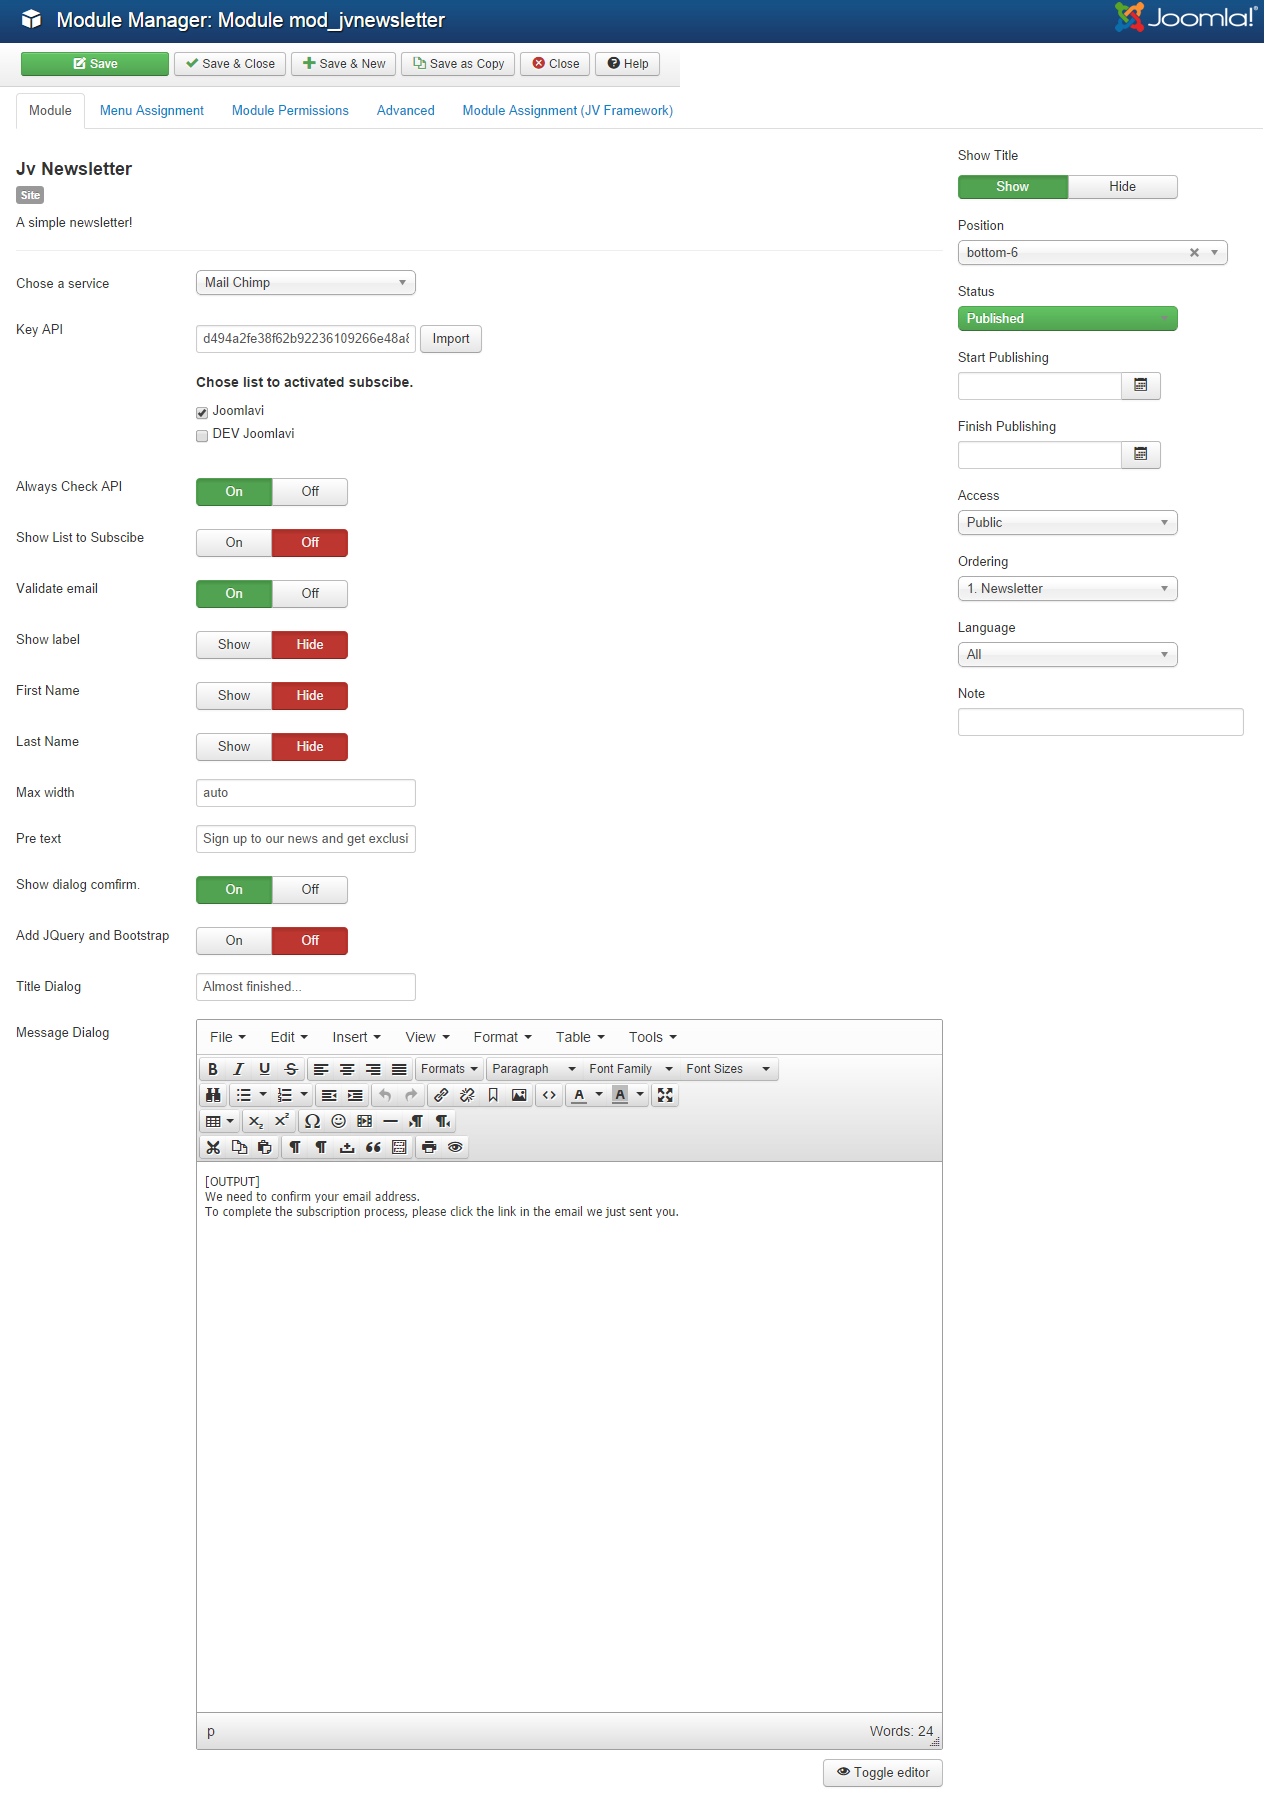
Module in frontend:
6. JV Ajax Search Hikashop
This module uses ajax to filter by name or price. There are 2 modules in Flatize demo: Filter by Price and Filter by name:
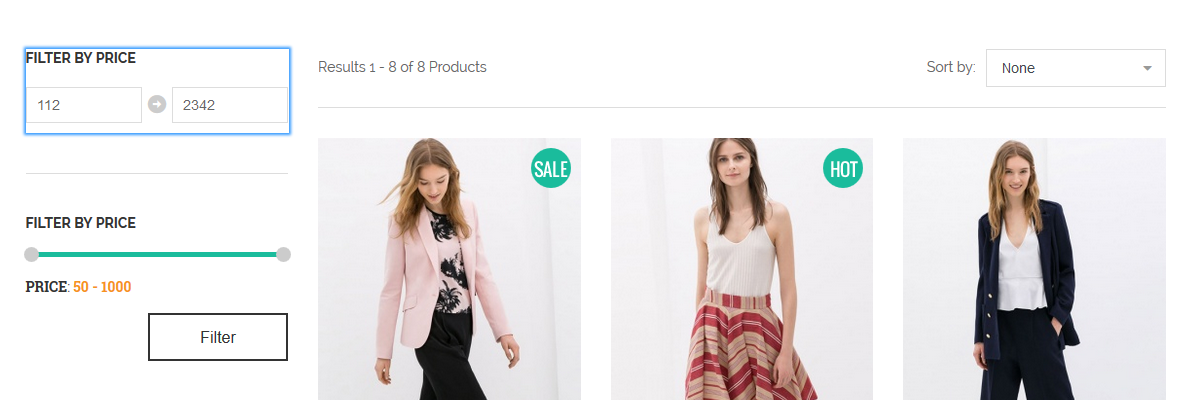
6.1 Filter by Price
Main Settings:
- Position: left
- Assignment: on Shop pages
- Price Filter: show
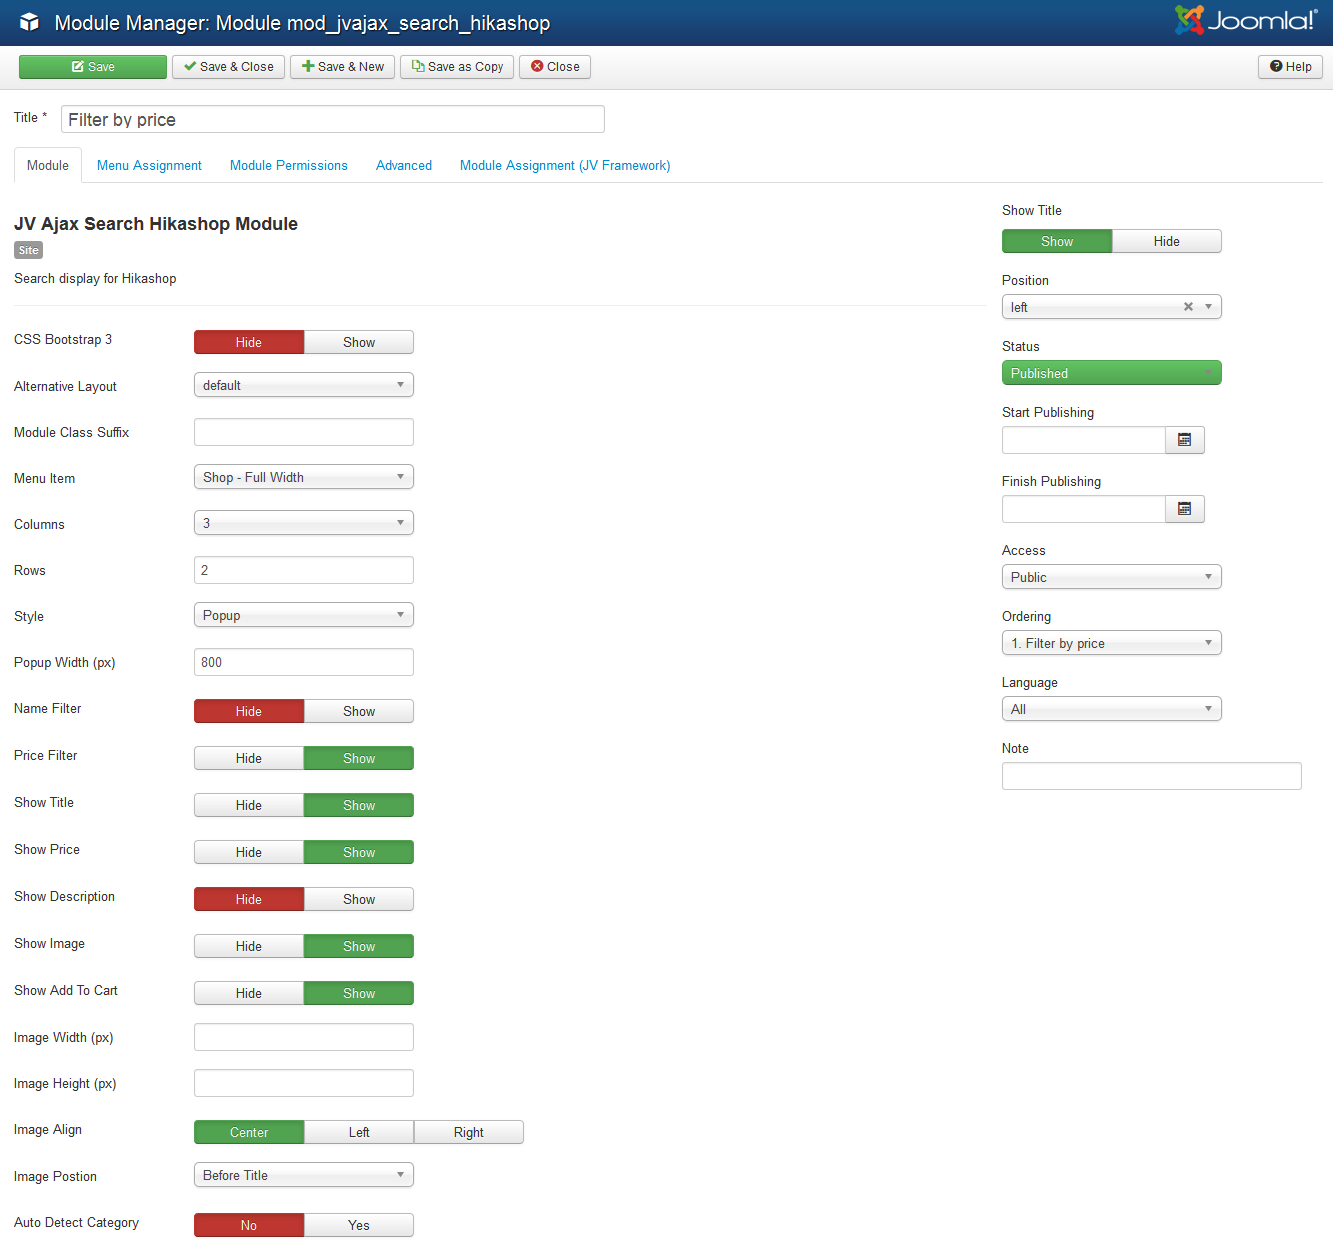
Module in Frontend:
6.2. Filter by name:
Main Settings:
Position: left
Assignment: on Shop pages
Name Filter: show
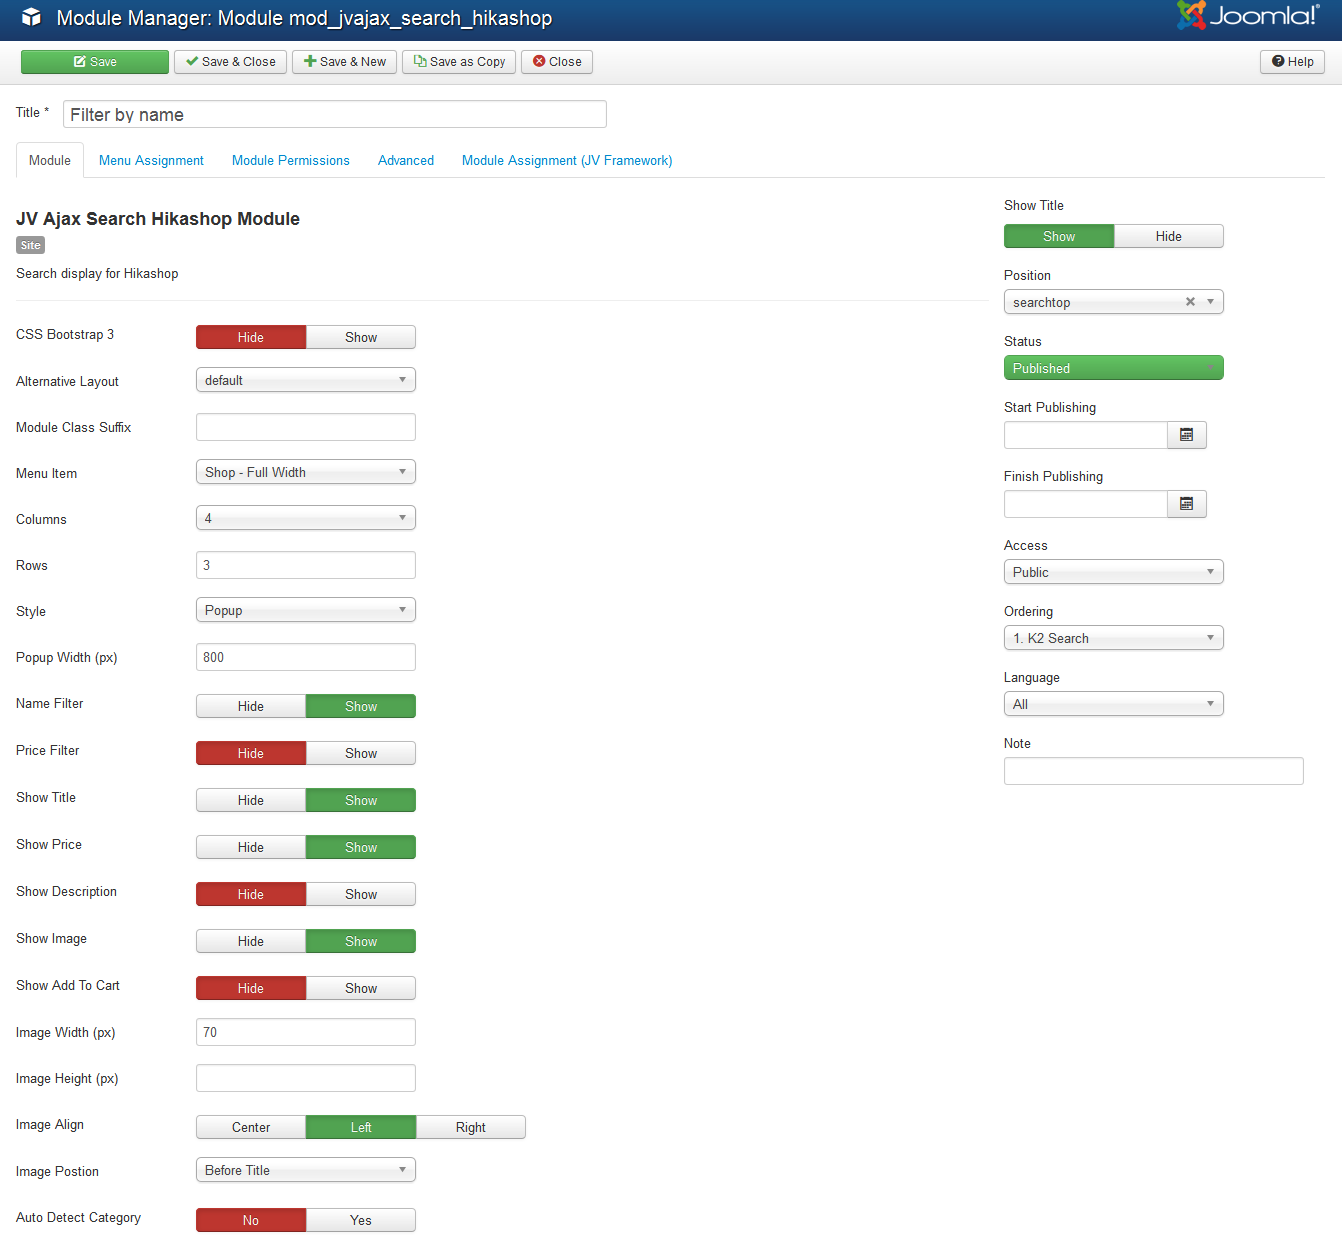
Module in front end:

Custom HTML Modules
The custom HTML module is one of the default modules for Joomla! It is designed to contain any valid HTML code. There are many cases where you might want to put free-form HTML inside a web page. For example, you might want to create an HTML Image Map or you might want to copy HTML code from PayPal, Amazon, or some other site. The Custom HTML Module allows you to create a self-contained HTML unit and then put it in any valid location on a page.
Note: If are new to Joomla! and HTML, best way for you is to copy and paste the code into the module. Or If you would like to edit the HTML code please notice on each of HTML module below.
How to create or a new Custom HTML module?
Like the way you create a new Joomla! default module. To 'add' a new Custom HTML module, navigate to Extensions >> Module Manager
Click the 'New' button and click on Custom HTML in the modal popup window.


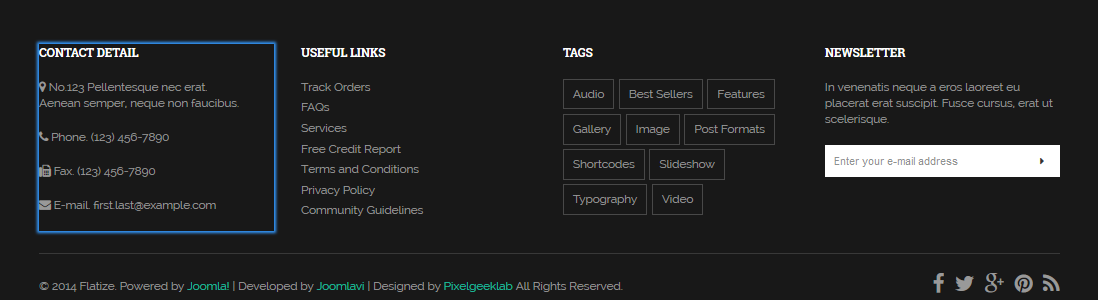
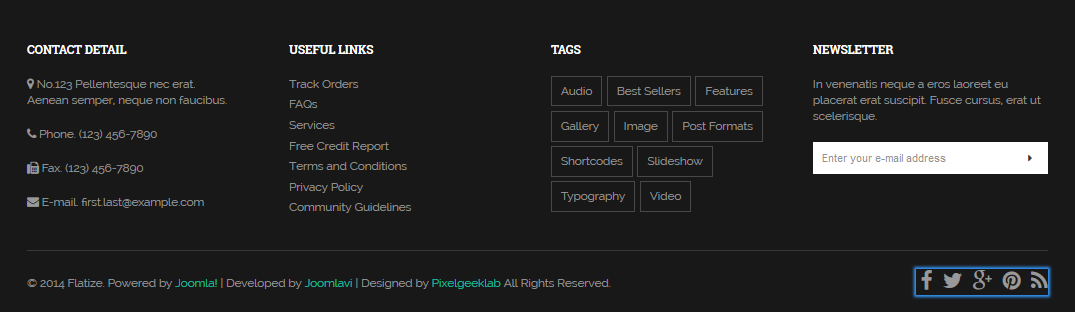
1. Contact detail
- Module position: bottom-1
- Module title: Fullscreen Slider & Seo
- Menu assignment : on all pages
<p><i class="fa fa-map-marker"><span class="hidden">hidden</span></i> No.123 Pellentesque nec erat. <br/> Aenean semper, neque non faucibus.</p>
<p><i class="fa fa-phone"><span class="hidden">hidden</span></i> Phone. (123) 456-7890</p>
<p><i class="fa fa-fax"><span class="hidden">hidden</span></i> Fax. (123) 456-7890</p>
<p><i class="fa fa-envelope"><span class="hidden">hidden</span></i> E-mail. <a href="mailto:This email address is being protected from spambots. You need JavaScript enabled to view it.">This email address is being protected from spambots. You need JavaScript enabled to view it.</a></p>
Module in front-end:
2. Social
- Module position: footer
- Menu assignment: on all pages
HTML:
<ul class="social">
<li><a title="" href="#" data-placement="top" data-toggle="tooltip" data-original-title="Facebook"><i class="fa fa-facebook"><span class="hidden">hidden</span></i></a></li>
<li><a title="" href="#" data-placement="top" data-toggle="tooltip" data-original-title="Twitter"><i class="fa fa-twitter"><span class="hidden">hidden</span></i></a></li>
<li><a title="" href="#" data-placement="top" data-toggle="tooltip" data-original-title="Google+"><i class="fa fa-google-plus"><span class="hidden">hidden</span></i></a></li>
<li><a title="" href="#" data-placement="top" data-toggle="tooltip" data-original-title="Pinterest"><i class="fa fa-pinterest"><span class="hidden">hidden</span></i></a></li>
<li><a title="" href="#" data-placement="top" data-toggle="tooltip" data-original-title="RSS"><i class="fa fa-rss"><span class="hidden">hidden</span></i></a></li>
</ul>
Module in front-end
3. Panel 1
- Module position: panel-1
- Menu assignment: on all pages
HTML:
<p>Free Shipping on all U.S orders over $50</p>
Module in front-end:

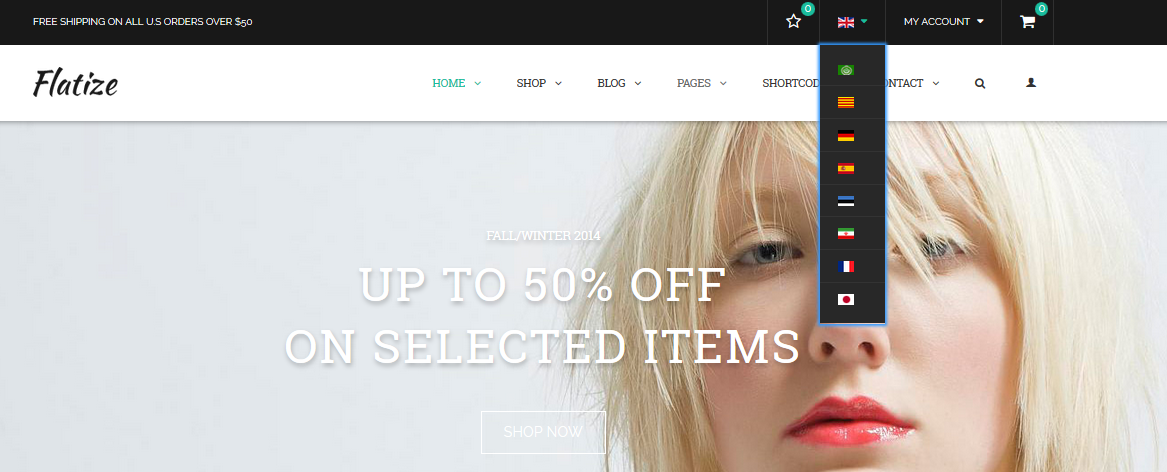
4. Language
- Module position: panel-2
- Menu Assignment: on all pages
HTML:
<ul class="menu dropdownMenu">
<li class="parent"><a class="item-text"><img src="/images/demo/flags/en.gif" alt="English" /> </a>
<div class="divsubmenu">
<ul>
<li><a class="item-text"><img src="/images/demo/flags/ar.gif" alt="AR" /></a></li>
<li><a class="item-text"><img src="/images/demo/flags/ca.gif" alt="CA" /></a></li>
<li><a class="item-text"><img src="/images/demo/flags/de.gif" alt="DE" /></a></li>
<li><a class="item-text"><img src="/images/demo/flags/es.gif" alt="ES" /></a></li>
<li><a class="item-text"><img src="/images/demo/flags/et.gif" alt="ET" /></a></li>
<li><a class="item-text"><img src="/images/demo/flags/fa.gif" alt="FA" /></a></li>
<li><a class="item-text"><img src="/images/demo/flags/fr.gif" alt="FR" /></a></li>
<li><a class="item-text"><img src="/images/demo/flags/ja.gif" alt="JA" /></a></li>
</ul>
</div>
</li>
</ul>
Module in front-end:
5. Ads
- Module position: right
- Menu Assignment: on Blog pages
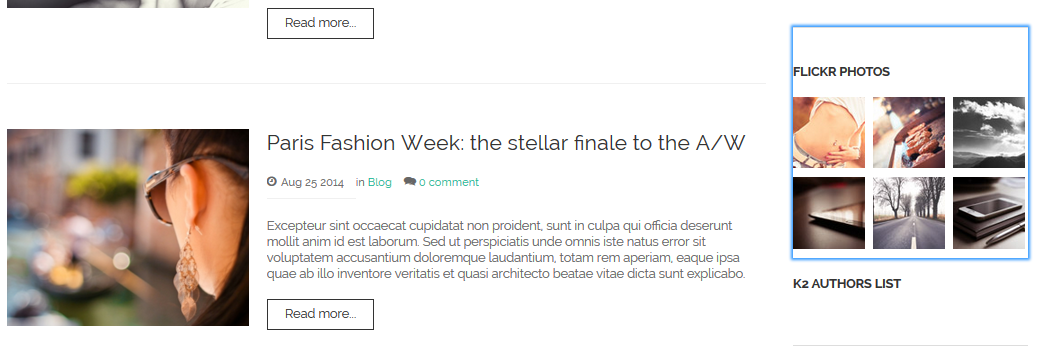
6. Flickr Photos
- Module position: right
- Menu assignment: On blog pages
HTML:
<ul class="list-thumb-photo">
<li><a href="#"><img src="/images/demo/blog/thumb/demo-thumb-1.jpg" alt="" /></a></li>
<li><a href="#"><img src="/images/demo/blog/thumb/demo-thumb-2.jpg" alt="" /></a></li>
<li><a href="#"><img src="/images/demo/blog/thumb/demo-thumb-3.jpg" alt="" /></a></li>
<li><a href="#"><img src="/images/demo/blog/thumb/demo-thumb-4.jpg" alt="" /></a></li>
<li><a href="#"><img src="/images/demo/blog/thumb/demo-thumb-5.jpg" alt="" /></a></li>
<li><a href="#"><img src="/images/demo/blog/thumb/demo-thumb-6.jpg" alt="" /></a></li>
</ul>
Module in frontend
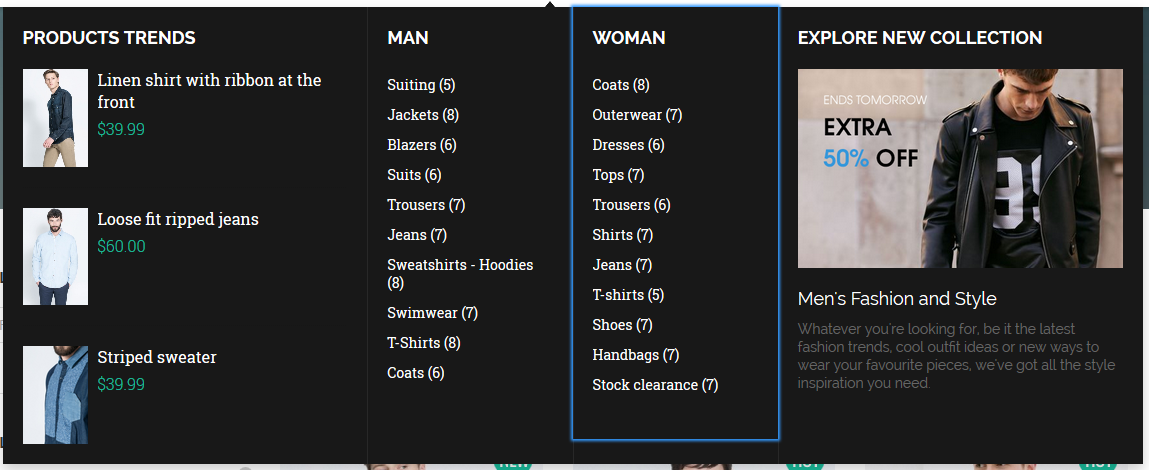
7. Explore New Collection
This module is loaded into Mega Menu, please refer to Mega menu configuration section to how to load module to Megamenu.
- Module position: submenu
- Menu assignment: On all pages
HTML:
<p><a class="thumbnail-image" href="/shop-product-detail1.html"><img src="/images/demo/ad-1.png" alt="" /></a></p>
<h4 class="moduleItemTitle"><a href="/shop-product-detail2.html">Men's Fashion and Style</a></h4>
<p>Whatever you're looking for, be it the latest fashion trends, cool outfit ideas or new ways to wear your favourite pieces, we've got all the style inspiration you need.</p>
Module in frontend
8. Ad 1, Ad 2, Ad 3
- Module position: top-1, top-2, top-3
- Menu assignment: On home page
Module in frontend:

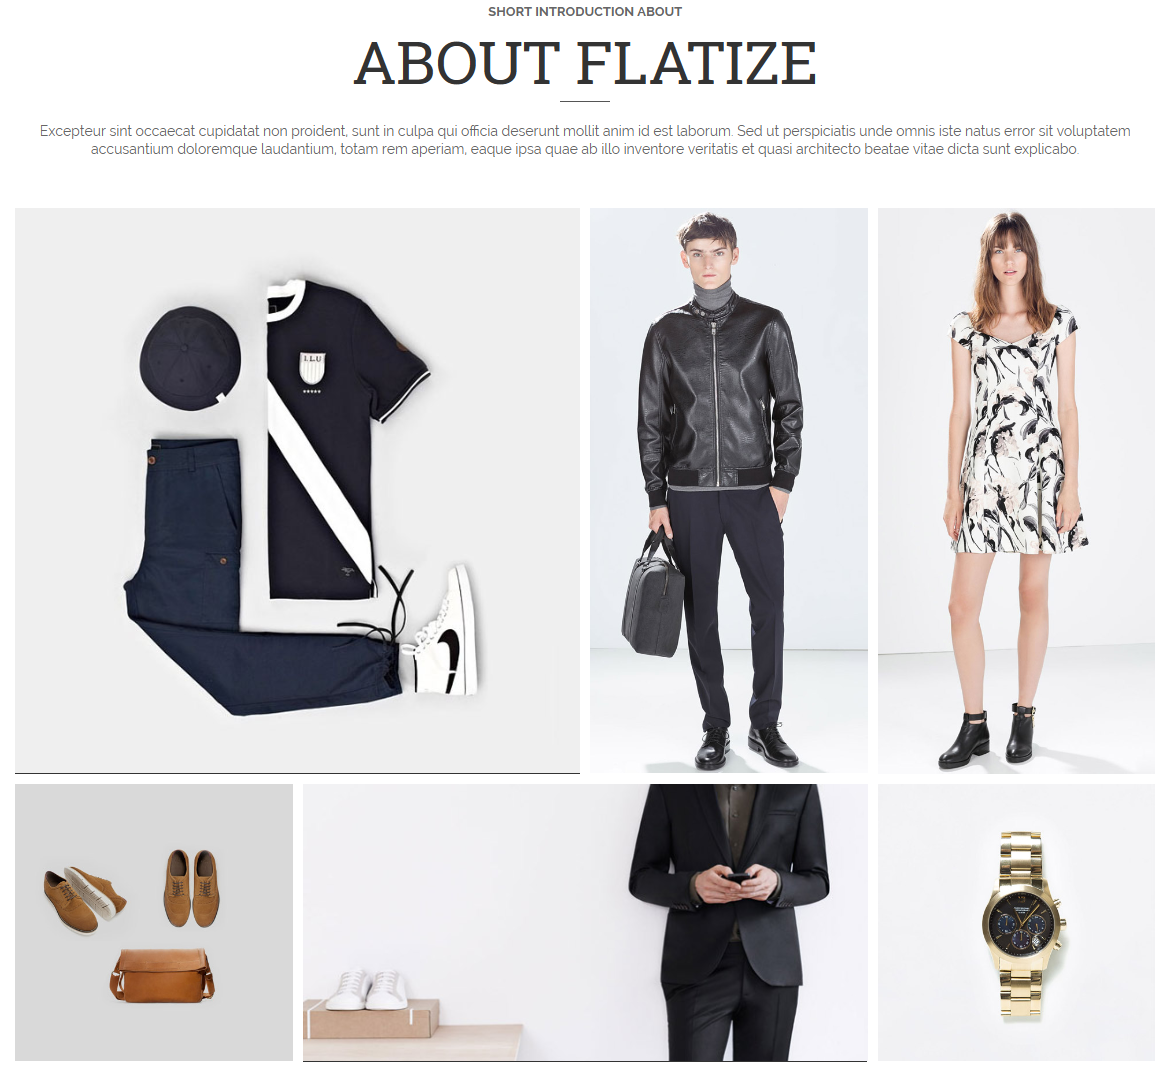
9. About Flatize
- Module position: user-1
- Menu assignment: on Home Version 3
HTML:
<div class="aboutShop">
<div class="introtext">
<p><strong>Short introduction about</strong></p>
<h1>About Flatize</h1>
<p>Excepteur sint occaecat cupidatat non proident, sunt in culpa qui officia deserunt mollit anim id est laborum. Sed ut perspiciatis unde omnis iste natus error sit voluptatem accusantium doloremque laudantium, totam rem aperiam, eaque ipsa quae ab illo inventore veritatis et quasi architecto beatae vitae dicta sunt explicabo.</p>
</div>
<div class="row">
<div class="col-sm-6 ">
<div class="catItem">
<figure><a href="/component/com_hikashop/Itemid,136/cid,55/ctrl,category/name,handbags/task,listing/"><img src="/images/demo/shop/cat-1.jpg" alt="" /></a> <figcaption>
<div class="description">
<h3>Men's Fashion and Style</h3>
<a href="/component/com_hikashop/Itemid,136/cid,55/ctrl,category/name,handbags/task,listing/">Read More</a></div>
</figcaption></figure>
</div>
</div>
<div class="col-xs-6 col-sm-3 ">
<div class="catItem">
<figure><a href="/component/com_hikashop/Itemid,136/cid,12/ctrl,category/name,man/task,listing/"><img src="/images/demo/shop/cat-2.jpg" alt="" /></a> <figcaption>
<div class="description">
<h3>Men's Fashion</h3>
<a href="/component/com_hikashop/Itemid,136/cid,12/ctrl,category/name,man/task,listing/">Read More</a></div>
</figcaption></figure>
</div>
</div>
<div class="col-xs-6 col-sm-3 ">
<div class="catItem">
<figure><a href="/component/com_hikashop/Itemid,136/cid,13/ctrl,category/name,woman/task,listing/"><img src="/images/demo/shop/cat-3.jpg" alt="" /></a> <figcaption>
<div class="description">
<h3>Women Style</h3>
<a href="/component/com_hikashop/Itemid,136/cid,13/ctrl,category/name,woman/task,listing/">Read More</a></div>
</figcaption></figure>
</div>
</div>
</div>
<div class="row ">
<div class="col-xs-6 col-sm-3 ">
<div class="catItem">
<figure><a href="/component/com_hikashop/Itemid,136/layout,listing/view,category/"><img src="/images/demo/shop/cat-4.jpg" alt="" /></a> <figcaption>
<div class="description">
<h3>Fashion and Style</h3>
<a href="/component/com_hikashop/Itemid,136/layout,listing/view,category/">Read More</a></div>
</figcaption></figure>
</div>
</div>
<div class="col-xs-6 ">
<div class="catItem">
<figure><a href="/component/com_hikashop/Itemid,136/cid,42/ctrl,category/name,t-shirts/task,listing/"><img src="/images/demo/shop/cat-5.jpg" alt="" /></a> <figcaption>
<div class="description">
<h3>Men's T-Shirts</h3>
<a href="/component/com_hikashop/Itemid,136/cid,42/ctrl,category/name,t-shirts/task,listing/">Read More</a></div>
</figcaption></figure>
</div>
</div>
<div class="col-xs-6 col-sm-3 ">
<div class="catItem">
<figure><a href="/component/com_hikashop/Itemid,136/cid,14/ctrl,category/name,accesories/task,listing/"><img src="/images/demo/shop/cat-6.jpg" alt="" /></a> <figcaption>
<div class="description">
<h3>Watch Style</h3>
<a href="/component/com_hikashop/Itemid,136/cid,14/ctrl,category/name,accesories/task,listing/">Read More</a></div>
</figcaption></figure>
</div>
</div>
</div>
</div>
Module in frontend
10. LookBook Women
- Module position: user-2
- Menu assignment: on Homepage
HTML:
<h2><a href="#">Lookbook Women</a></h2>
<p>Etiam aliquam risus ante, quis ultrices enim porta a. Integer et dolor sit amet enim feugiat faucibus. Donec sit amet egestas orci. Proin facilisis mi ornare turpis sollicitudin; vel rutrum est viverra. Vestibulum hendrerit egestas semper.</p>
Module in frontend

11. Free Shipping on orders over $75
- Module position: user-2
- Menu assignment: On Home version 2
HTML:
<h2>Free Shipping on orders over $75</h2>
<p>Etiam aliquam risus ante, quis ultrices enim porta a. Integer et dolor sit amet enim feugiat faucibus. Donec sit amet egestas orci. Proin facilisis mi ornare turpis sollicitudin; vel rutrum est viverra. Vestibulum hendrerit egestas semper.</p>
Module in frontend:

12. Slide User 4
- Module position: user-4
- Menu assignment: On Homepage
HTML:
<div id="owl-text-slide" class="owl-carousel">
<div class="item">
<blockquote>
<p>Design is a funny word. Some people think design means how it looks. But of course, if you dig deeper, it's really how it works.</p>
<footer>by <cite title="Steve Jobs">Steve Jobs</cite></footer></blockquote>
</div>
<div class="item">
<blockquote>
<p>They may forget what you said, but they will never forget how you made them feel.</p>
<footer>by <cite title="Steve Jobs">Carl W. Buechner</cite></footer></blockquote>
</div>
</div>
Module in frontend

13. Slide parallax shop
- Module position: user-4
- Menu assignment: On Home version 2
HTML:
<div id="owl-text-slide" class="owl-carousel">
<div class="item">
<div class="intro">
<h2>Men's Fashion and Style</h2>
<p>Whatever you're looking for, be it the latest fashion trends, cool outfit ideas or new ways to wear your favourite pieces, we've got all the style inspiration you need.</p>
<a class="btn btn-white" href="#">Shop Now</a></div>
</div>
<div class="item">
<div class="intro">
<h2>Men's Fashion and Style 2</h2>
<p>Whatever you're looking for, be it the latest fashion trends, cool outfit ideas or new ways to wear your favourite pieces, we've got all the style inspiration you need.</p>
<a class="btn btn-white" href="#">Shop Now</a></div>
</div>
</div>
Module in frontend

14. More Info Shop
- Module position: panel-2
- Menu assignment: On all pages
HTML:
<ul class="moreInfoShop">
<li>
<div class="inner"><i class="fa fa-plane"><span class="hidden">hidden</span></i><strong>Delivery worldwide</strong>See all conditions</div>
</li>
<li>
<div class="inner"><i class="fa fa-refresh"><span class="hidden">hidden</span></i><strong>30 days returns</strong>For a smooth shopping</div>
</li>
<li>
<div class="inner"><i class="fa fa-phone"><span class="hidden">hidden</span></i><strong>0123 456 789</strong>Contact Customer</div>
</li>
<li>
<div class="inner"><i class="fa fa-lock"><span class="hidden">hidden</span></i><strong>30 days returns</strong>For a smooth shopping</div>
</li>
<li>
<div class="inner"><i class="fa fa-question-circle"><span class="hidden">hidden</span></i><strong>Shopping Guide</strong>Contact Customer</div>
</li>
</ul>
Module in frontend:

Joomla Modules
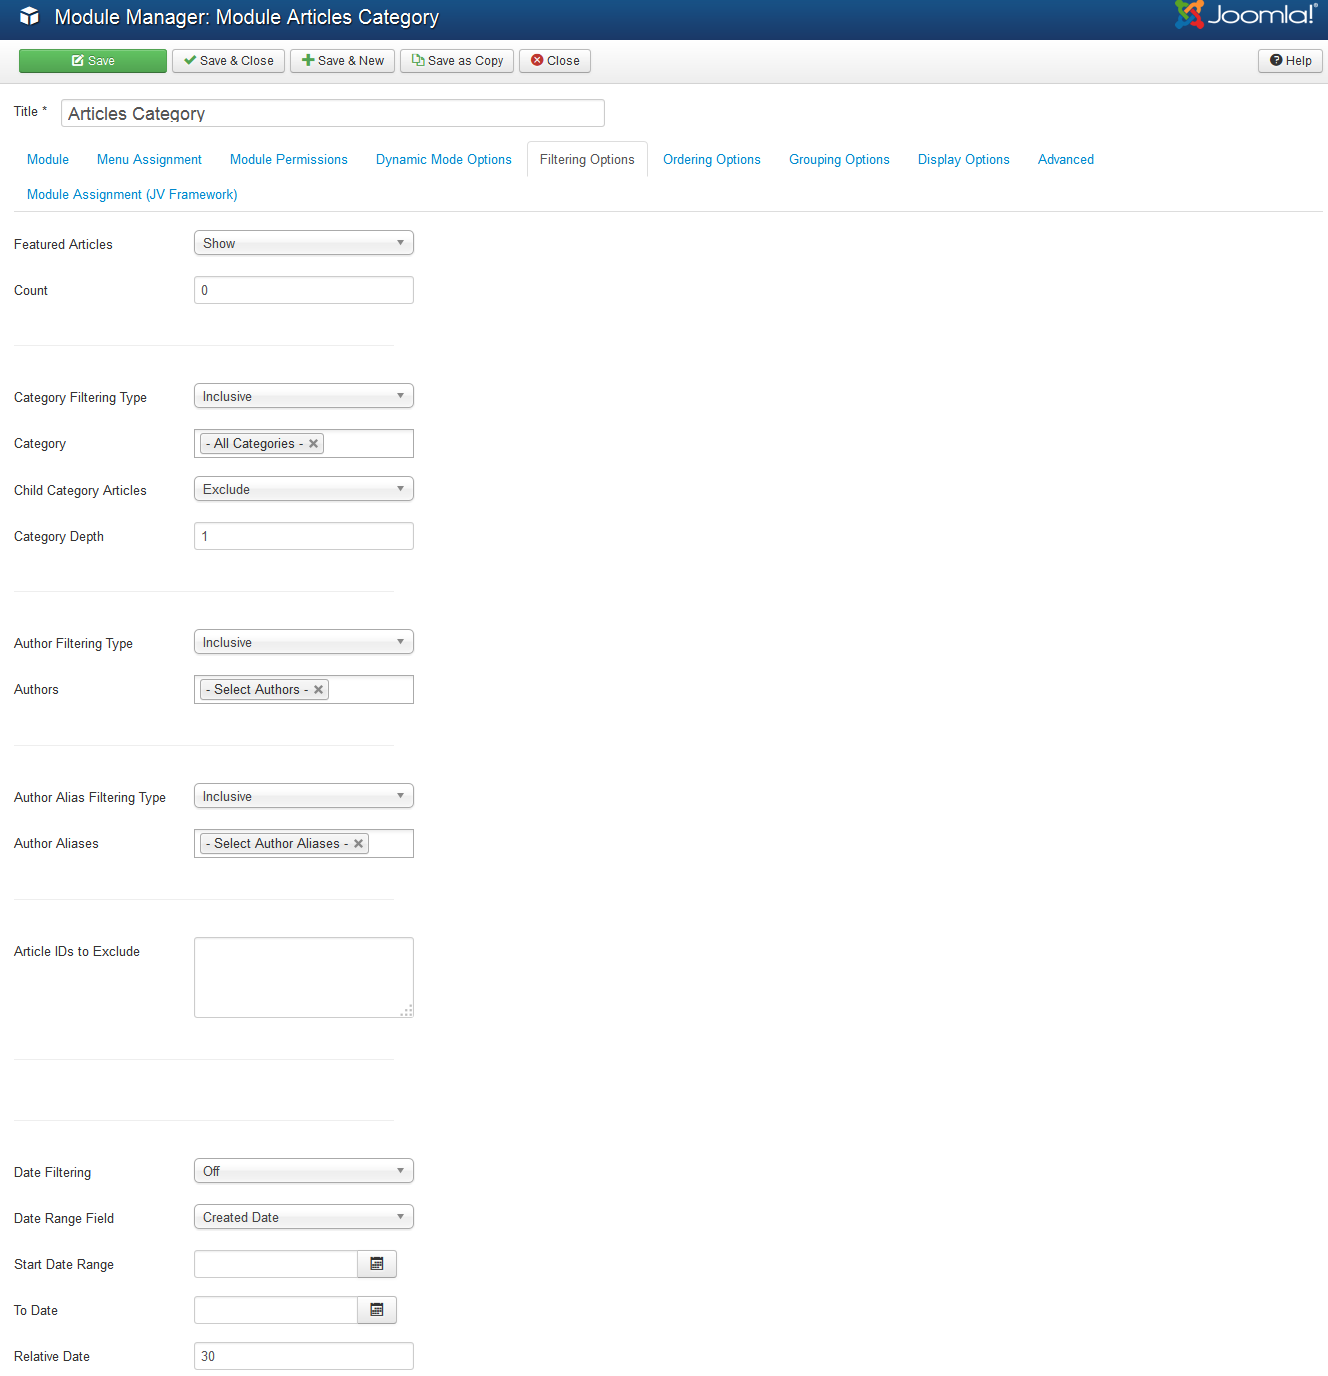
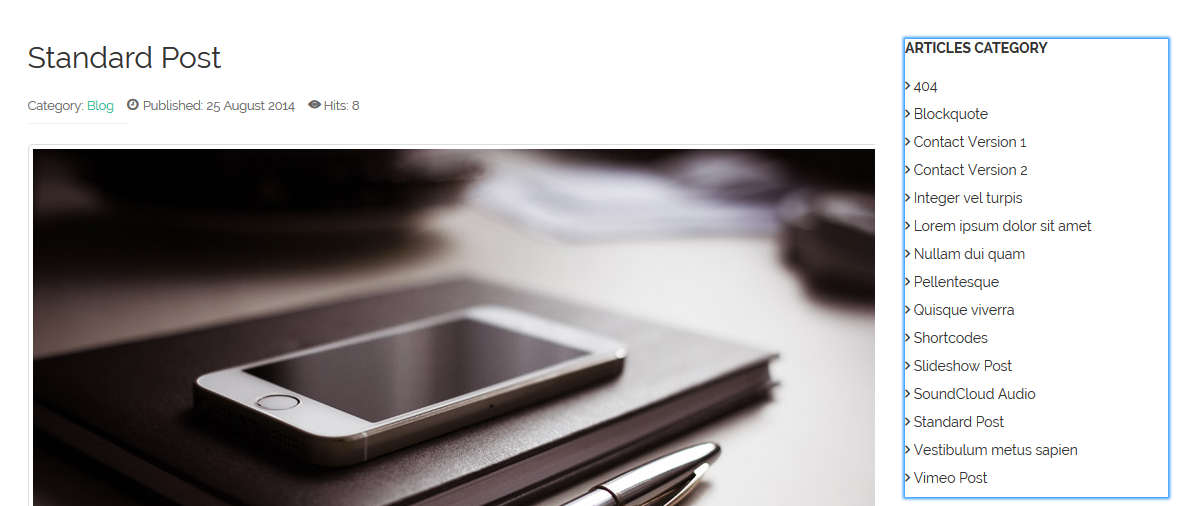
This sections will show other modules used in Flatize Demo:1. Articles Category
This module displays a list of articles from one or more categories..
Main Settings:
- Position: right-2
- Assignment: sub-articles pages
- Module Type: Articles Category
Back-end settings
Module in frontend
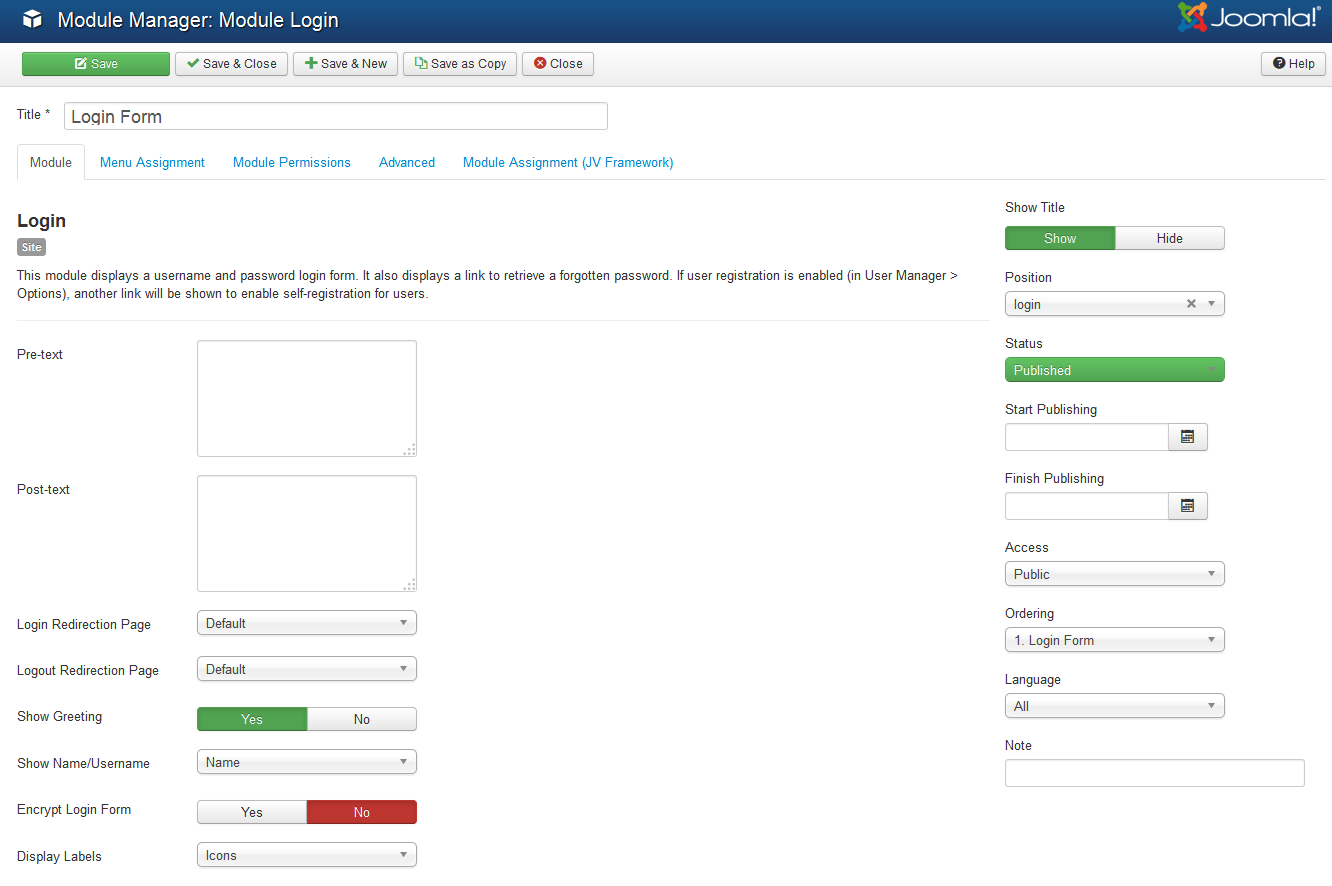
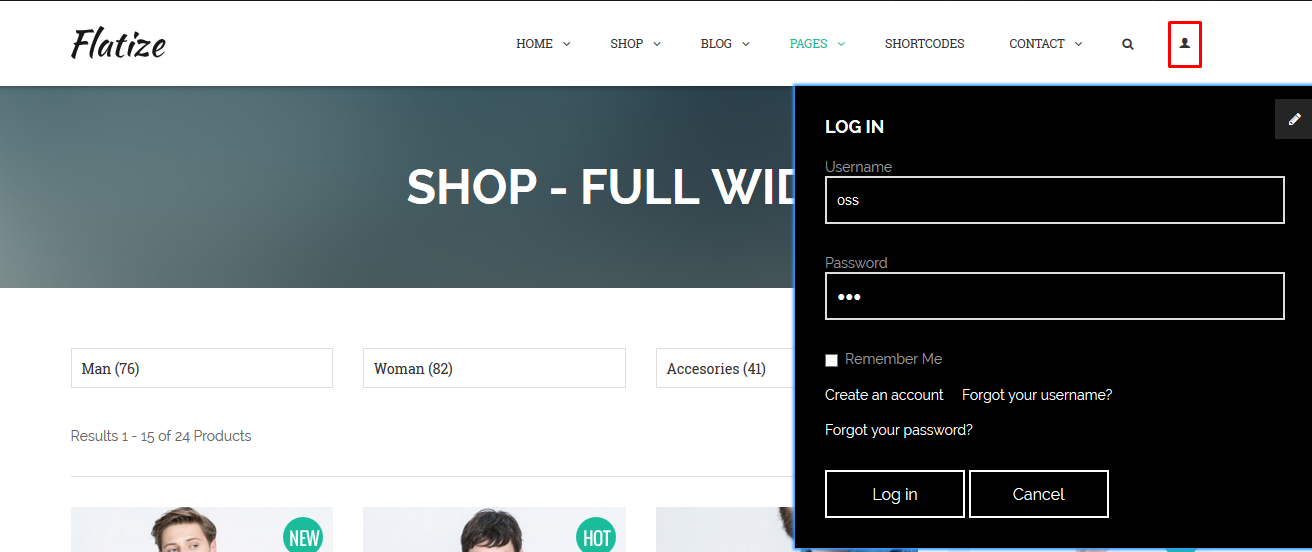
2. Login
This module displays a username and password login form. It also displays a link to retrieve a forgotten password. If user registration is enabled (in User Manager > Options), another link will be shown to enable self-registration for users.
Main Settings:
- Position: login
- Assignment: on all pages
- Module Type: login
Back-end settings
Module in frontend
3. Menu modules
This type of module displays a menu on the frontend
There are 3 modules used in Flatize demo:
3.1. Useful Links
Main Settings:
- Position: bottom-2
- Assignment: on all pages
- Module Type: menu
- Select Menu: Useful links
The module in frontend
3.2. Main Menu
Main Settings:
- Position: menu
- Assignment: on all pages
- Module Type: menu
- Select Menu: Main Menu
The module in frontend

3.3. My Account
Main Settings:
- Position: panel-2
- Assignment: on all pages
- Module Type: menu
- Select Menu: HikaShop default menus
The module in frontend

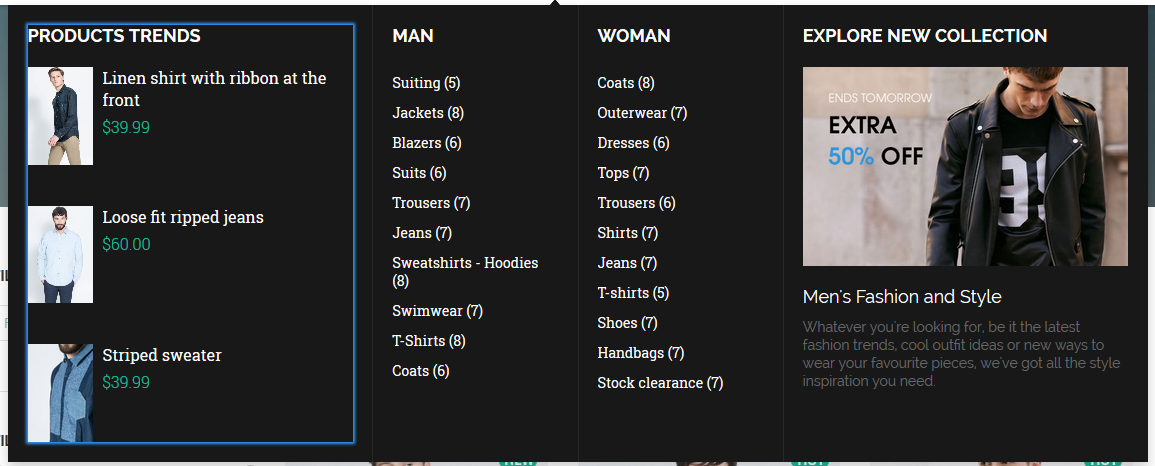
Mega Menu Configuration
Mega menu is a feature of any template built-in JV Framework, to create a Mega Menu go the following steps:
4.1 Create menu structure
First of all, you need to create your own mene structure including level-1, level-2 ... menu items. It depends on how large is you menu system you want to build. The image bellow is an example, the level-1 menu item is the starting point.
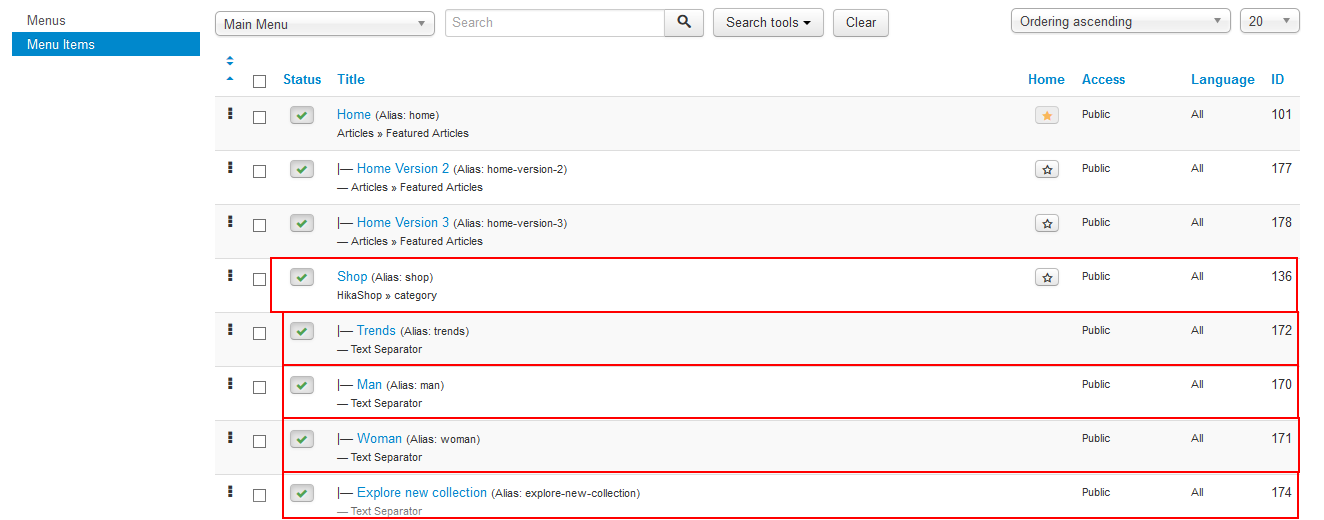
If you want to add modules to Mega Menu, you need to create them first. Assuming that 4 modules were created: Trends , Man, Woman, Explore New Collection to load to Mega menu. As shown in the image below:
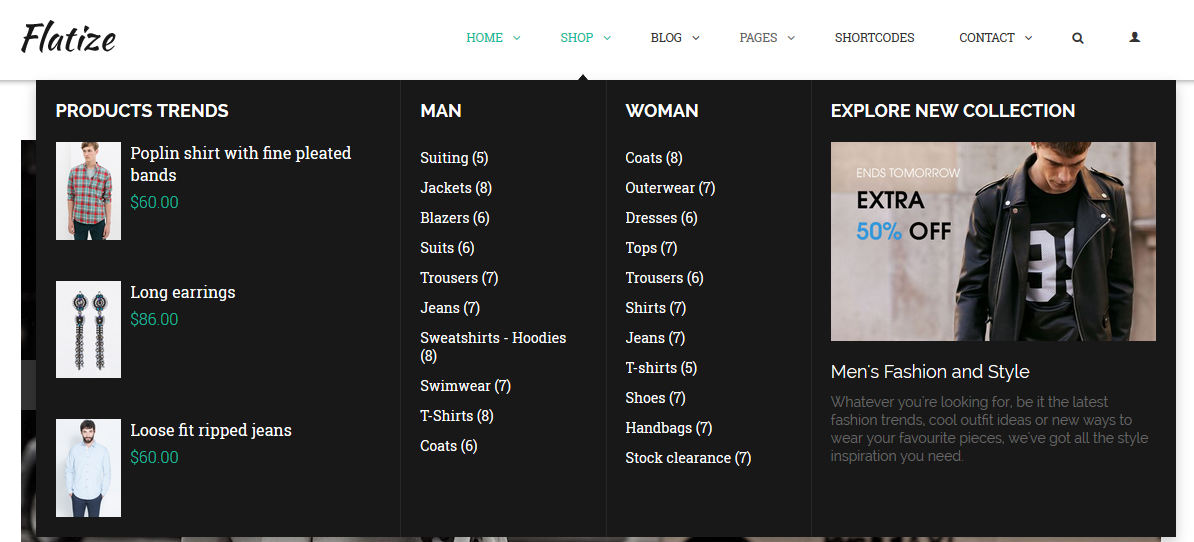
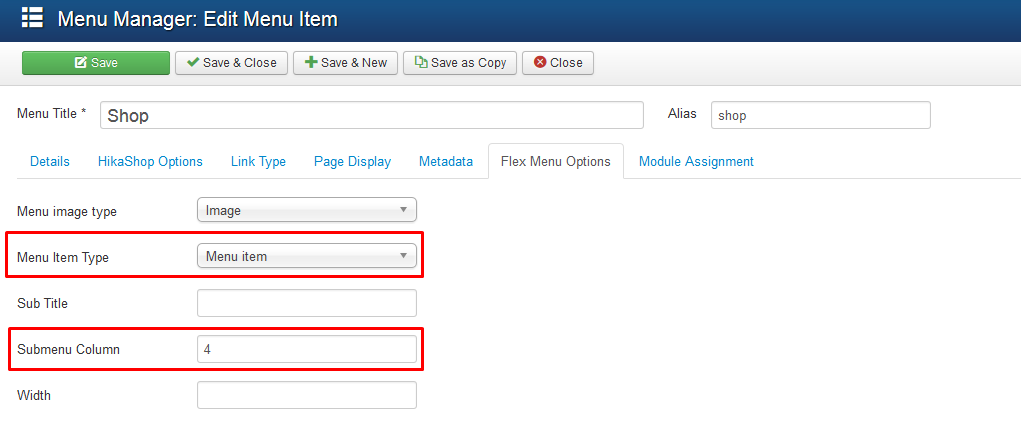
4.2 Flex Menu Options:
Go to each menu item and choose the tab "Flex Menu Options", this is the important tab, which helps you configure the Mega Menu:
In this example, we configure each menu item as following:
- Menu item "Shop": This menu item is the starting point so you need to enter submenu collumns
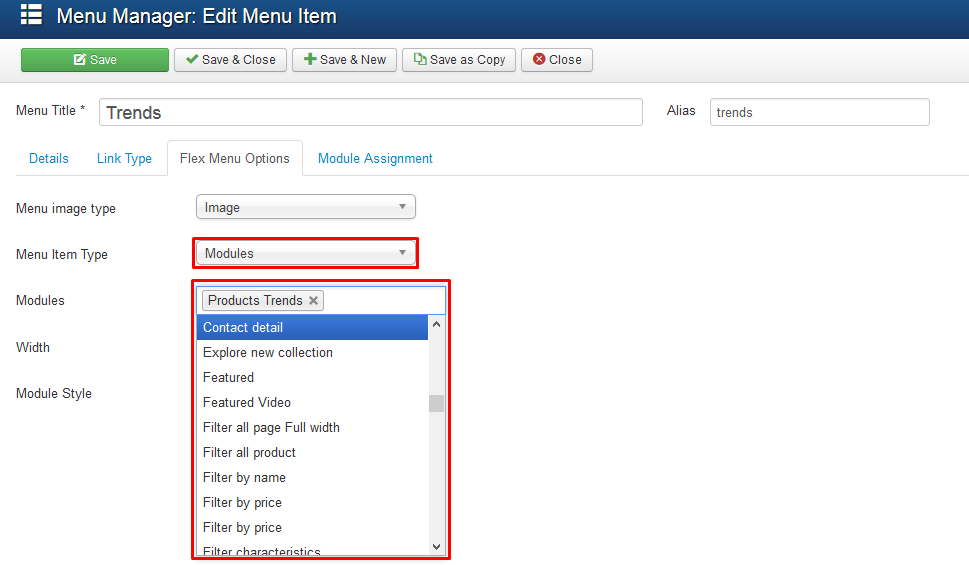
- For Menu items: "Trend", "Man", "Woman" and "Explore New Collection": These menu item show group of their menu items in one column, so select Menu Item Type as "Modules" and select module from dropdown to show
hikashop configuration
This part is intended to cover important things of Hikashop Component. After going through this part, you can know know to configure the component and Hikashop modules used in Flatize demo.
You may need to visit https://www.hikashop.com/support/documentation.html for more detailed Hikashop documentation.
Flatize supports 2 versions of Hikashop (Free + Commercial), if you would to use commercial version of Hikashop for better usability, let me know, I'll send you coupon code for 20% discount!
1. Installation
HikaShop is a Joomla Component and like any other Joomla extensions, it can be installed easily within no more 2 clicks!
You don't have to extract the package first, HikaShop will automatically install some plugins and modules.
Log on to the Joomla Administrator Section and go to Extensions >> Extension Manager
Browse for your HikaShop package and then click "Upload File & Install". The installation process may take about 1 minute

HikaShop will automatically install its modules and plugins and default categories so that you can directly add your products to your store.
2. Hikashop dashboard
The dashboard is the place you come to when you open HikaShop via the administrator joomla menu Components >> HikaShop. It is composed of two parts: a statistics part at the top, where you can see information about your sales and customers, and a menu part with a list of the main parts of HikaShop.
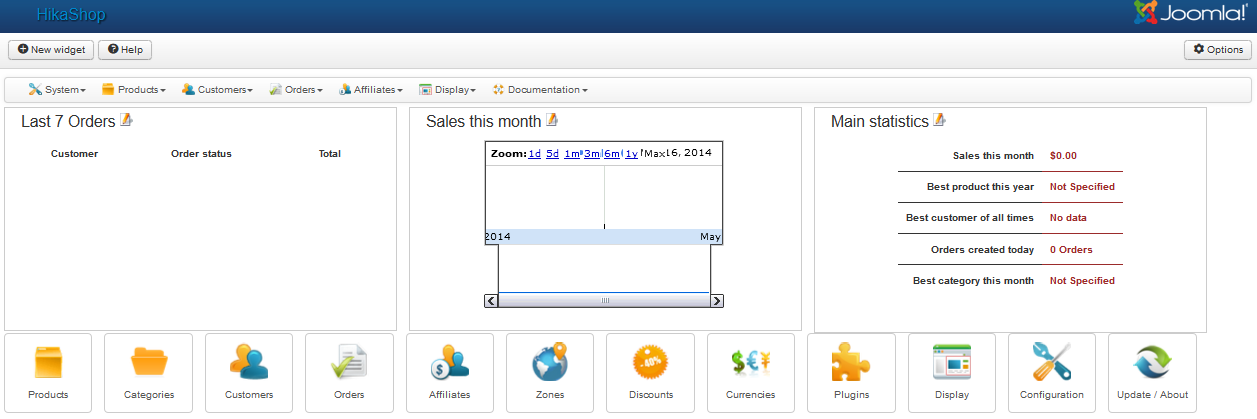
The statistics part will greatly help you in administering your shop. By default, you can see a list of your latest orders, your latest customers and a chart graph of your sales over a month period. This way, you can easily follow the success of your shop and access to the latest sales for more details.
On the bottom of the page, you should see a list of the main features available in HikaShop and a small description of the purpose of the corresponding area.You can also use the horizontal menu under the title of the page in order to quickly access all the important areas of the backend of HikaShop.
Products: This area allows you to manager all of your products. You can create, edit, delete, your products; handle images, files, prices, related products, information, etc.
Categories: You can create, edit, delete categories of your products
Customers: You can edit/manage customer information
Orders: Manage your customers order; create/edit/delete orders
Affiliates:Manage your affiliates and affiliate sales; create/edit/delete banners
Zone: Manage your store zone; manage taxes and tax categories for your products
Discounts: Manage discounts and coupon codes; handle restrictions on them
Currencies: Manage currencies available in your store; update currency rates
Plugins: Manage payment and shipping plugins
Display: Edit any view in Hikashop; config your Hikashop content menus & modules; custom fields configuration
Update/about: View Hikashop Documentation
3. Hikashop modules
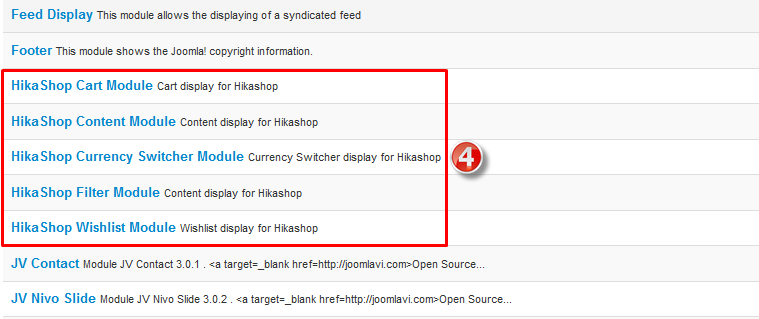
During installation process, Hikashop will automatically install its modules in your Joomla! The modules types:
HikaShop Cart Module
HikaShop Content Module
HikaShop Currency Switcher Module
HikaShop Filtering module
HikaShop Wishlist Module
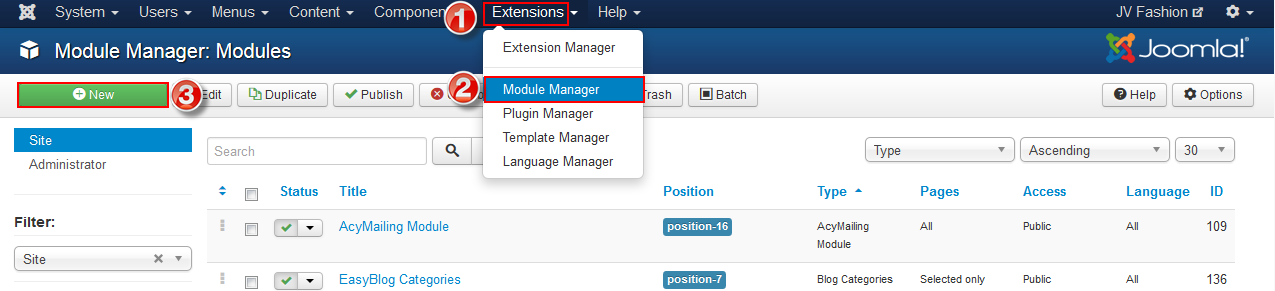
If you install JV BookStore on your Joomla, you need to add new modules by going to Extensions >> Module Manager >> New ,then choose a Hikashop module type from a list:
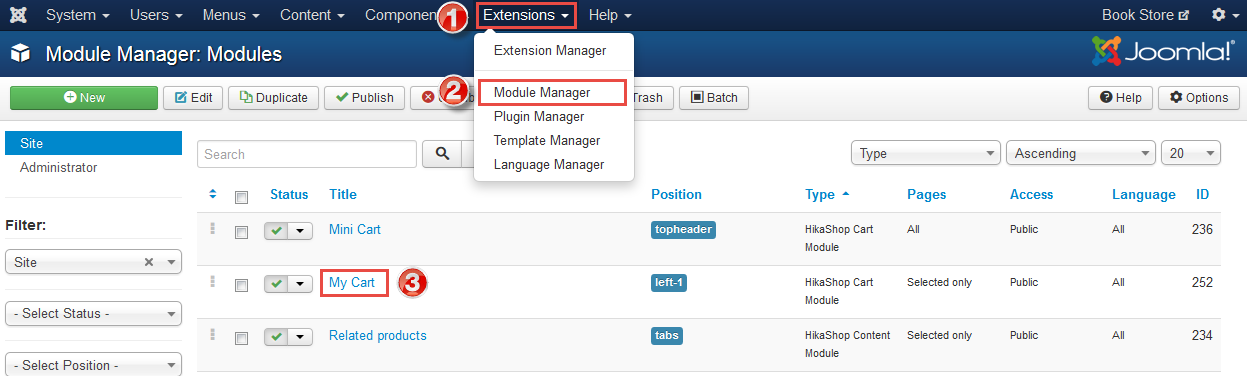
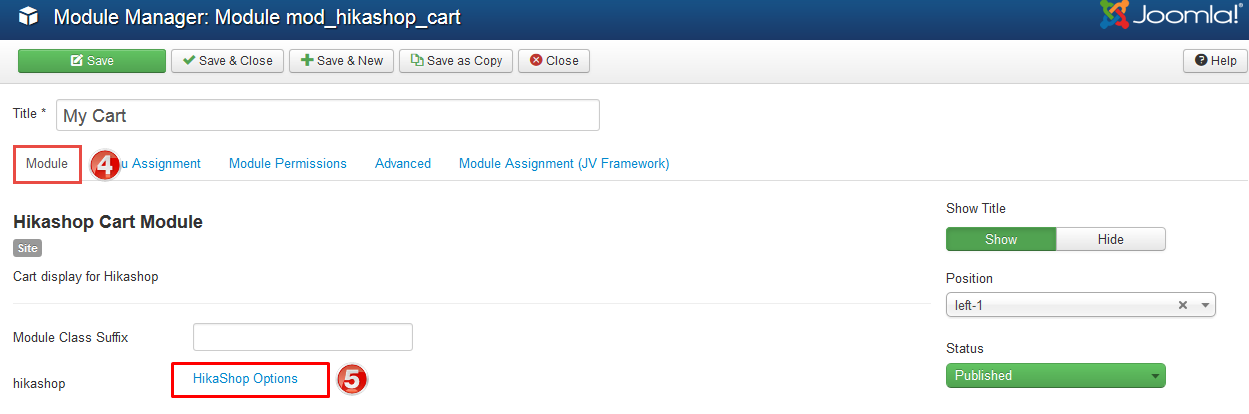
To manage Hikashop module, go to Extensions >> Module Manager in Joomla administrator area. Click on the title of the module. Finally click on HikaShop Options
Let's check all Hikashop modules used in Flatize Demo
4.1. Cart
This module shows shopping cart
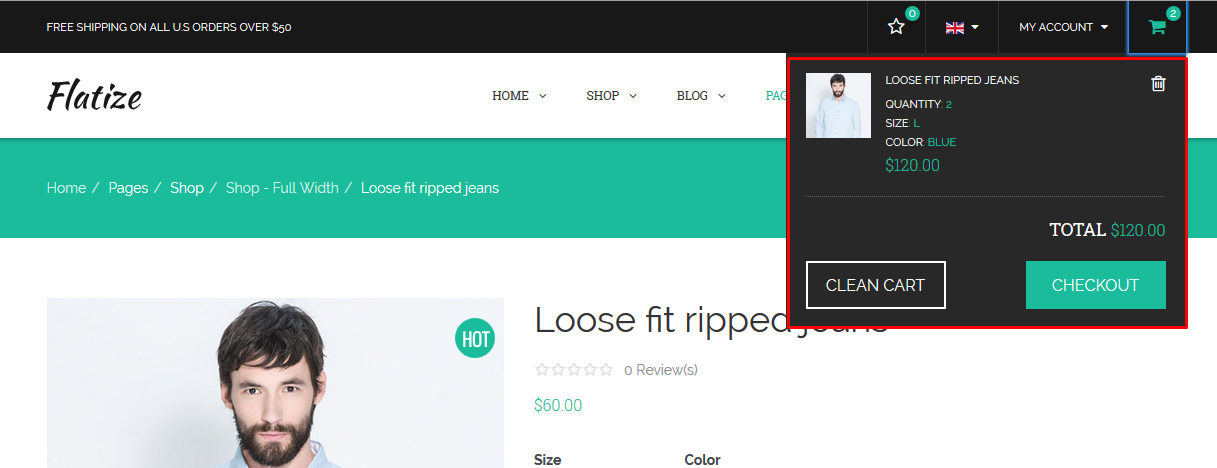
Main settings
- Module position: panel-2
- Assigned: on all pages
- Tittle: Cart
- Module type: Hikashop Cart Module
4.2. Wishlist
This module displays Wishlist for Hikashop

Main settings
- Module position: panel-2
- Assigned: on all pages
- Tittle: Wishlist
- Module type: HikaShop Wishlist Module
4.3. Filter by price
This Hikashop module displays filter...
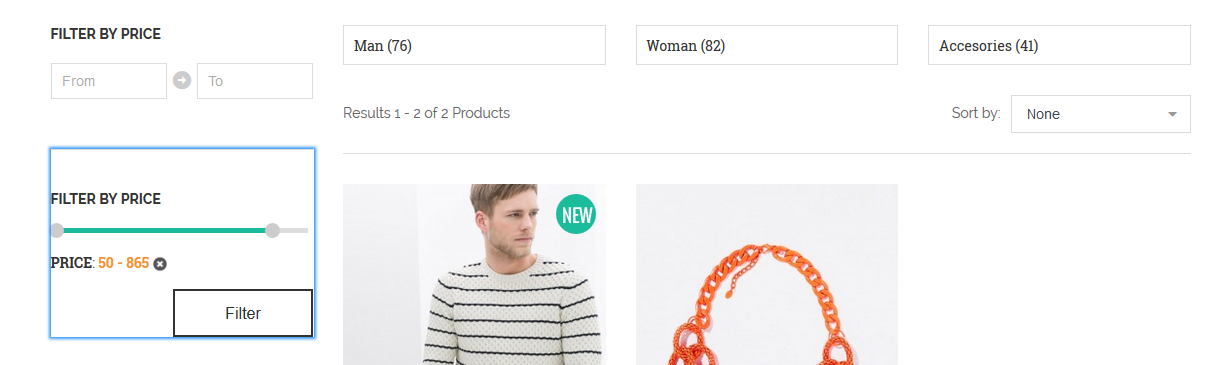
Main settings:
- Position: left
- Module type: Hikashop Filter Module
- Menu Assignment: Shop pages
- Module Class Suffix: sidebar-right filter-product
- Filters: Filter_by_Price (filters can be created in Hikashop Dask Board >> Display >> Filter )
The module in frontend:
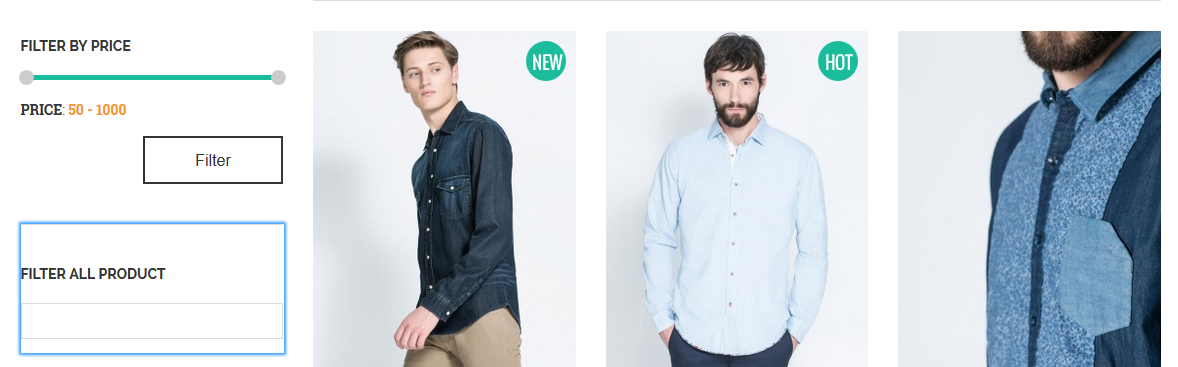
4.4. Filter all product
Main settings:
- Position: left
- Module type: Hikashop Filter Module
- Menu Assignment: Shop pages
- Module Class Suffix: not used
- Filters: Filter_by_all (filters can be created in Hikashop Dask Board >> Display >> Filter )
The module in frontend:
4.5. Filter characteristics
Main settings:
- Position: left
- Module type: Hikashop Filter Module
- Menu Assignment: Shop pages
- Module Class Suffix: sidebar-right filter-product filter-by-characteristics
- Filters: Filter_by_color, Filter_by_size (filters can be created in Hikashop Dask Board >> Display >> Filter )

4.6. Sort by
Main settings:
- Position: sortby
- Module type: Hikashop Filter Module
- Menu Assignment: all pages
- Module Class Suffix: selectbox filter-sort-by
- Filters: Sort_by (filters can be created in Hikashop Dask Board >> Display >> Filter )

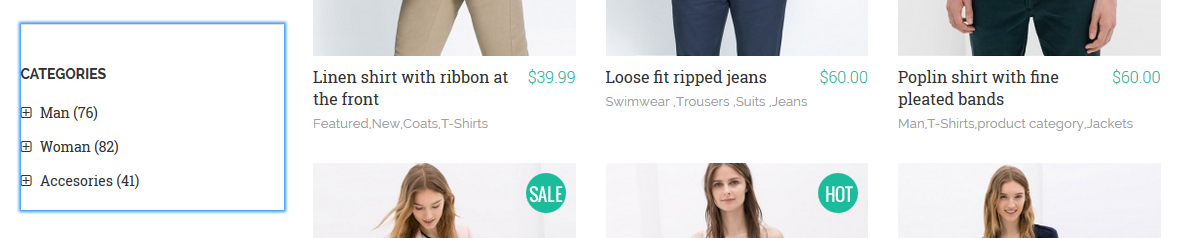
4.7. Categories
This module is Hikashop content module used to display categories
Main settings:
- Position: left
- Module type: HikaShop Content Module
- Menu Assignment: Shop pages
- Module Class Suffix: not used
- Type of content: Category

Frontend display:
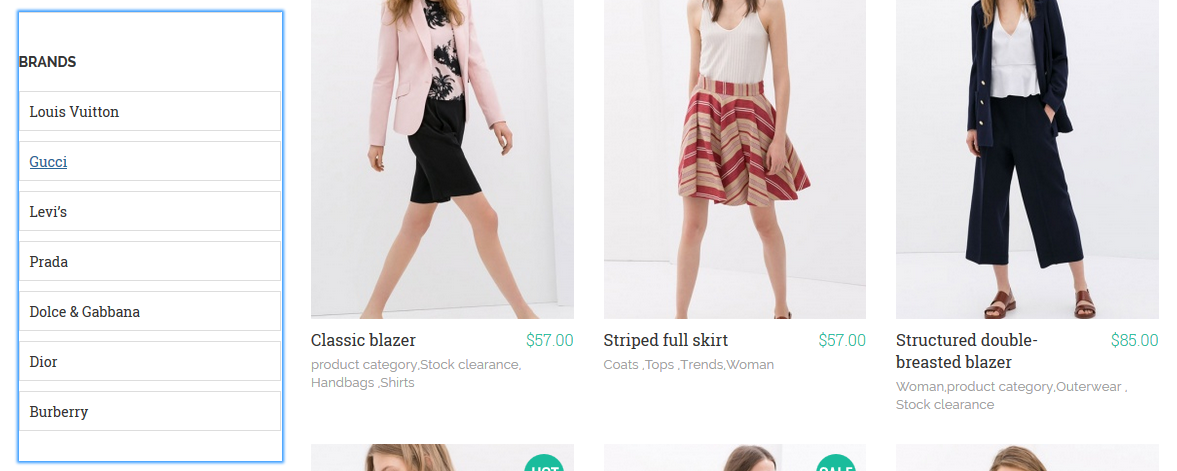
4.8. Brands
This module is Hikashop content module used to display categories
Main settings:
- Position: left
- Module type: HikaShop Content Module
- Menu Assignment: Shop pages
- Module Class Suffix: not used
- Type of content: Category
Frontend display:
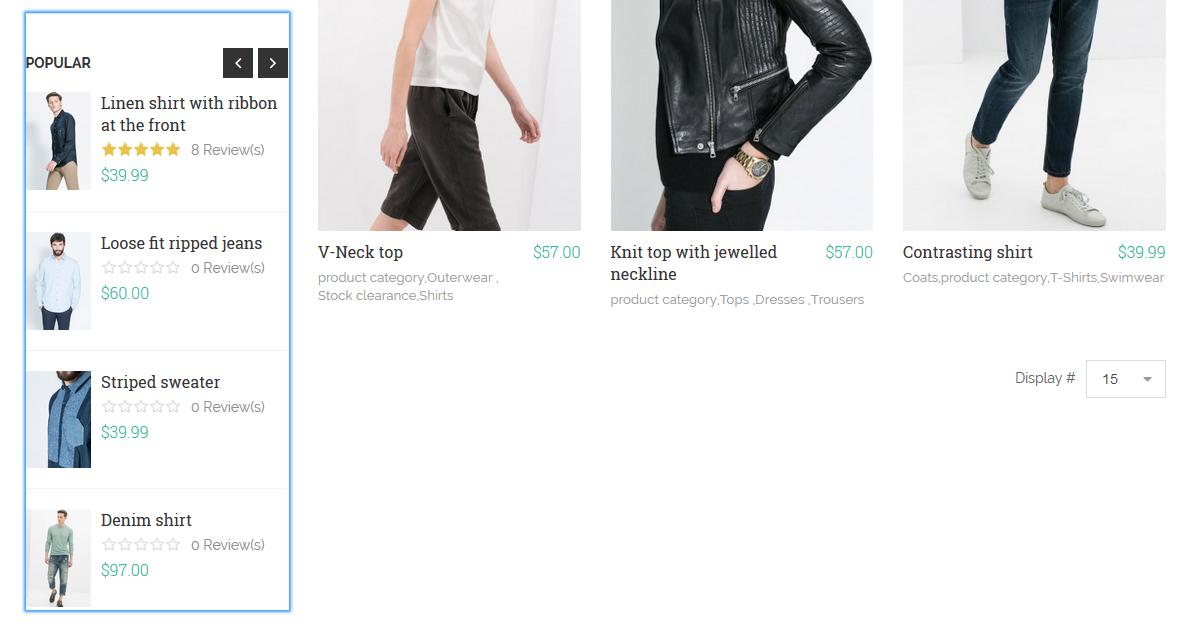
4.9. Popular
This module is Hikashop content module used to display Products
Main settings:
- Position: left
- Module type: HikaShop Content Module
- Menu Assignment: Shop pages
- Module Class Suffix: not used
- Type of content: Product
Frontend display:
4.10. Man
This module is Hikashop content module used to display categories. Note that this module is loaded on mega menu
Main settings:
- Position: submenu
- Module type: HikaShop Content Module
- Menu Assignment: on all pages
- Module Class Suffix: not used
- Type of content: Category
Frontend display:
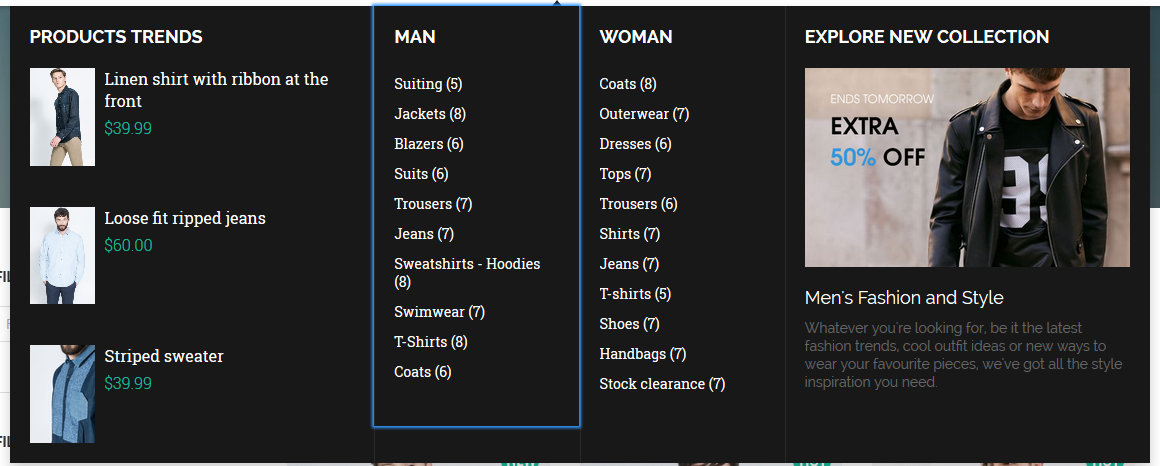
4.11. Woman
This module is Hikashop content module used to display categories. Note that this module is loaded on mega menu
Main settings:
- Position: submenu
- Module type: HikaShop Content Module
- Menu Assignment: on all pages
- Module Class Suffix: not used
- Type of content: Category
Frontend display:
4.12. Products trends
This module is Hikashop content module used to display products. Note that this module is loaded on mega menu
Main settings:
- Position: submenu
- Module type: HikaShop Content Module
- Menu Assignment: on all pages
- Module Class Suffix: not used
- Type of content: Product
Frontend display:
4.13. Products for man
This module is Hikashop content module used to display products. Note that this module is loaded on module tabs New Products with position: user-3, assigned on homepage. View more above at JV Tabs Configuration.
Main settings:
- Position: tabs-products
- Module type: HikaShop Content Module
- Module Class Suffix: not used
- Type of content: Product
Frontend display:
4.14. Products for woman
This module is Hikashop content module used to display products. Note that this module is loaded on module tabs New Products with position: user-3, assigned on homepage. View more above at JV Tabs Configuration
Main settings:
- Position: tabs-products
- Module type: HikaShop Content Module
- Module Class Suffix: not used
- Type of content: Product
Frontend display:
4.15. Accessories
This module is Hikashop content module used to display products. Note that this module is loaded on module tabs New Products with position: user-3, assigned on homepage. View more above at JV Tabs Configuration
Main settings:
- Position: tabs-products
- Module type: HikaShop Content Module
- Module Class Suffix: not used
- Type of content: Product
Frontend display:
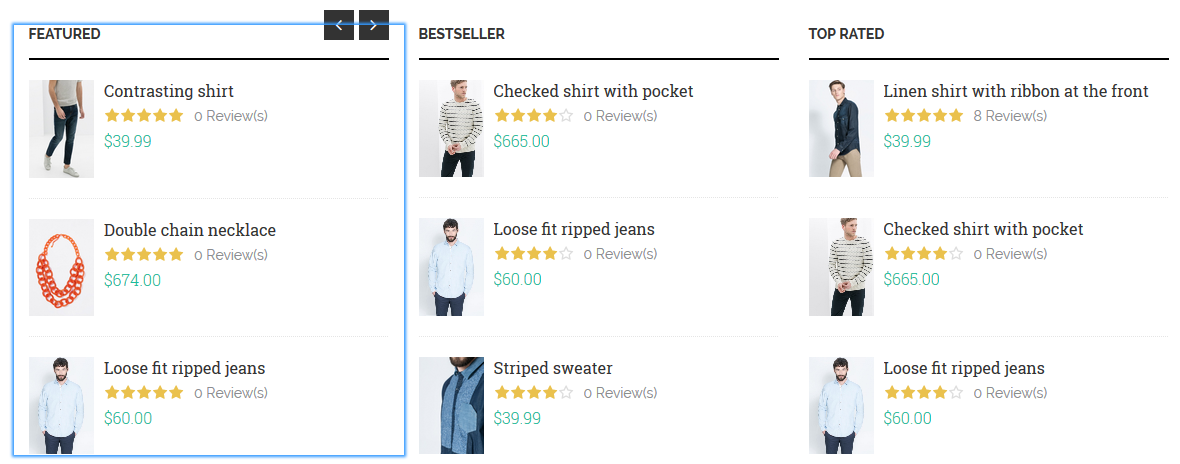
4.16. Featured
This module is Hikashop content module used to display products.
Main settings:
- Position: topb-1
- Module type: HikaShop Content Module
- Menu Assignment: Home Version 2 and Home Version 3
- Module Class Suffix: not used
- Type of content: Product
Frontend display:
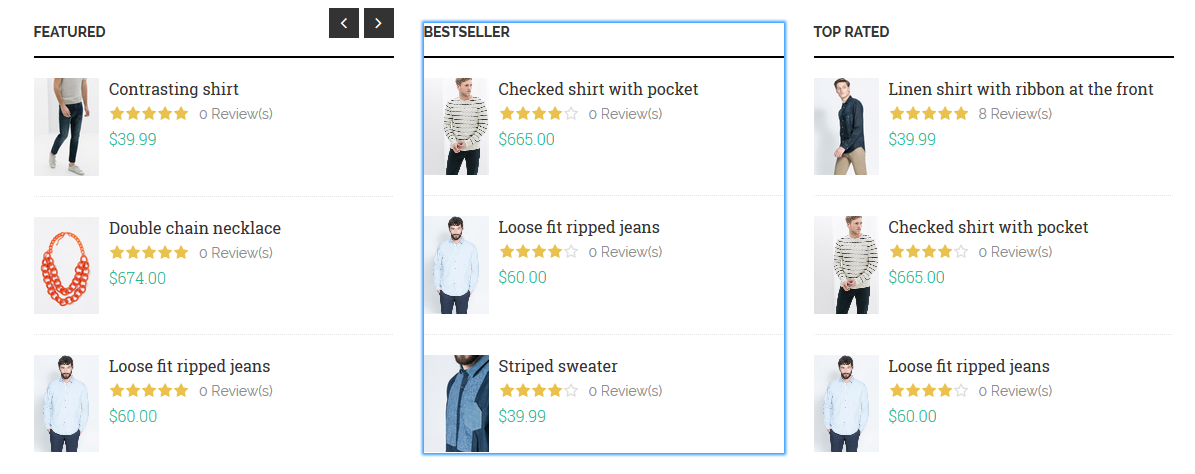
4.17. Bestseller
This module is Hikashop content module used to display products.
Main settings:
- Position: topb-2
- Module type: HikaShop Content Module
- Menu Assignment: Home Version 2 and Home Version 3
- Module Class Suffix: not used
- Type of content: Product
Frontend display:
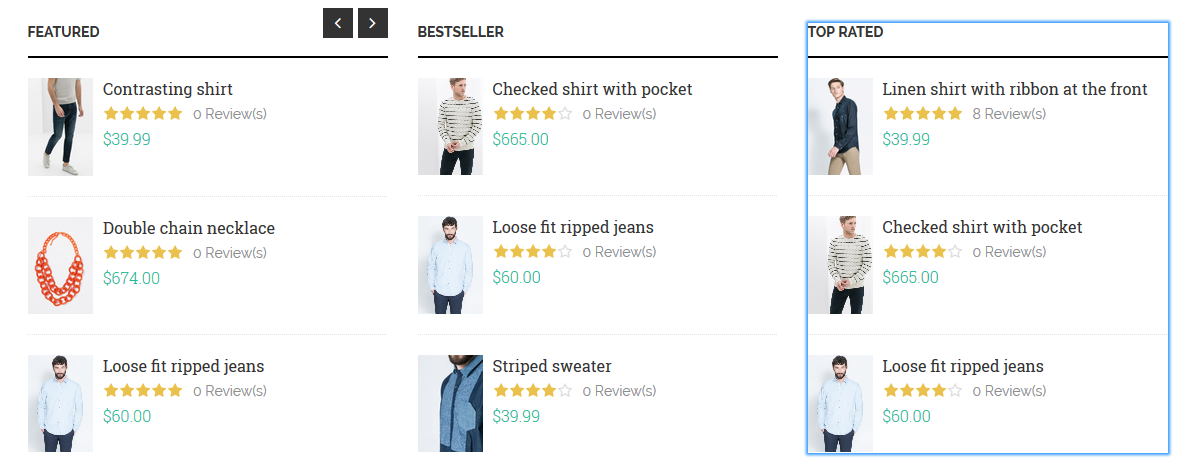
4.18. Top rated
This module is Hikashop content module used to display products.
Main settings:
- Position: topb-3
- Module type: HikaShop Content Module
- Menu Assignment: Home Version 2 and Home Version 3
- Module Class Suffix: not used
- Type of content: Product
Frontend display:
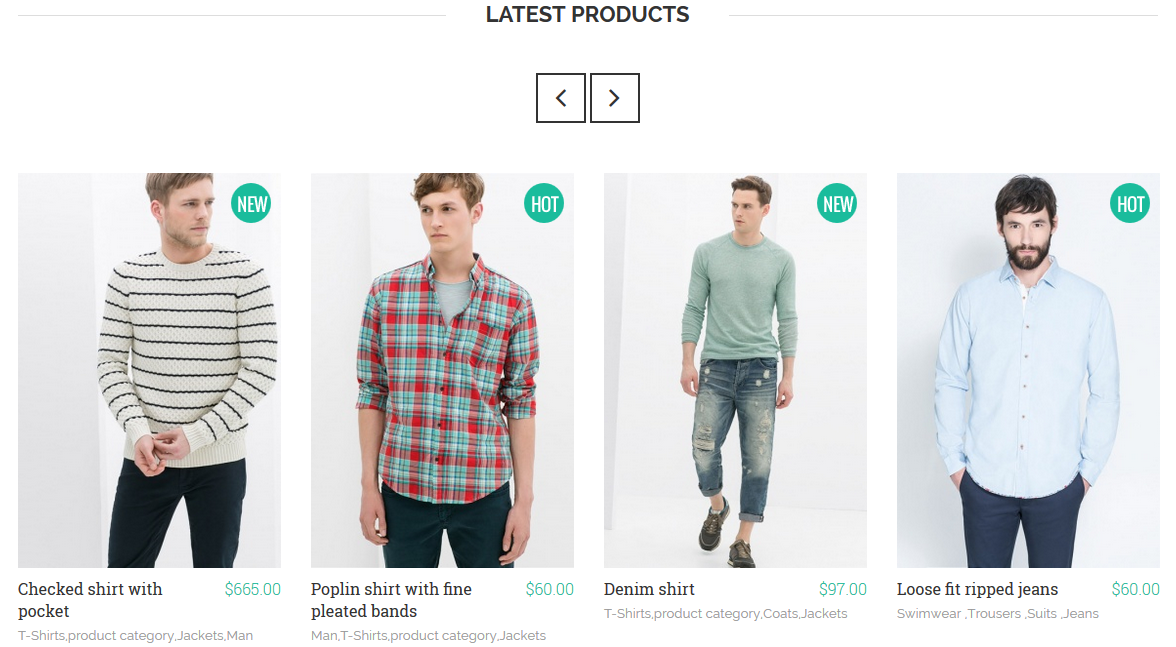
4.19. Latest Products
This module is Hikashop content module used to display products.
Main settings:
- Position: user-3
- Module type: HikaShop Content Module
- Menu Assignment: Home Version 2
- Module Class Suffix: not used
- Type of content: Product
Frontend display:
K2 configuration
K2 component is a very popular and free component which helps you to control and manage site content easily. Let's view what can you do with this great extension and how to config. This part covers important and common facts you may use frequently with K2. If you need full detailed K2 document, please view more at https://getk2.org/documentation.
1. Installation
K2 can be easily installed on Joomla like other extension. If you are new, you may need to view this link https://joomlavi.com/documentation/extension-installation-guide.
2. Manage Items with K2
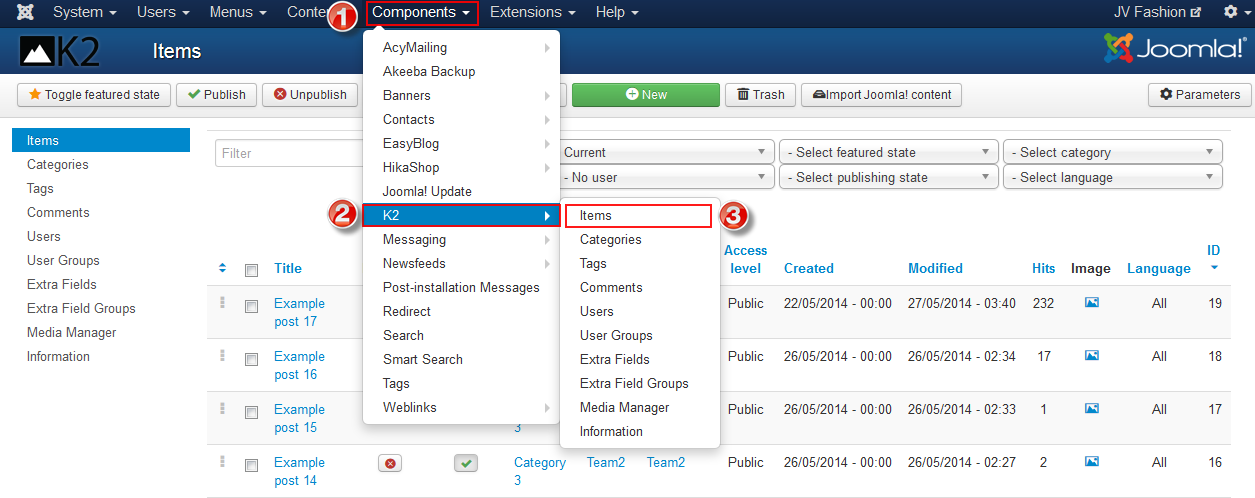
From the backend area, navigate to Components >> K2 >> Items
Within K2 Items you can do the followings:
- Create new K2 item: Click on "New" button in the toolbar to ad a new item
- Edit existing K2 item: Click on the item to edit that item
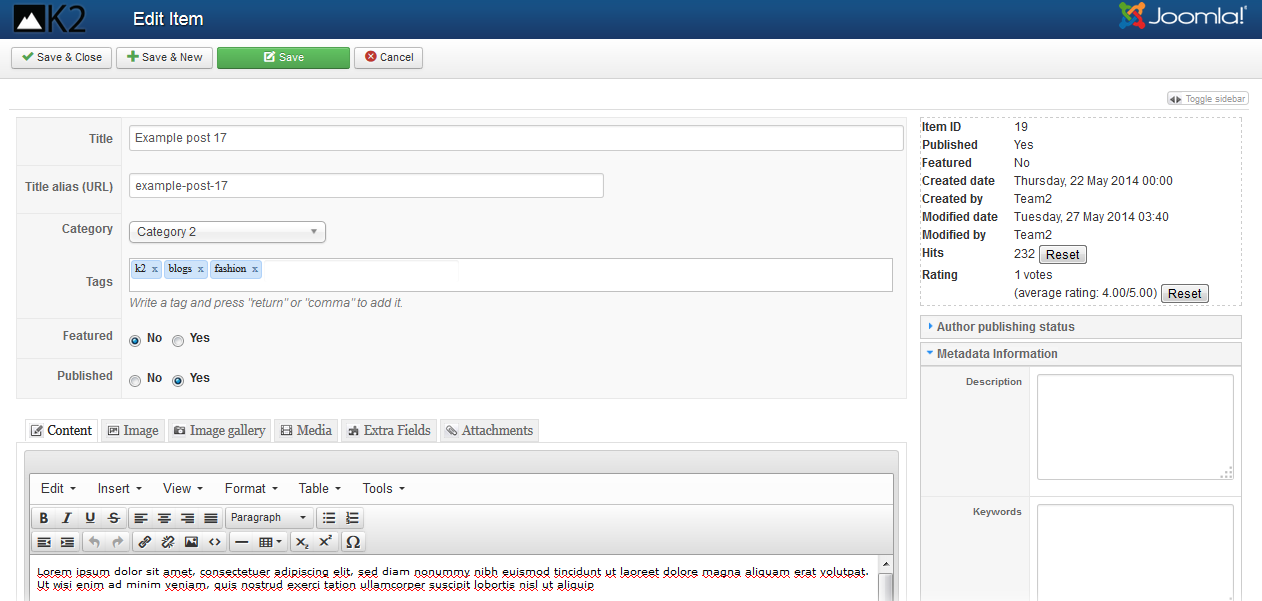
In the edit/add item page you can do important things:
- Change/add title of the item
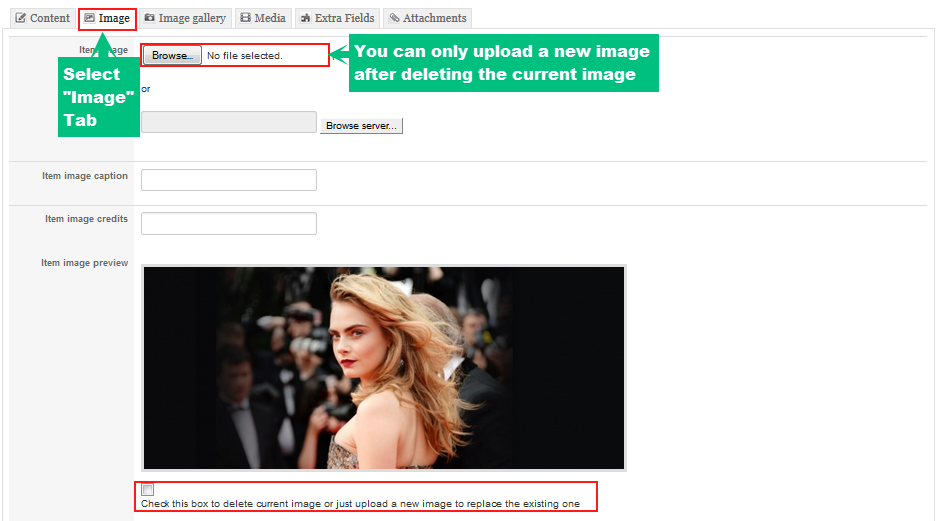
- Upload images: you can upload an image via "Image" tab
- Edit your Author publishing status: Under the "Author publishing status" drop menu in the right side of the page, you can edit many publishing features
- Optimize item for Search Engine: Under the "Meta information" drop menu in the right side of the page, you can add/edit meta description, keywords, robots, author
3. Manage images with K2
In this section you need to distinguish between Media Manager and Image Tab.
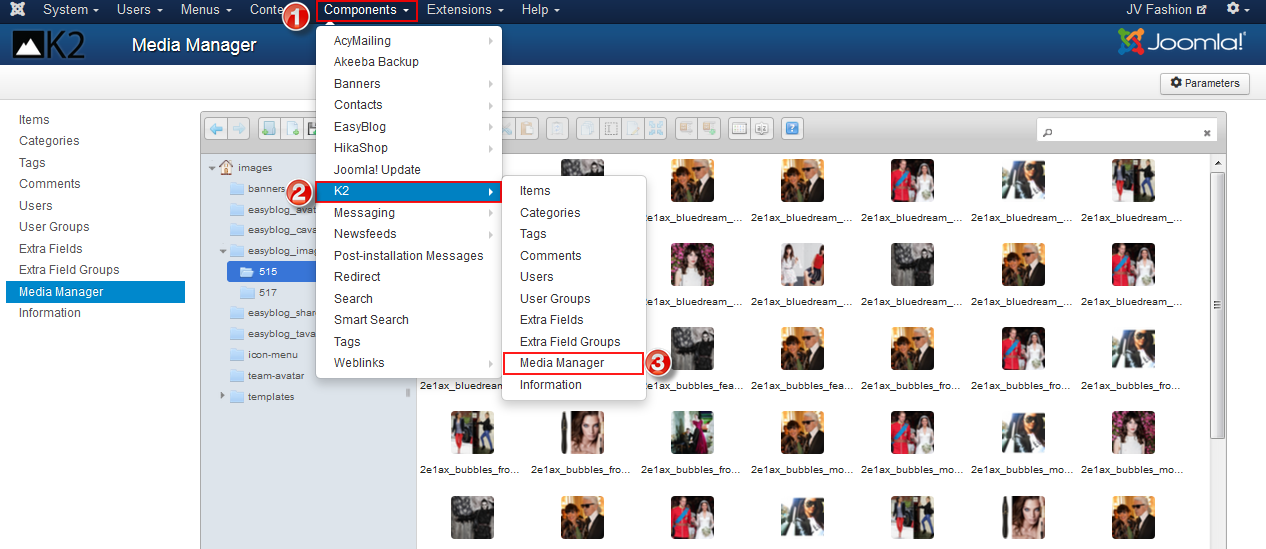
- Media Manager is used when you want to insert image into the text of items or categories. Before inserting the images directly into text filed, you need to upload the images to Media Manager by navigating to Components >> K2 >> Media Manager, in Media Manager you can create new folder to contains images, then upload images
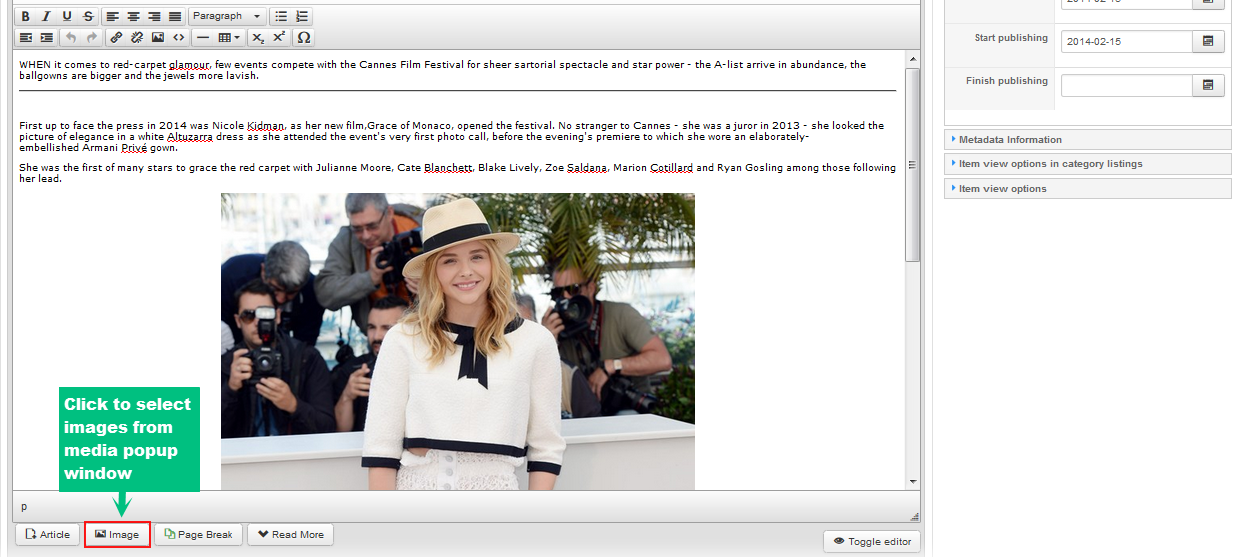
Now you can insert the images directly into text field when you edit/add any item category. Simply click on "Image" in the bottom of the editor as shown in the picture below:
- Image Tab: as I mentioned above, Images uploaded via "Image" Tab usually represent as a main image for item or category. When uploading images via the Image Tab, you can upload directly from your computer without having to store it in any sort of Media Manager
4. Manage Categories with K2
In the administration area, go to Component >> K2 >> Categories , such like how to access to K2 Items.
You can do the followings in K2 Categories:
- Create a new categories
- Edit existing categories
- During editing/creating a categories you can change/add title, upload images into categories, etc. similar to what you've done with K2 Item
5. Global configuration
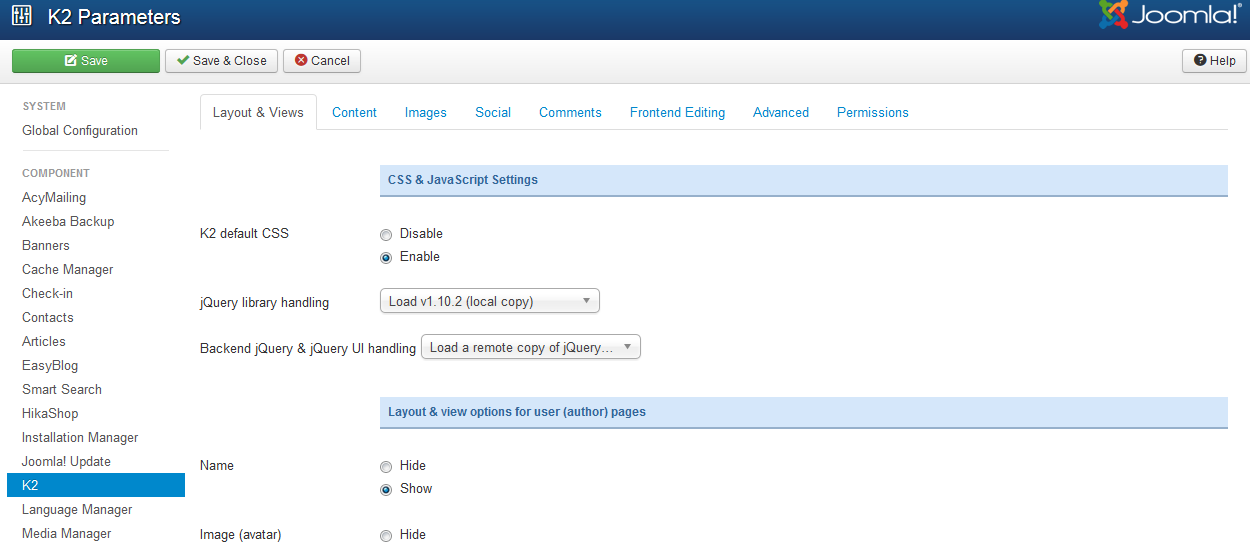
Go to System >> Global Configuration >> K2
In this section, you can see 8 tabs as you can see below
In each tab you can configure its parameters. There are so many parameters, I do not want to make you confused and tired by explaining all parameters, take it easy and find out by yourself.
Newbie Questions
All Gurus once were Newbies, so this section is to answer the most common questions in template configuration for those who are new to Joomla
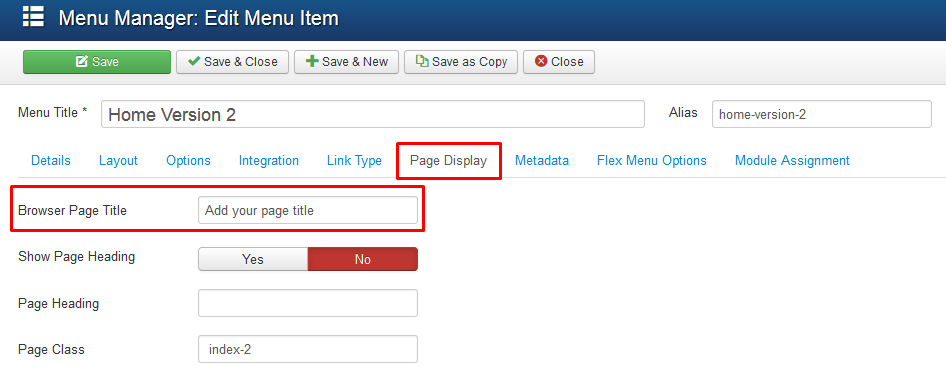
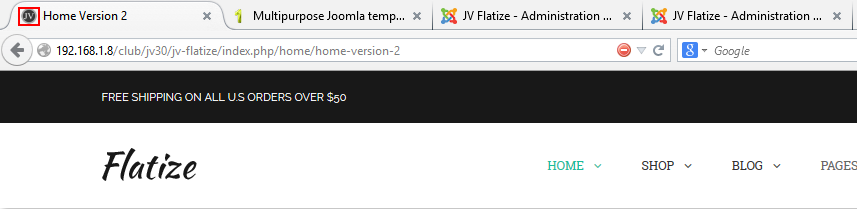
How to change browser title page?
This is a sample browser page title
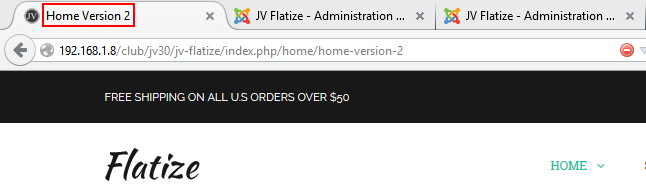
In the above sample, that is the browser page title for the Home Version 2 menu item. Please go to Menu Manager and open that menu item. Open the Page Display section. Specify Browser page title. Save changes. You can do the same for all menu items.
How to change favicon for Joomla site?
If you install Flatize quickstart package, you will need to change the favicon.
To change favicon, take the following steps:
Step 1: Create a 16x16 pixel image.
Step 2: Name the image favicon.ico , so you have your own favicon.
Step 3: Replace the exsiting favicon.ico file with your own file favicon.ico to /<your joomla>/templates/<your template> directory .
During this step, you should use FTP application to log into your server. There are number of both free and commercial FTP application. In this example, I choose FileZilla.
Joomla 3 installation hangs at creating database
If you’ve been trying to install a package with a template Joomla 3 quickstart zip file and the installation hangs at the “Creating configuration File” step.
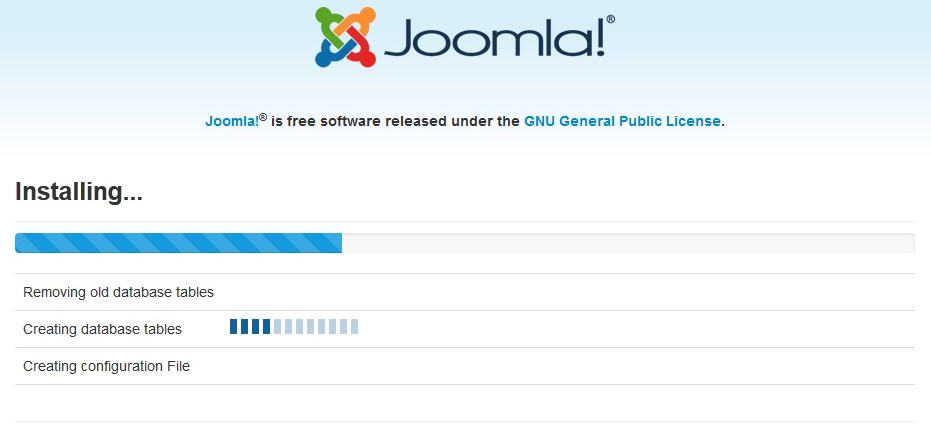
You have to make few changes in order to fix it, let view some ways below:
First tip: Increase PHP memory limit:
A PHP memory limit of 32MB is the minimum requirement for Joomla! and 64MB is recommended for Quickstart installations. Locate the php.ini file used by your web server. Note that this change will affect all CMS websites and PHP scripts on the server. Add or Edit the memory_limit parameter in the php.ini file:
Add this line memory_limit = 64M ; to a php.ini file in your Website root folder. If there is no section already for this, place the above line at the end of the file.
In some hosting environments, accessing to the PHP memory limit setting is restricted, you can ask your hosting provider to adjust it for you.
Second tip: Increase Max execution time:
Locate php.ini file and search for max_execution_time = 60 and change it to 240 or more. Then the installation will be perfect.
Third tip: (for hanging at creating database when developing site on XAMPP or WAMPP)
- Go to wamp\www\your-joomla\installation\sql\mysql (if you are using Wampp) or Xampp\htdocs\Your joomla folder\installation\sql\mysql (for Xampp)
- Open Joomla.sql file find the term ENGINE=InnoDB and replace all with ENGINE=MyIsam
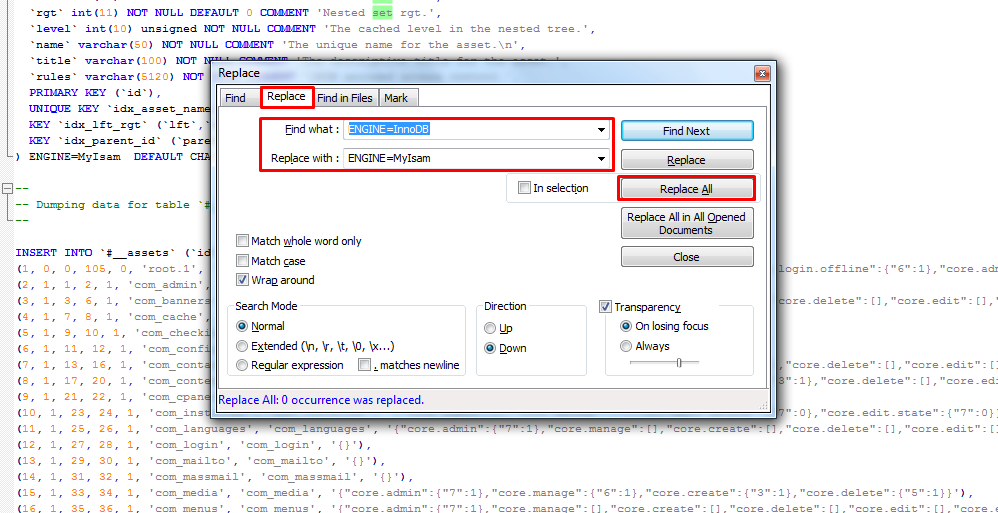
- Save the file and remake
- If the installation process continues hanging on step "installing sample data". You do the same with file sample_data.sql