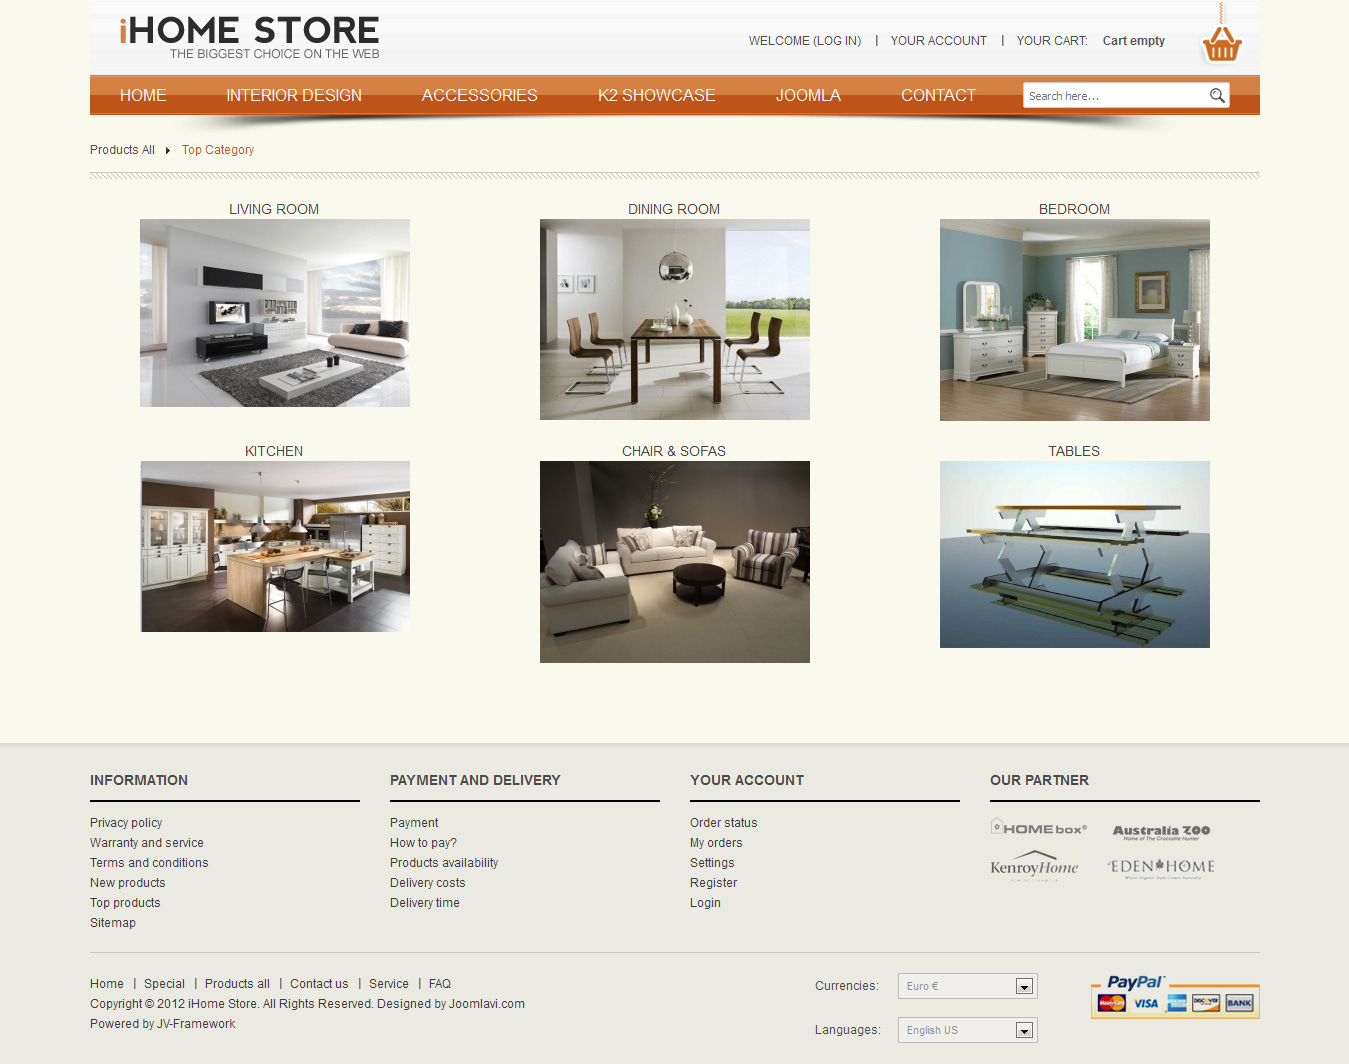
Installation
Visit JV Furniture download area, where you can see multiple files available for your site development
1. Installation with Quick-start version
Quick-start installer will create an entire new Joomla site with JV Shopper, data and all related extensions installed, essentially a replication of JV Shopper’s demo site. This installation procedure is the best choice for those who are new to Joomla. Please check the following to know how to install JV Shopper with Quickstart package.
2. Installation with Template version
This installation procedure allows JV Interior to be installed on an existing site (instead of creating entire new site). However, this method will not install included extensions, making it look different from the demo site
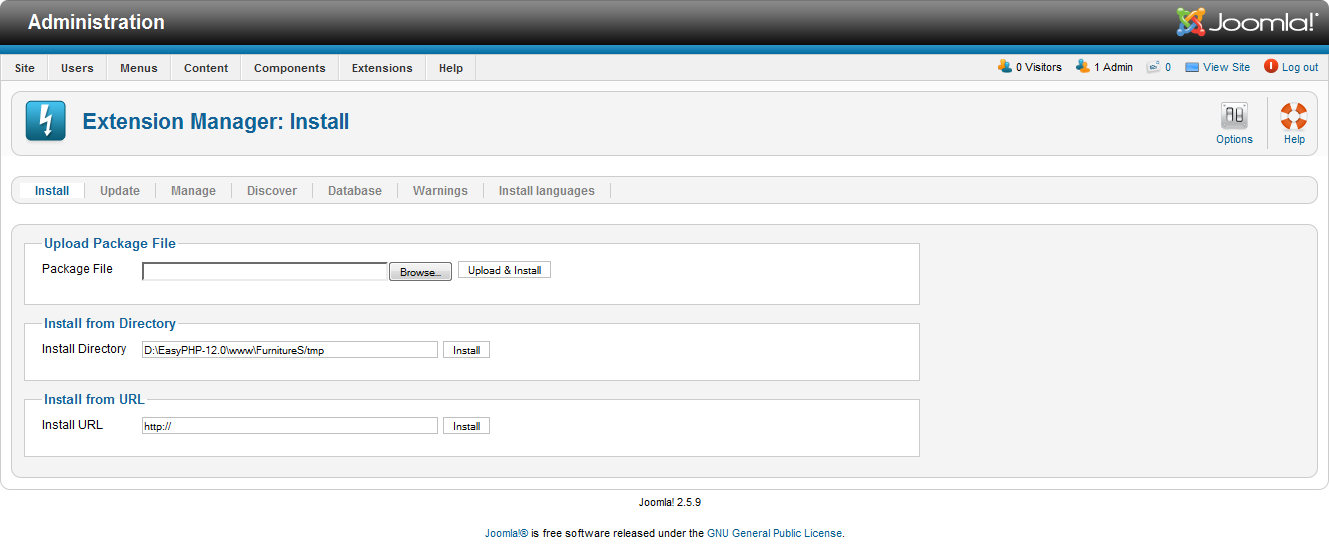
The Template version allows JV Furniture Store to be installed on an existing site (instead of creating entire new site). However, this method will not install the related ex-tensions, making it look different from the demo site.
To install a Template version of JV Furniture Store, follow the following steps:
- Download JV Framework version 3.0 and the Template version of JV Furniture Store
- Extract any file with ‘unzip_first’ in its name.
- Use Joomla’s default installer to install JV Framework like a normal extension.
- Use Joomla’s default installer to install JV Furniture Store template like a normal extension
- In Template Manager, Set the new style/template as default by selecting it and click on the default button.
Managing JV Furniture
Note: this guide does not cover how to use Template Manager, nor does it cover all the parameters and features of JV Framework.
Unlike older versions, JV Framework utilizes Template Manager instead of an independent Style Manager. This was to make the framework friendlier toward new users.
The template itself is still has a style edit page and an edit template page
1. Style Edit
To edit a style, simply click on its name in under the style section in Template Manager.
The defaults tabs found in this page are:
✔ GLOBAL
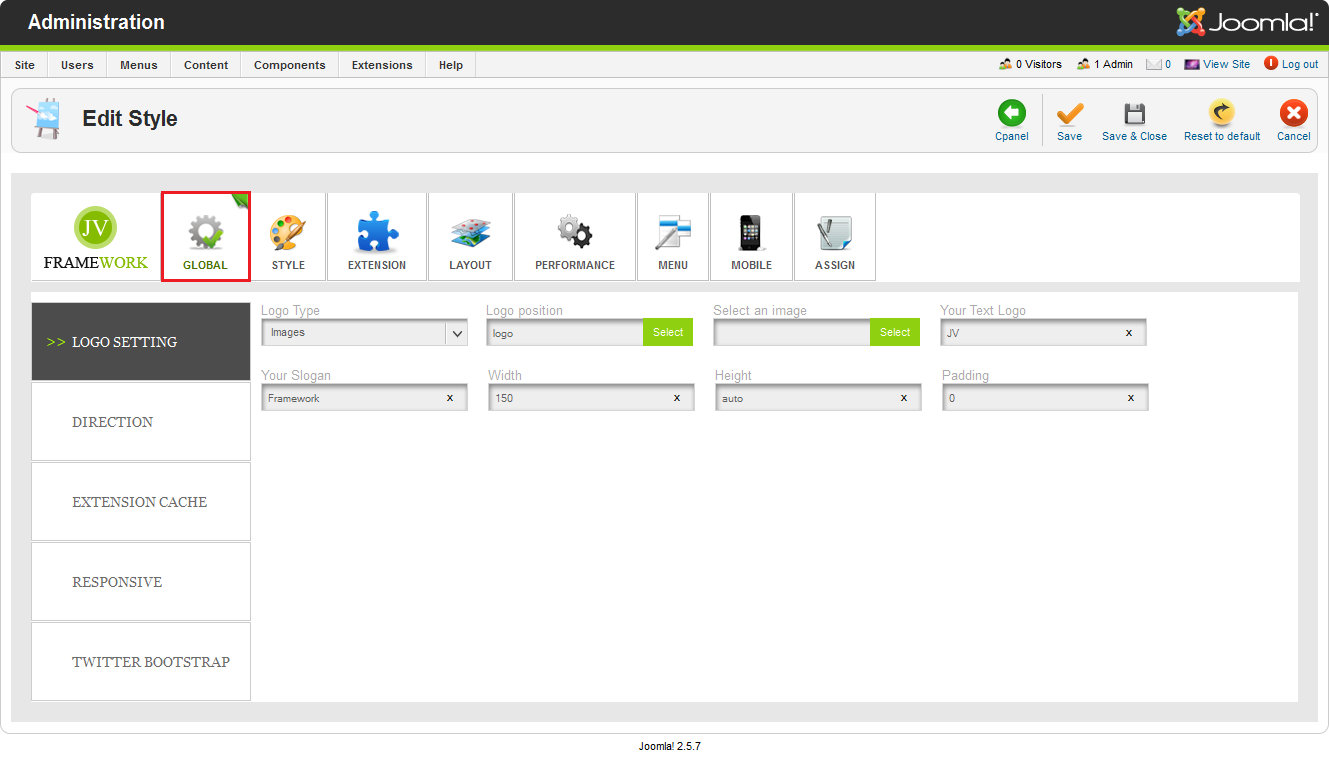
This tab contains a collection of general parameters that affect the entire site.
The sets of parameters that can be found in this tab are:
- Logo Setting: With this set of parameters, you can set an image or text logo for the site and adjust its dimension or padding. Take note that this logo will be applied to all colors choice. If you want different logos for different color choices, you have to manually replace the respective logo images with your own.
- Direction: This is where you set whether your site should be read from left to right (LTR) or right to left (RTL).
- Extension Cache: This is where you enable or disable the cache function for JV Framework’s extensions.
- Responsive: This is where you can enable/disable responsive layout for the entire site or a particular resolution level.
- Twitter Bootstrap: This is where you can enable and disable bootstrap functions in the site.
✔ STYLE
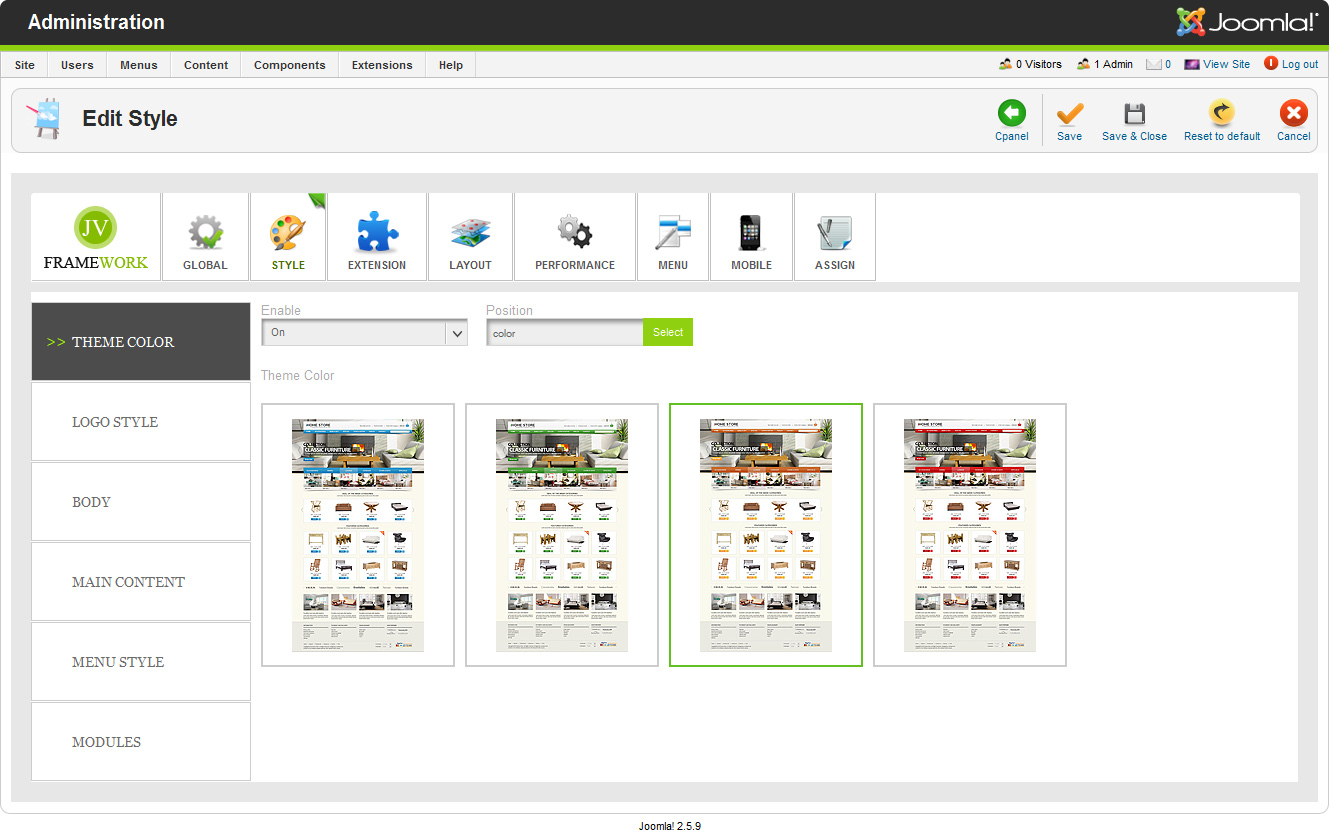
This tab contains the parameters that affect the styling of the site
- Theme Color: This is where you can select the site’s theme color among the presets, as well as enable/disable the selector on front end.
- Logo Style: This is where you can set the style parameters for your logo (if you chose Text logo for Logo Setting in Global tab)
- Body: This is where you can set the style parameters for the site’s Body.
- Main Content: This is where you can set the style parameters for the Main Content.
- Menu Style: This is where you can set the style parameters for the menus and sub-menus.
- Module: This is where you can set the style parameters for the modules.
✔ EXTENSION
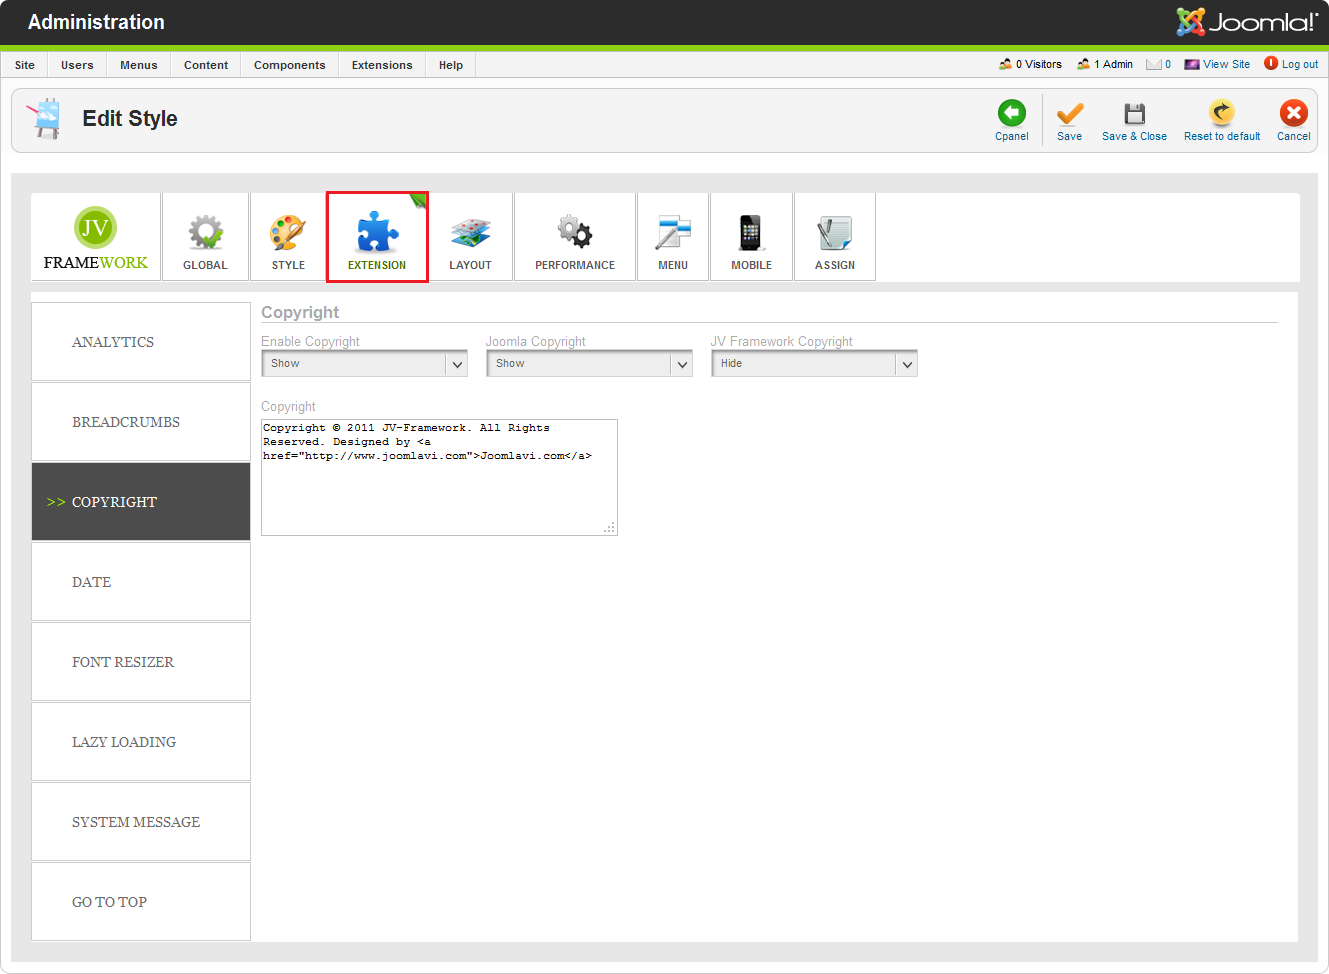
This tabs contains several set of parameters that enhance or support the Framework .
- Analytics: This is where you can enable and disable analytics like Google Analytic and Yahoo Analytic.
- Breadcrumbs: This is where you select the position for the breadcrumbs.
- Copyright: This is where you can show/hide all the copyrights, as well as editing the site’s copyright.Joomla!
- Date: This is where you can enable/disable the date indicator, as well as configure it.
- Font Resizer: This is where you can enable/disable the font resizer.
- Lazy Loading: This is where you can enable/disable lazy loading mode.
- System Message: This is where you can select the position for system message.
- Go To Top: This is where you can enable/disable Go To Top button.
✔ LAYOUT
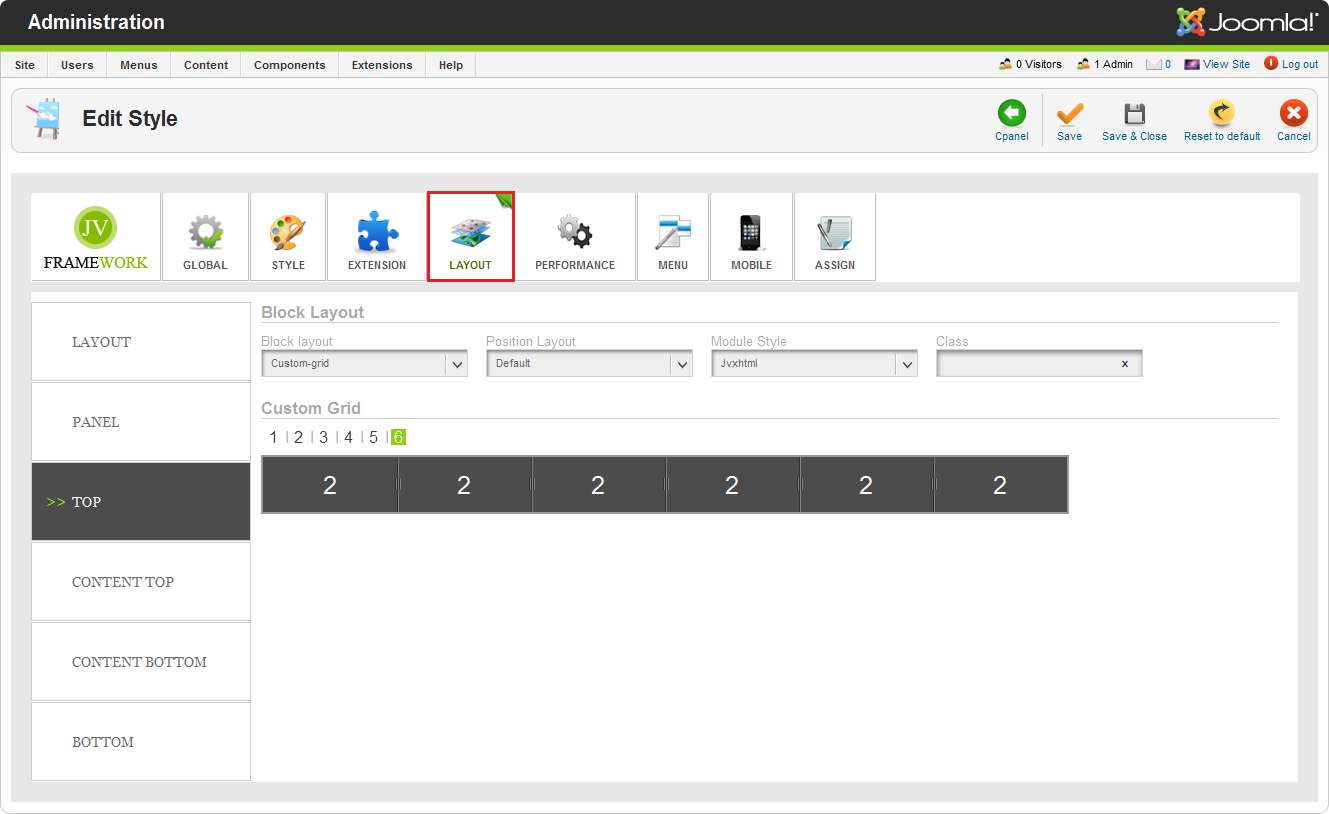
This tab contains parameters that allow you to adjust the size ratio and configuration of the grid layout.
- Layout: this is where you can select the general layout for this style (For example: left-main, left-rigth-main, right-main, right-main-left, etc), as well as adjusting the size ratio between side bars and main body.
- Panel, Top, Content Top, Content Bottom, Bottom: this is where you manage the layout for the corresponding sections
✔ PERFORMANCE
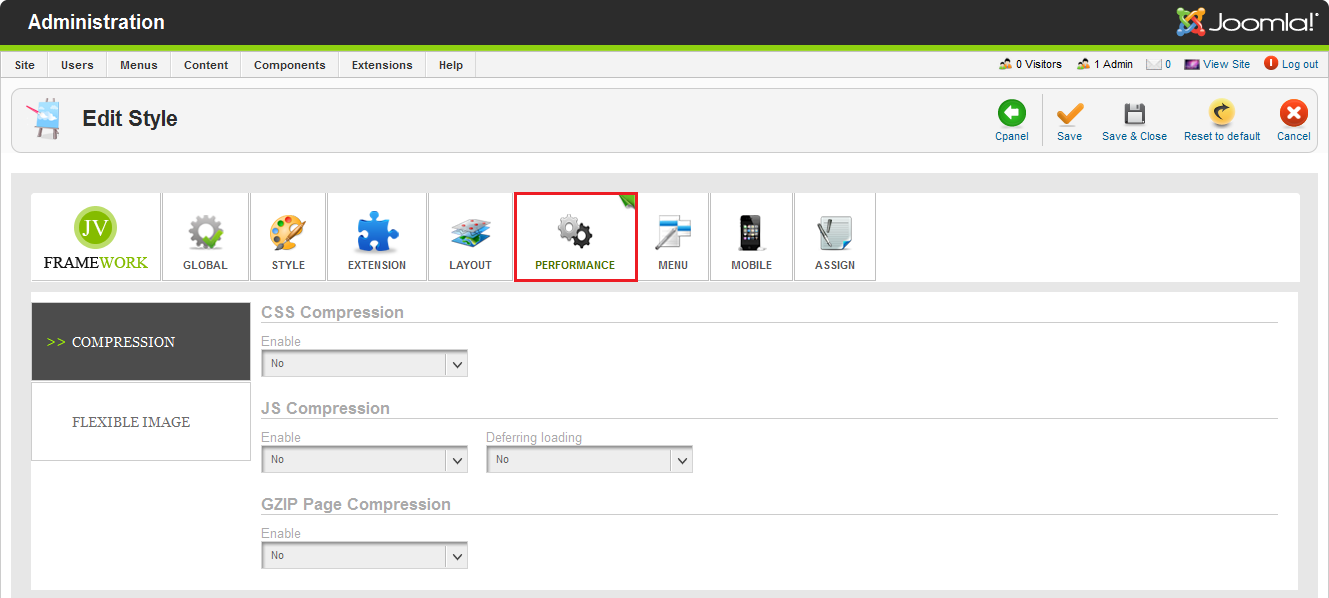
This tab contains features that, when enabled, can help increasing the site’s performance.
- Compression: This is where you can enable/disable various mode of compression to reduce the size of transmitted data. These modes also utilize a smart compression process to avoid interfering with the site loading Furniture Store.
- Flexible Image: Allows you to enable and disable Flexible image. This is a function that will automatically detect your screen size and resize the image to fit it better.
✔ MENU
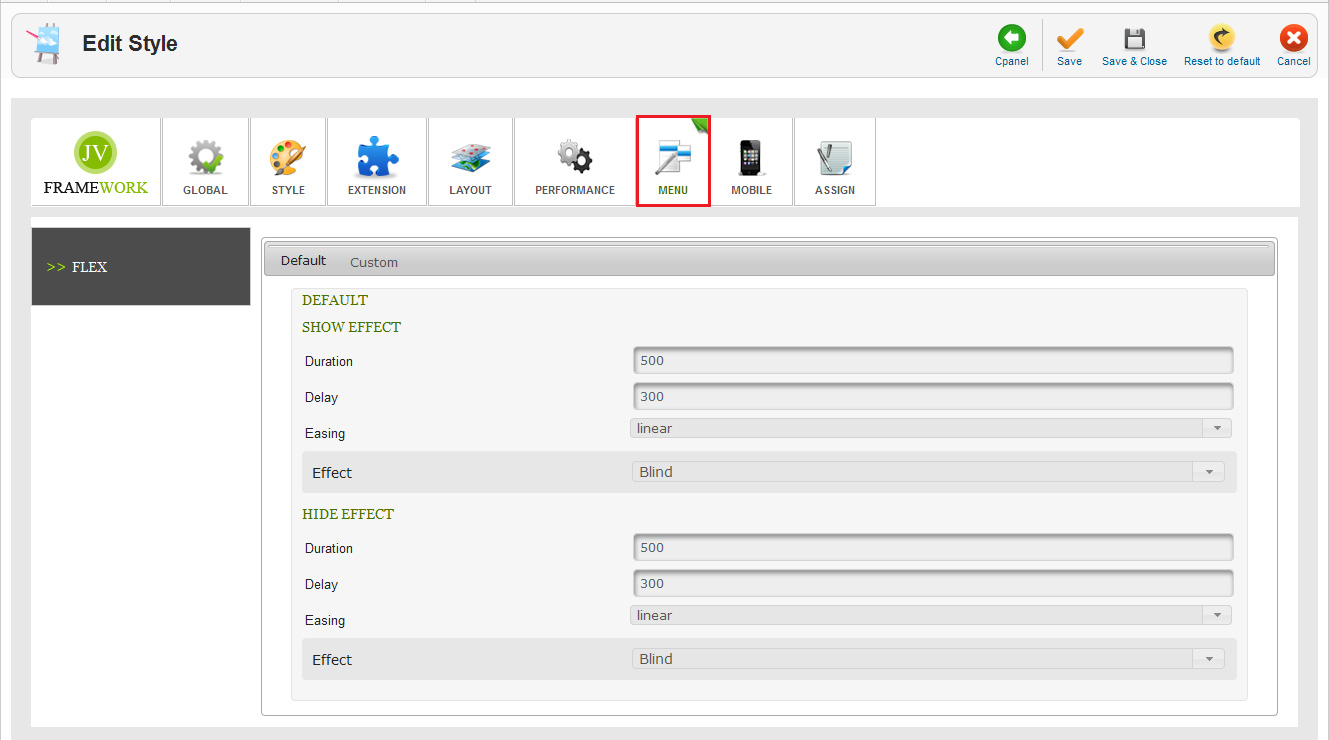
This is the tab that allows you to customize the menus.
- Flex: this is where you can configure flex menus.
✔ MOBILE
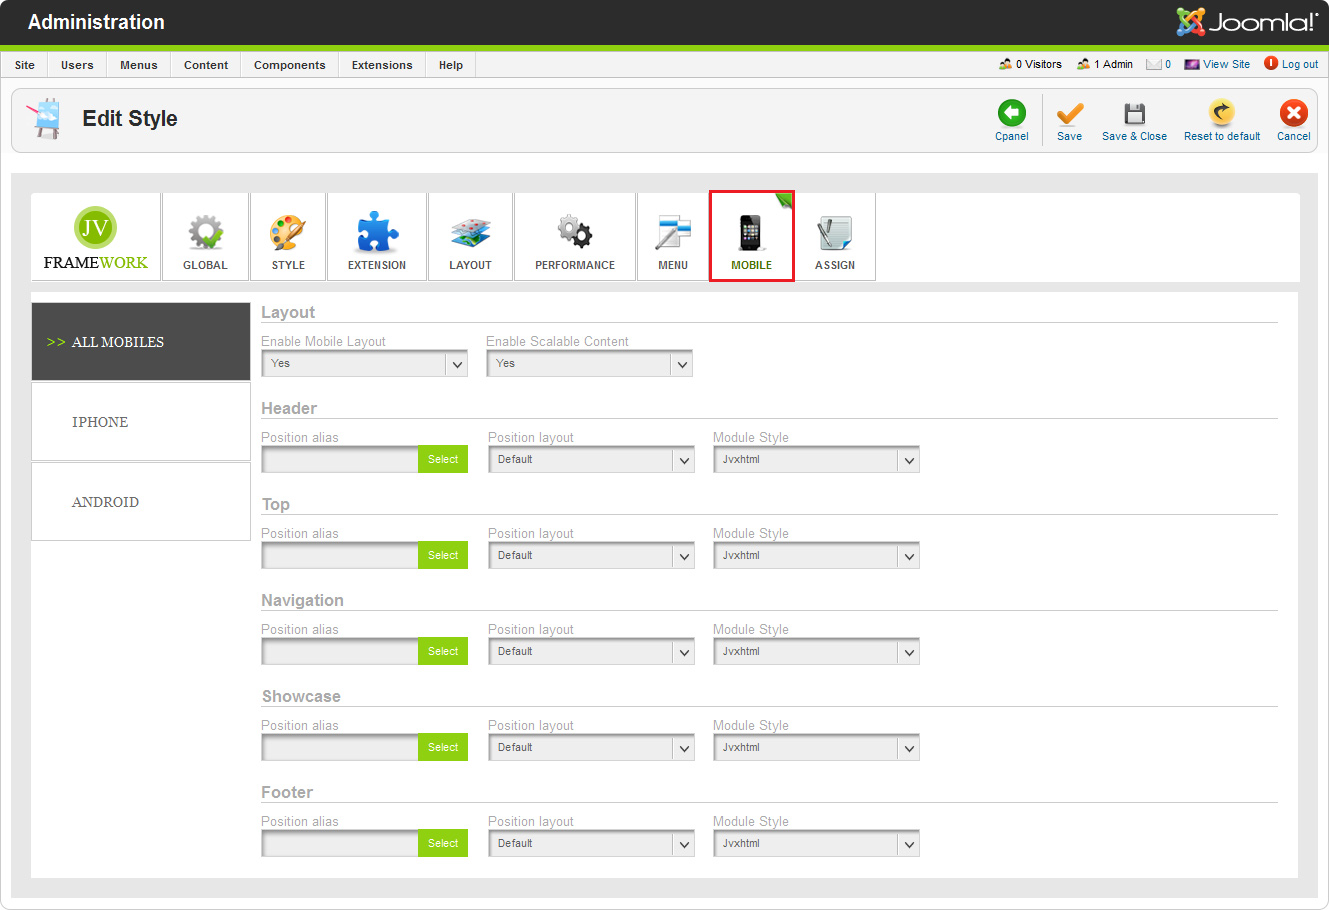 JV Framework mobile settings
This is where you can enable, disable or setup the mobile-exclusive layout for JV Furniture Store .
- All Mobile: This configuration will be applied to all mobile devices.
- I-phone: This configuration will be applied to I-phone mobile devices.
- Android: This configuration will be applied to mobile devices using Android.
✔ ASSIGN
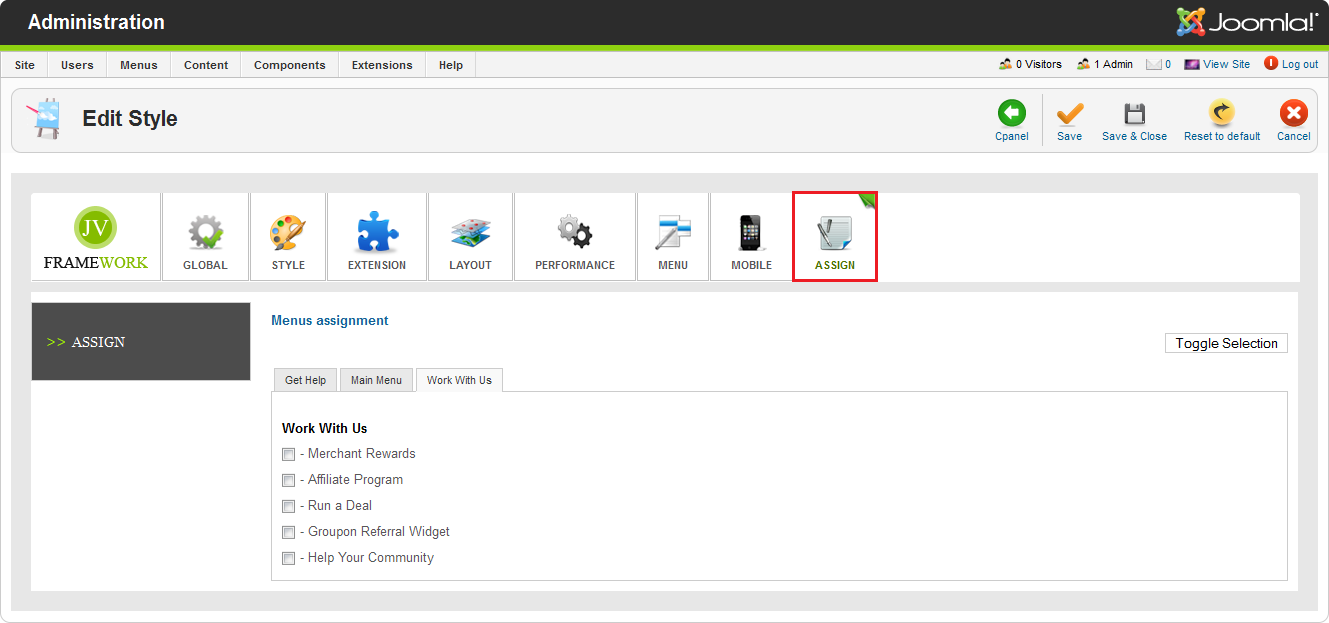
If this style is not the default one, this is where you can assign which page will utilize this style instead of the default one.
2. Template/Template Edit
With the Template Edit provided along with JV Framework, you will be able to edit, delete, create and upload files and folders easily.
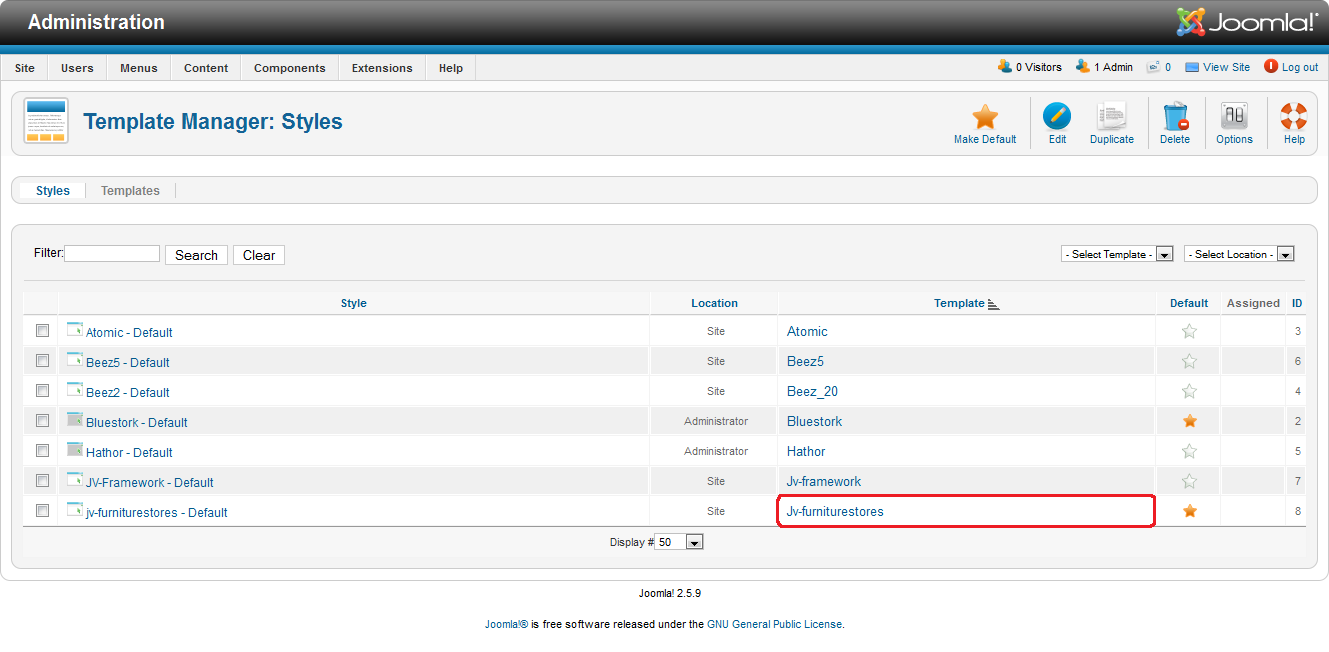
To open template edit page:
In template manager, click on JV Furniture Store’s name in the “Template” column
On the new page, click on “Edit Template” to open the popup.
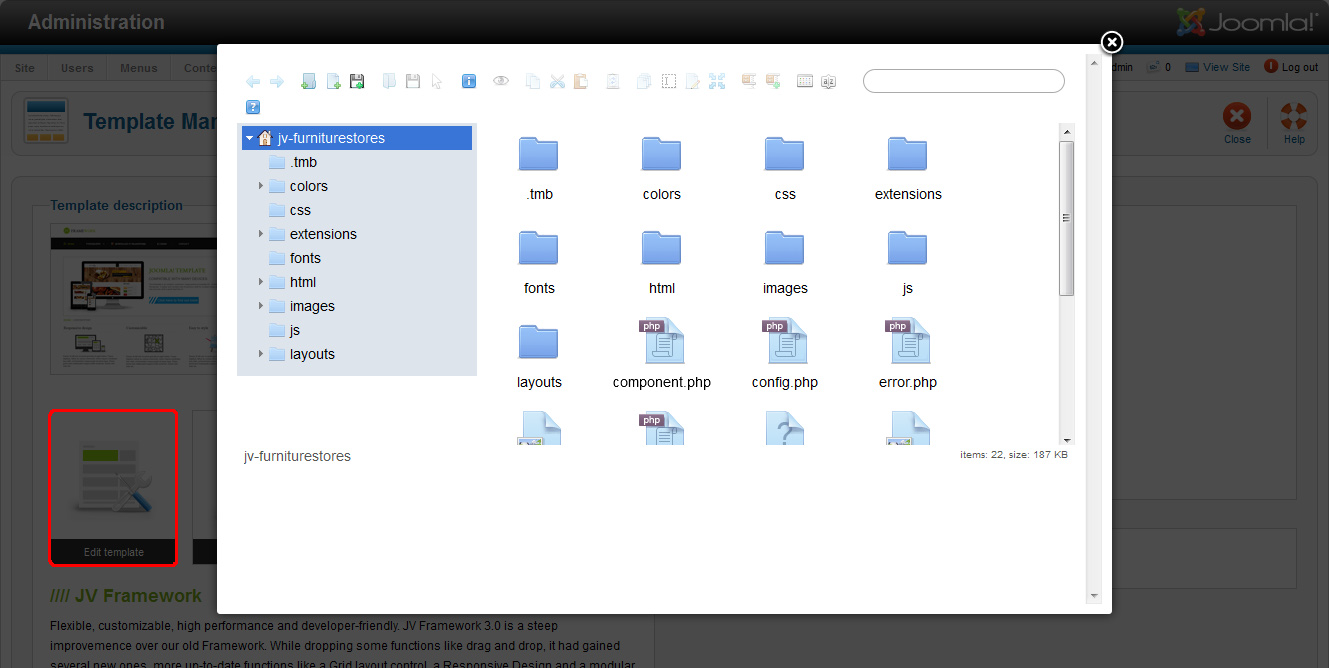
Extenstions
1. JV SlideR Pro
a. Introduction:
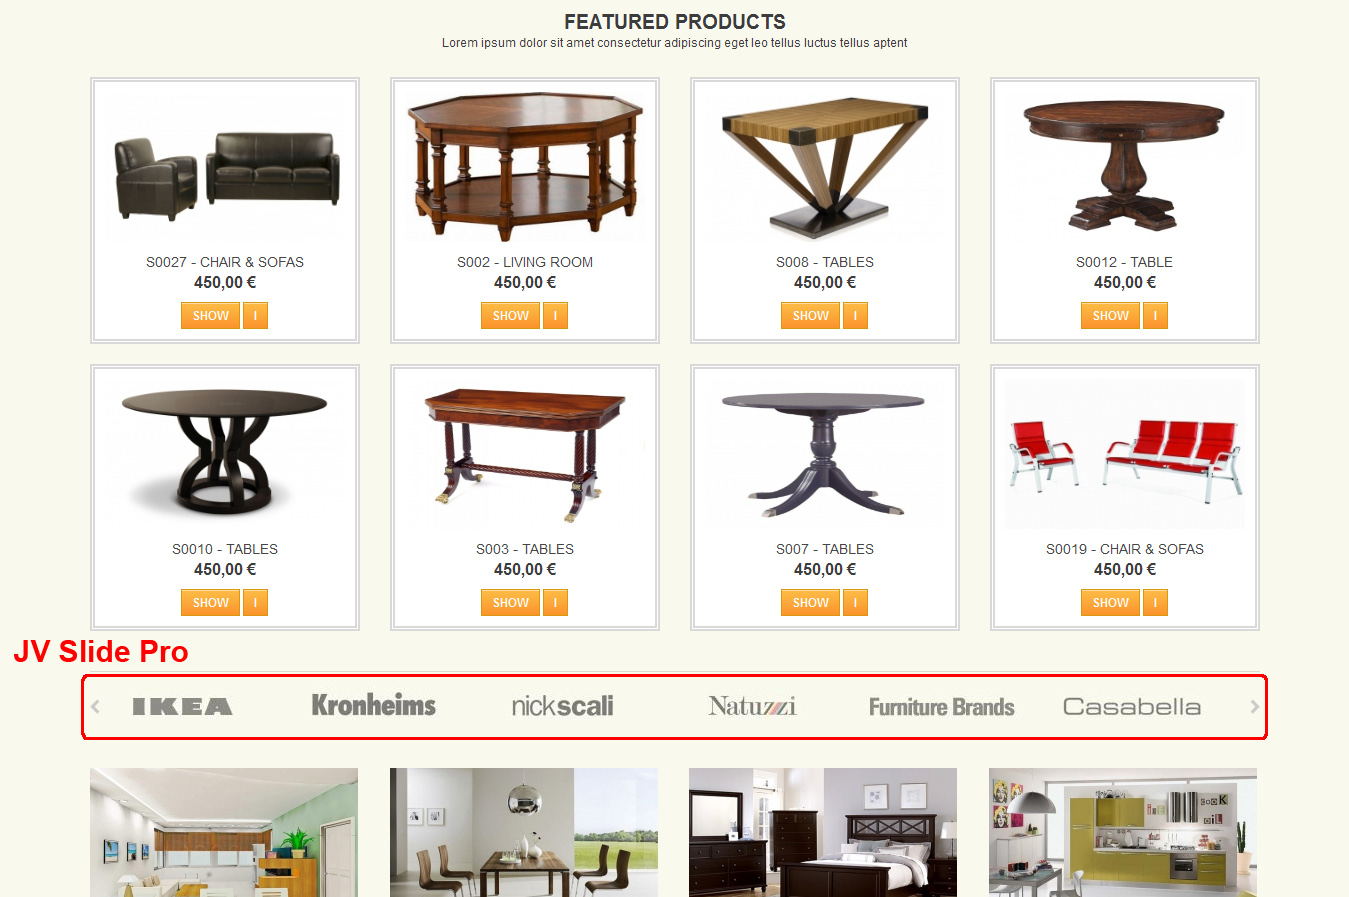
JV Slide Pro is a Joomla photo slide module developed by team Joomlavi. It incorporates several display modes from other Slide-type modules.
In Furniture Store, this extension is used as a logo slider.
b. Where to find:
JV Slide Pro is currently an exclusive extension for templates, thus you won’t be able to find it on our extension page. It will be included in the extension package for JV Furniture Store though.
c. Setting up JV Slide Pro:
This part will show how JV Slide Pro module was setup in the quickstart version, so that those who weren’t quick-start user can make their site as close to the demo as possible.
To set up JV Slide Pro:
- Create a folder (<images/iconlogo/> in the quick-start version) and upload the logos you need to it
- Create a module using module type JV Slide Pro, or utilize the default one created upon installation. Rename it to “Logo slider”
- Assign the module to position ‘bottomtop’ on home page.
- In Basic Options>>Get source from:
Select ‘From Directory’.
Enter the path to the folder you create in the “Path” parameter.
Enter the image types you want in the “Accept” parameter.
- In Basic Options>>Image editor:
Enable “Resize to”
Set the width and height of “Resize to” at 155 and 35, respectively.
- In Basic Options>>Slide config:
Select “JV Slider”
Set “Fix height” at 155
Turn off all on/off parameter except “Mouse wheel”.
Set “Duration of effect (ms)” to 500
Set “Transition effect” to ‘linear’
JV Slide Pro view from ront end:
2. JV Nivo Slide
a. Introduction:
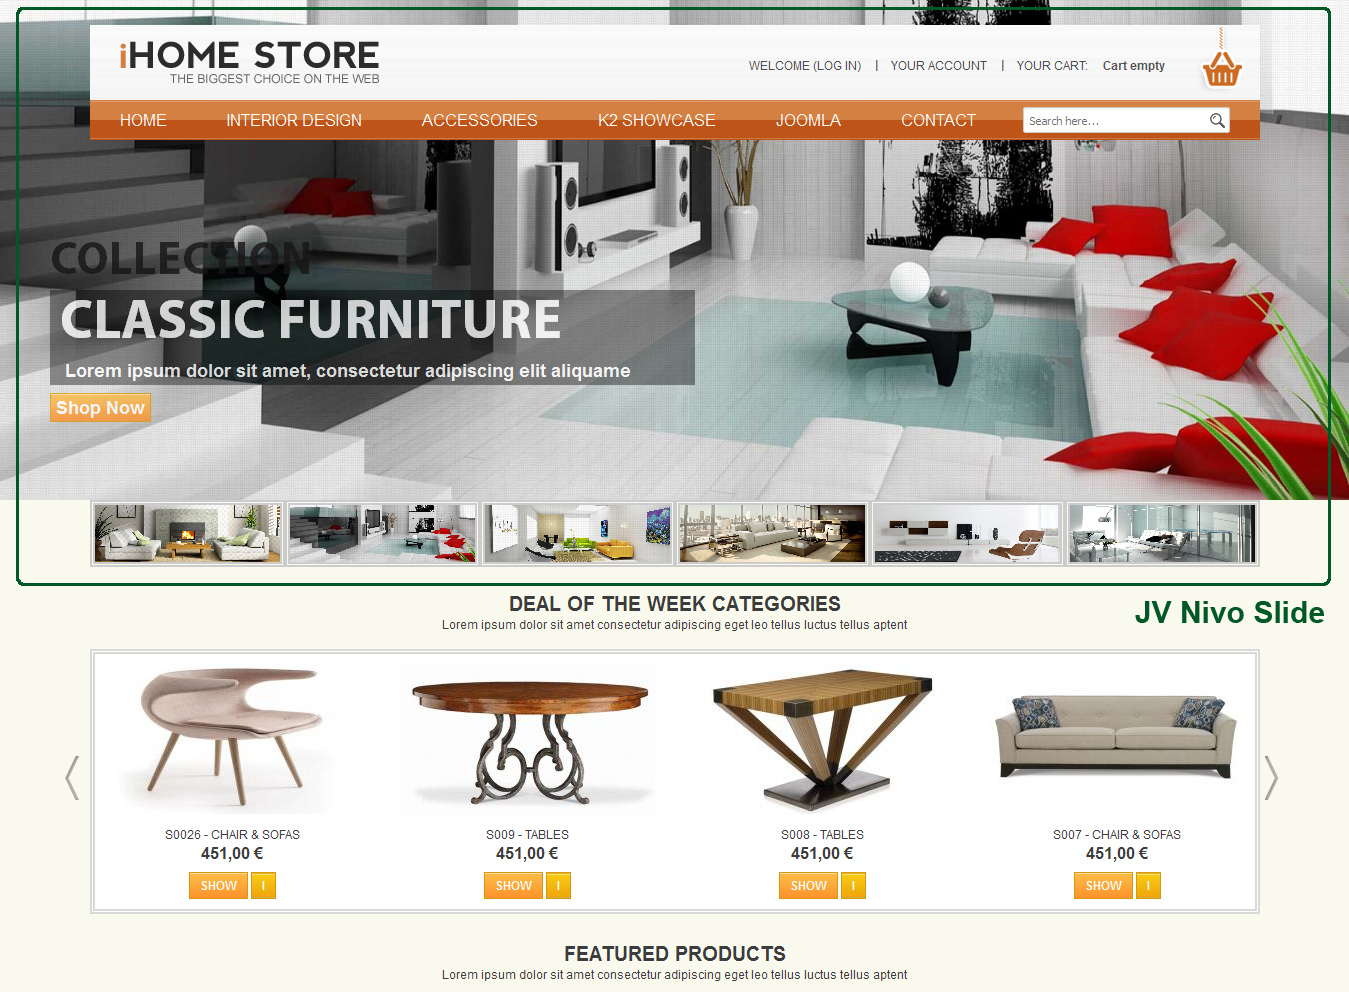
JV Nivo Slide is a powerful photo slider module that provide several great effects, a flexible setup, drag and drop sorting as well as support for Virtuemart.
b. Where to find:
JV Nivo Slide can be found at: https://www.joomlavi.com/joomla-extensions/jv-nivo-slide.html
It can also be found in JV Furniture Store’s Extensions package
c. Setting up JV Slide Pro:
This part will show how JV Slide Pro module was setup in the quickstart version, so that those who weren’t quick-start user can make their site as close to the demo as possible.
To set up JV Slide Pro:
- Create a folder (<images/slideshow/> in the quick-start version) and upload the images you need to it
- Create a module using module type JV Nivo Slide, or utilize the default one created upon installation. Rename it to “JV Nivo Slide”
- Assign the module to position ‘panel’ on home page .
‘Slide’:
- Select ‘Folder’.
- Click on “Select Images” and set up the images you want to use.
‘Options’:
- Set ‘slideshow’ as Module Class Suffix.
- Set “Control NAV Thumb” to ‘Yes’
JV Nivo Slide on front-end:
3. JV Contact
a. Introduction:
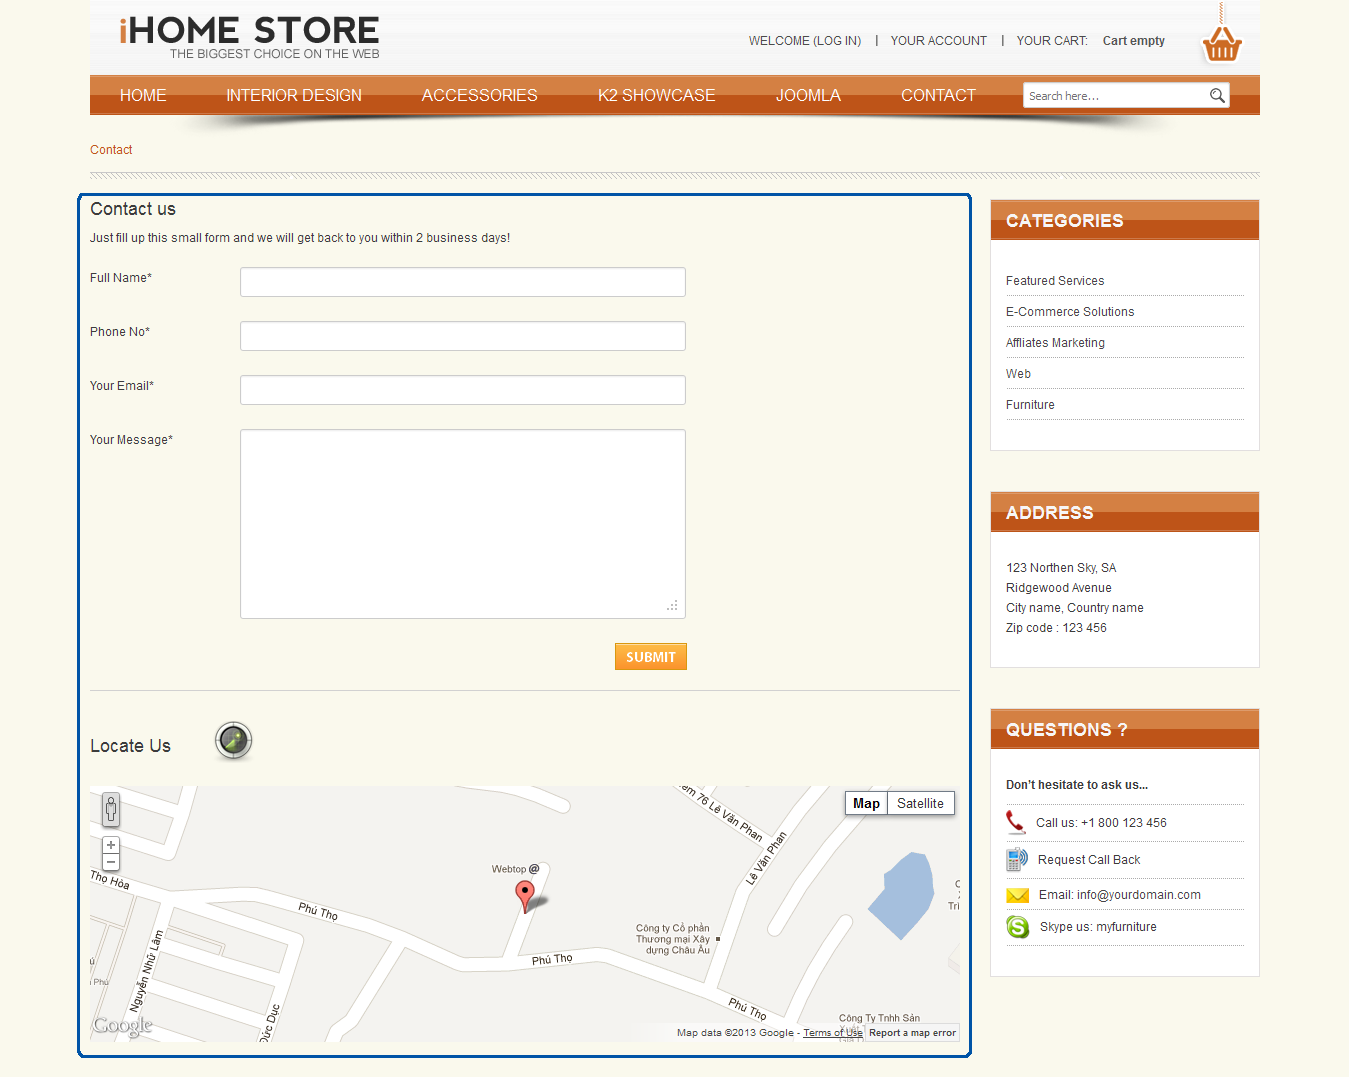
A joomla contact module developed by team Joomlavi. Beside normal contact messages, it also features functions like social buttons and google map.
b. Where to find:
JV Contact can be found in: https://www.joomlavi.com/joomla-extensions/jv-con¬tact-2.html
You can also get JV Contact from the extension package of JV Furniture Store.
c. Setting up JV Contact:
This part will show how JV Contact module was setup in the quickstart version, so that those who weren’t quick-start user can make their site as close to the demo as possible.
To set up JV Contact:
- Create an article named “Contact us”, which contain the code: <div></div>
- Create a menu item using ‘Single Article’ type in Main menu and name it “Contact”, then link this menu item to article “Contact us”
- Create a new modules using module type ‘JV Contact’, you can also make use of the module that was created upon installation
- Rename the module “JV Contact”. In this module:
- Fill the various text fields in “Basic Options” with your info and the desired texts or messages.
- In Form and Fields, set “Show Form” to ‘Yes’ and “Title in Field” to ‘No’. Create 4 text fields called “Full Name” (Name type field), “Phone No” (Text type field with number validation) and “Your Email” (Email type field). Then add the text area that has “Your Message” as both its name and title.
- In Google Map, set “Show Google Map” to on. Input the API key, set “Map Width” to 100%, “Map Height” to 256 px, “Zoom” to 17. Finally input the coordination and popup text you want.
- Assign the module to ‘Contact’ page in Main Menu, position ‘loadcontact’
The front-end looks:
4. JV News
a. Introduction
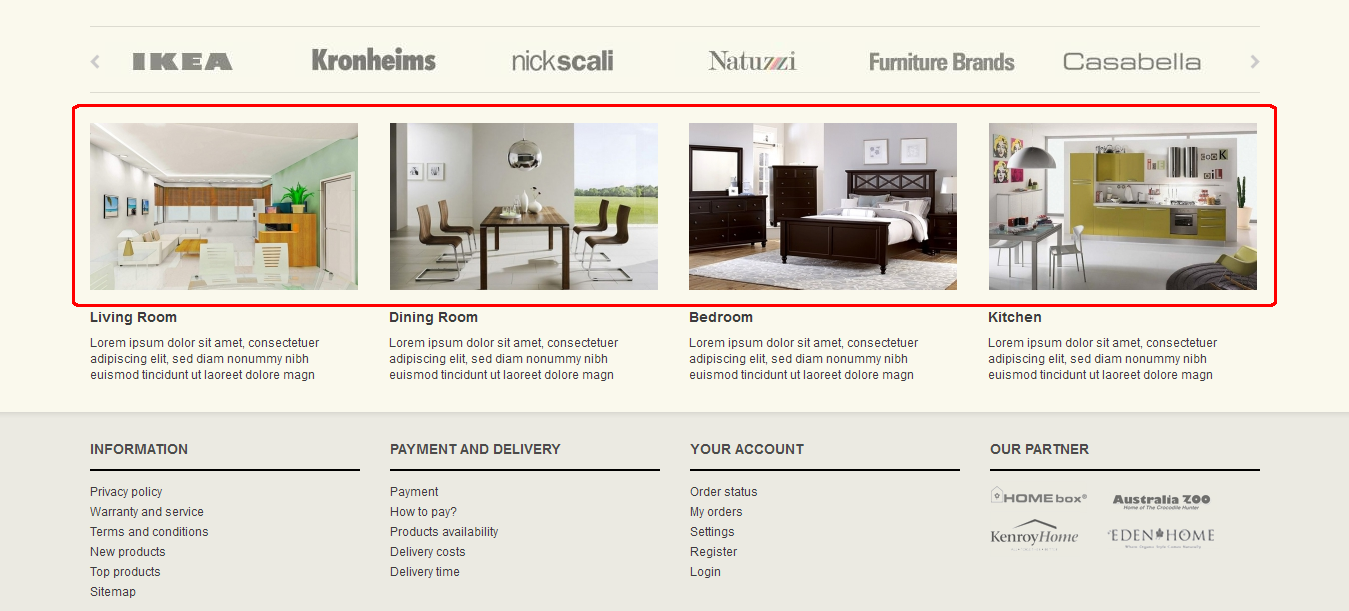
An article-displaying module that shows articles or categories in e-newspaper format
b. Where to find:
- JV-Furniture Store Extensions pack (With styling)
- From URL: https://www.joomlavi.com/joomla-extensions/jv-news.html (without styling)
c. Setting up JV News to make it similar to quick-start/demo:
- Create the categories and corresponding articles you need. In the demo/quick-start version, there are 4 main categories (News, No content, Contact, Joomla default), with “News” category containing 4 sub-categories named after product types and “Joomla default” containing “Joomla categories”.
- Create a menu, for each article in News, create a Single Article type menu item linked to it. Name this menu “News Content Static”
- In the back end, create 2 modules using the “JV News” module type. Rename them to “News Interior Design” and “Furniture collection”.
- In “News Interior Design” module configuration:
- Assign it to the position ‘bottom-1’.
- Assign it to the position ‘bottom-1’.
- In “Module Parameters”:
- Enter ‘_newsproduct’ as the Module Class Suffix.
- Select ‘News’ category for the “Categories” parameter.
- In “Leading setting”, set # Leading to 0
- In “Intro setting”:
- Set # Intro to 4
- In “Content”, set “Title Link” to ‘yes’, then set the parameters between it and “Show Content” to ‘no’.
- Set “Maxchars” to 120.
- Set “Width” to 268, “Height” to 67’.
- In “Link setting”, set “# Link” to 0.
- In “Pagination Setting”, set “Show Pagination” to ‘no’
- In “Other Setting”, set “Columns” to 4, then set “Enable Default Images” and “Show More Articles Text” to ‘No’.
- In “Pagination Setting”, set “Show Pagination” to ‘no’
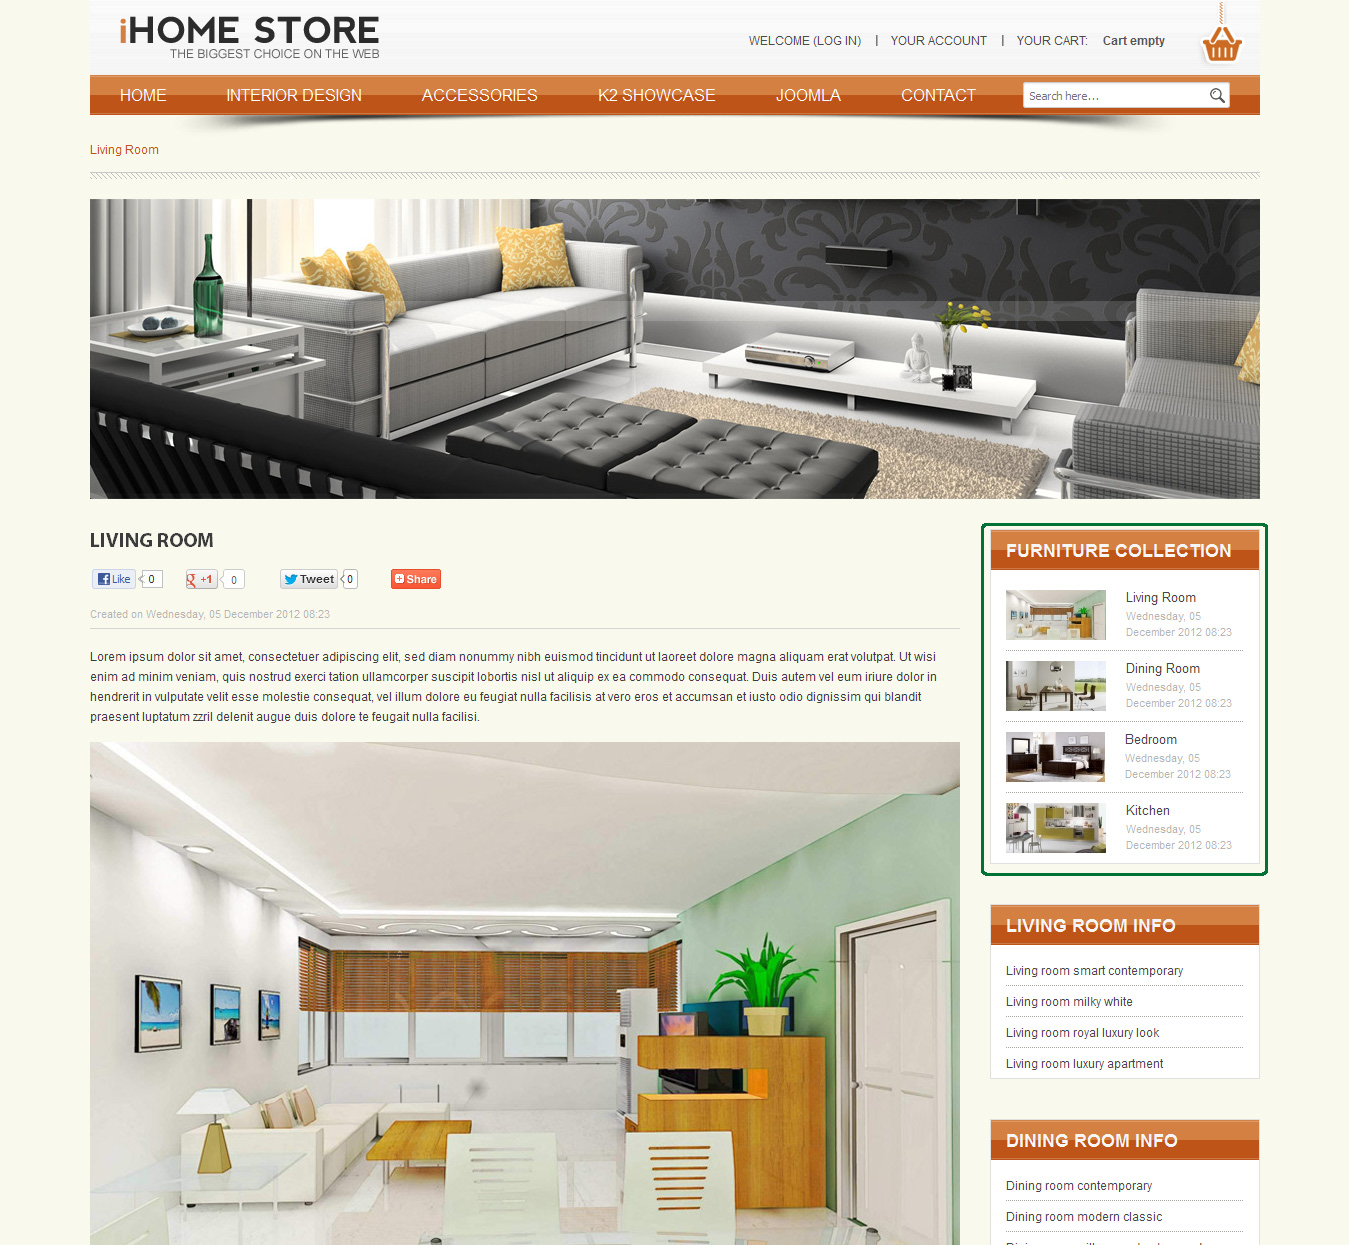
- In “Furniture collection” module configure:
- Assign the module to the position ‘right-1’ on all menu items in “News Content Static”.
- In “Module Parameters”:
- Enter ‘_newscollection’ as the Module Class Suffix
- Select ‘News’ category for the “Categories” paramete
- In “Leading setting”, set # Leading to 0
- In “Intro setting”:
- Set # Intro to 4
- set all parameters before “Author Name” in “Content” to ‘yes’, set “Author Name” and all parameter behind it in “Content” to ‘no’.
- Set “Maxchars” to 50
- Set “Align” to ‘Left’.
- Set “Width” to 100, “Height” to 60
- In “Link setting”, set “# Link” to 0
- In “Pagination Setting”, set “Show Pagination” to ‘No’.
- In “Other Setting”
- Set “Enable Default Images” and “Show More Articles Text” to ‘No’
On Front-end:
5. JV Social Plugin
a. Introduction:
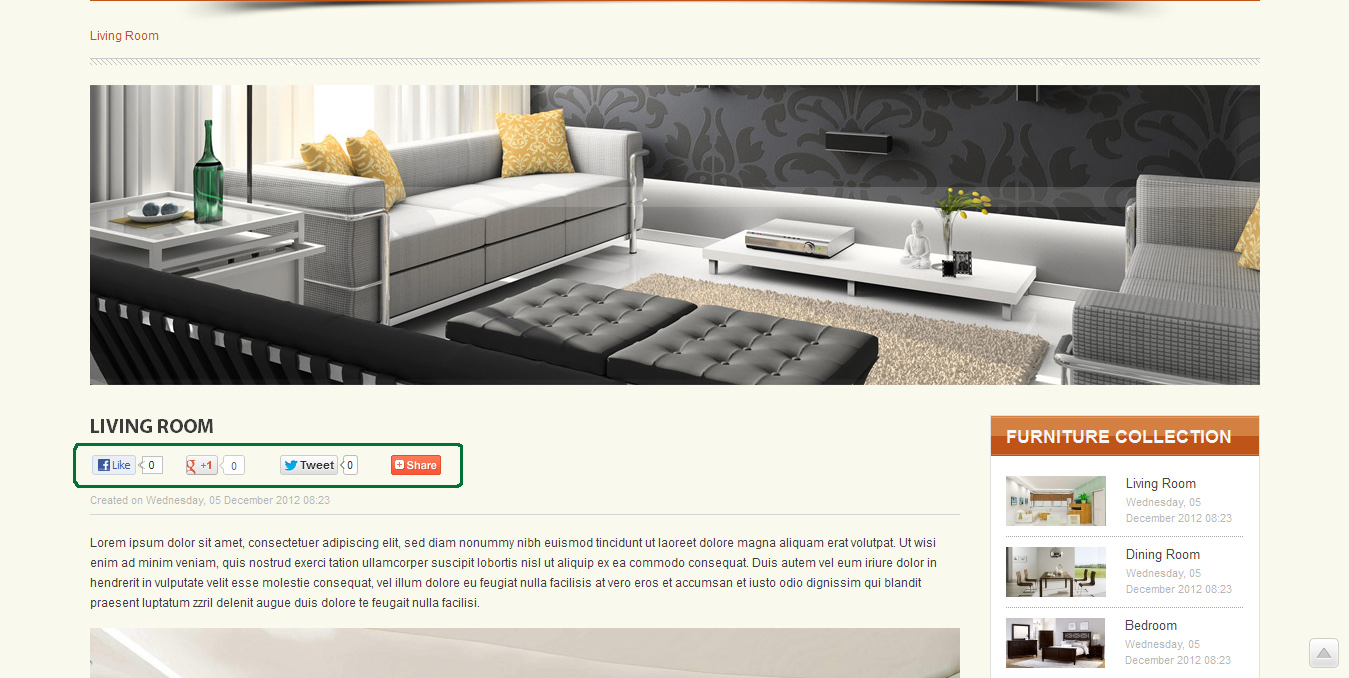
JV Social Plugin is a Joomla plug-in that can generate various social buttons like Face Book Like, Google +1, etc for each article. This extension was developed by team Joomlavi.
b. Where to find:
This extension can be found at: https://www.joomlavi.com/joomla-extensions/jv-social.html
c. Setting up JV Social Plug-in:
Simply install JV Social plugin and enable it. You can adjust the parameters to your liking.
On front-end:
6. K2
a. Introduction
K2 is a well-known and powerful article managing extension for Joomla. It was developed by JoomlaWorks.
b. Where to find
K2 extension can be found on its original developer’s site: https://getk2.org/
c. Setup
Create the categories and enter the articles you need (in Quick-start and demo site, there are 4 categories inside a parent “News” category. These Categories are: Living, Dining, Bedroom, Kitchen).
In Main Menu, create a menu item using “Latest items from (one or more) users or categories” type and name it “K2 Showcase”.
Create 4 sub-menu items for “K2 Showcase” called “K2 Living Room”, “K2 Dining Room”, “K2 Bed Room”, “K2 Kitchen”. In their configuration, select the corresponding category (Ex: Select “Living” category for “K2 Living Room”
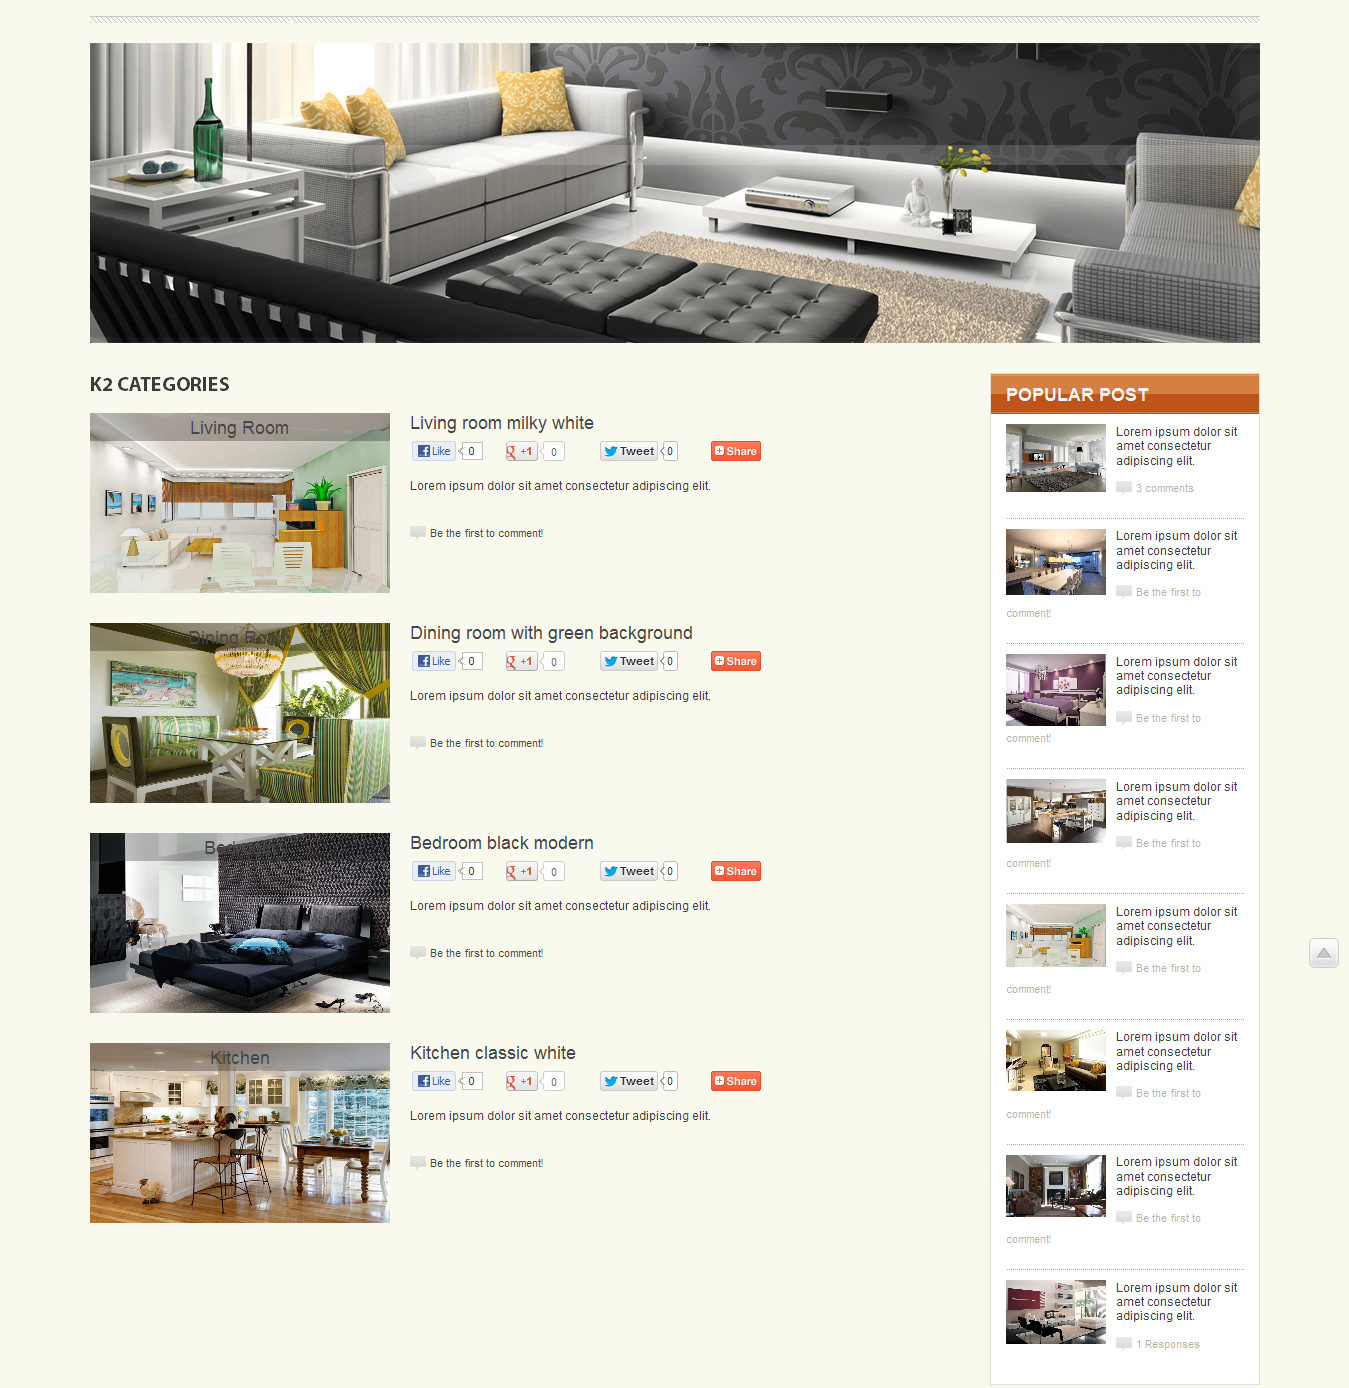
Create a module using “K2 Content” type and name it “Popular Post”. Assign it to the position ‘right-1’ on all K2 pages. In the “Basic Options” section of the module configuration:
- Select all categories.
- Set “Item Ordering” to ‘Oldest first’
- Set all parameters with hide/show in “Item view options” to ‘hide’, except “Introtext”, “Image” and “Comment counter and anchor link”
- In “Other Options”, set “Auto-generated RSS Feed icon” to ‘hide’
A K-2 Page on Front-end:
7. VirtueMart.
a. Introduction:
Virtuemart is a well-known Open Source e-commerce solution for Joomla.
b. Where to find:
Virtuemart can be found on:
https://virtuemart.net/
c. Setting up Virtuemart:
Please note that we do not own Virtuemart, so all questions regarding how the component work should be directed to the correct developer.
To replicate the demo site:
- Create the following modules:
- In Footer Menu, create a “VirtueMart » VirtueMart Categories Layout” type Menu item and rename it “Products all”.
- In Login Menu, create a “VirtueMart » Account Maintenance” type Menu item and rename it “Your account”. After that, create a “VirtueMart » Shopping Cart” type Menu item and rename it “Your cart”
- Also in Main menu, create the home page using “VirtueMart » Front page”
- Create “Virtuemart » Category Layout” type sub-menu-items for “Interior Design” and “Accessories”. Select the category you want for each of them.
- In Main menu, create 2 ‘text separator’ type menu-item called “Interior Design” and “Accessories”
- Create the categories and products you need in Virtuemart. Set featured for some products.
- 1 module using “Sot VirtueMart Simple Slider” module type, rename it “DEAL OF THE WEEK CATEGORIES” and assign it to the position ‘top-1’ on Home page.
- 1 module using “Virtuemart Category” module type, rename it “Category Products” and assign it to position ‘right-1’ on the pages of “Hidden”, “Login” and “Main Menu”, except “Home”, “K2 Showcase” and its sub menu items
- 1 module using “Virtuemart Currency Selector” module type, rename it “Currencies:” and assign it to the position ‘footer’ on all pages.
- 1 module using “VirtueMart Manufacturers” module type, rename it “VM – Manufacturer” and assign it to the position ‘position-4’ on all pages.
- 1 modules using “Virtuemart Products” module type, rename it “Products default” and assign it to position ‘right-1’ on the pages of “Hidden”, “Log in” and “Main Menu”, with the exception of “Home”, “Contact”, “K2 Showcase” and its sub menu items
- 1 module using “Virtuemart Search Product” module type, rename it “VM-Search in Shop” and assign it to position ‘position-4’ on all pages.
- 2 module using “Virtuemart Shopping Cart” module type. Name one of them “Statistics shopping cart top” and assign it to the position ‘login’ on all pages. Name the other one “Shopping Cart” and assign it to the position ‘right-1’ on the pages of “Hidden”, “Login” and “Main Menu”, with the exception of “Home”, “Contact”, “K2 Showcase” and its sub menu items.
- Set up the modules:
- Set the parameter “Parent Category” to ‘Top Level Category’ for “Category Products” module.
- Add “module class suffix”: ’ dealof’ for “DEAL OF THE WEEK CATEGORIES” module; ‘vm_mod_category’ for module “Category Products”; ‘statistics’ for “Statistics shopping cart top”; ‘shopping-cart’ for “Shopping Cart”
“Products all” - a page generated by Virtuamart in front-end:
