
System requirements
1. Browser compatibility
JV Pet Store was tested to be sure to display perfectly on the following web browsers:
 Firefox 4+
IE (Internet Explorer) 8+
Google Chrome 14+
Opera 12+
Safari 5+
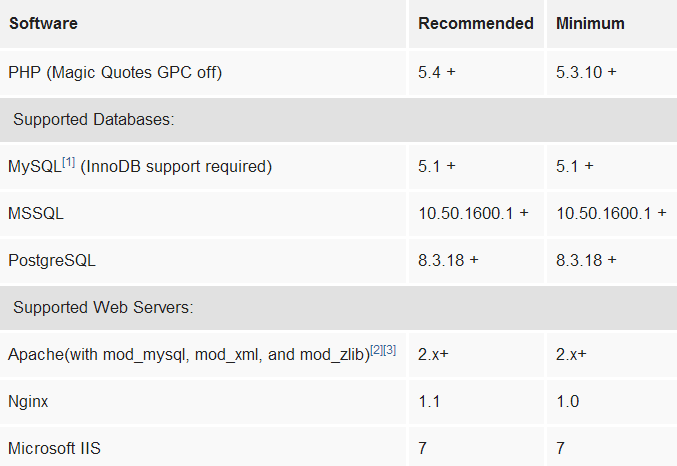
2. Joomla 3 requirements
3. Development requirement
We recommend you using Localhost for development process. The following servers are preferred:
Windows:
WAMP
XAMPP for windows
Linux:
LAMP Buddle
XAMPP for Linux
Download
To get privilege to download this premium template, first of all, you need to sign up for an account.
Log into your account and go to JV Petstore download area where you can see zip files including quickstart, template, source, extensions:
If you are new to Joomla! or planing to create a completely new Joomla Site which looks like JV Petstore Demo, You may need to select Quickstart Package.
If you've already had a existing Joomla! site or experienced in Joomla!, you may need to choose template, extensions.
Select suitable files and click download.
Quickstart Installation
Choosing quickstart package to install helps you create an entire Joomla site site which includes Joomla! CSM, JV Pet Store templates, JV extensions, sample articles, default Joomla! modules. This installation procedure is a perfect choice for those who are new to Joomla! or want to quickly start up an entirely new site.
Once you have downloaded the quickstart package. Take the following steps to install JV Pet Store Quickstart.
✔ STEP 1: EXTRACT QUICKSTART PACKAGE:
The first step you need to do is locate the quickstart package zip file and extract extract it to a folder, which contains all necessary files for installation.
✔ STEP 2: UPLOAD FOLDER TO YOUR SEVER:
- If you install JV Pet Store on your localhost for testing or development: just copy the folder to …\xampp\htdocs (If you are using XAMPP) or….\wamp\www (If you are using WAMP)
- If you install JV Pet Store on your actual server:
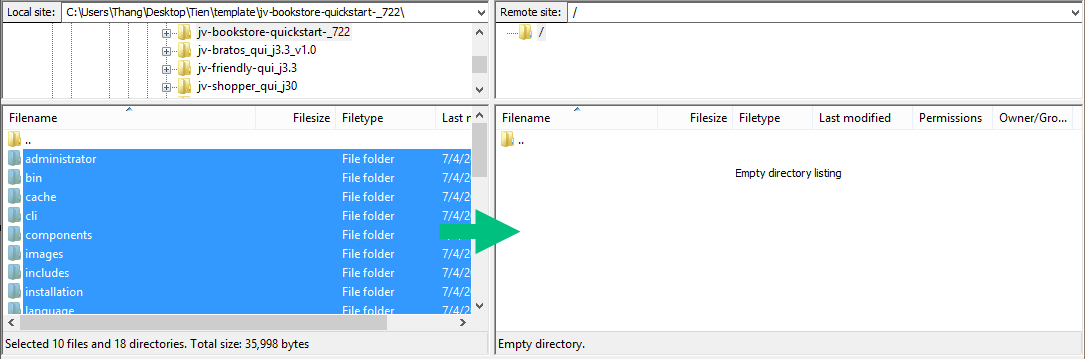
You can upload files via FTP using a client application like Filezilla or via cPanel -> File Manager -> Upload file(s).
If you want your Joomla! to be the main installation on your account and to be accessed through your main domain (i.e. www.yourdomain.com), you need to upload the extracted files to your public_html folder. (Though some host severs have a different structure, in most cases, the root folder is "public_html."). However, you can always create a sub-folder (i.e. public_html/petstore)if you want to run installation through www.yourdomain.com/petstore
✔ STEP 3: CREATE DATABSE FOR YOUR JOOMLA SITE
Now, you need to create a Database name and a user account (username and password) to it with full permissions to control database. Once you created your Database and User, make sure you remember the database name, database username and password you've just created, because they will be used in installation process.
While you are uploading the files to your server, it is time to create your MySQL database. The database is where your Joomla! files and images for your site are stored. You need to login to your hosting account cPanel to create your database. Normally you would use phpMyAdmin to create the database. Be sure to save your information from your database because you will need it when you install Joomla!
✔ STEP 4: RUN INSTALLATION
Now it's time to start with the installation process. If you have uploaded installation files in your root directory you just need to go to https://yourdomain.com or subdomain (i.e https://yourdomain.com/petstore) in your browser and get started.
You will see the first screen where you enter necessary information:
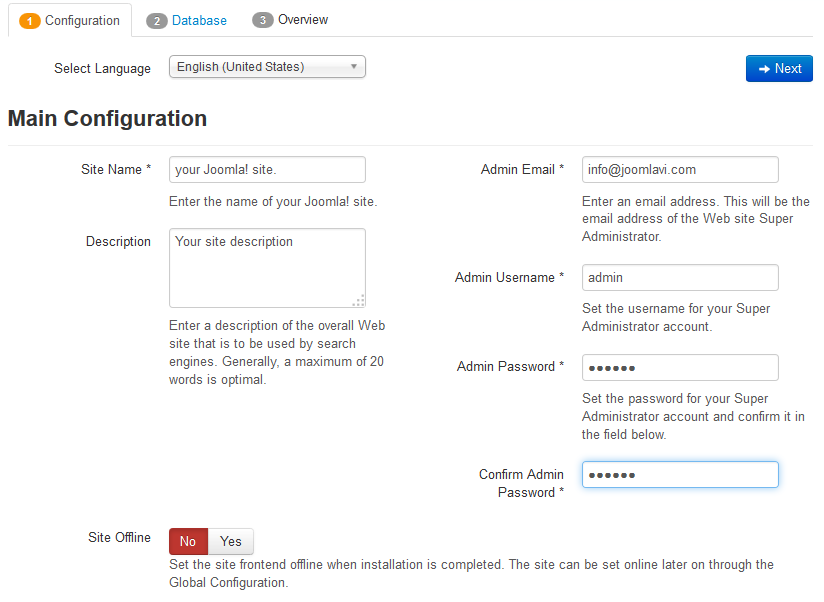
- Site Name: Enter the your site's name. This for the first heading of your index.
- Description: Enter a short description of your website.
- Admin Email: Enter a valid email address for system messages and password recovery.
- Admin Username: Enter admin username.
- Admin Password: Enter a password.
-Site Offline: Select whether your site should be taken offline after installation process is completed.
Click "Next" to continue the installation process.
The next screen you will see is about Database Configuration:
- Database Type: By default this value is set to MySQLi, but you can select MySQL
- Host Name: Leave the default localhost value.
- Username: Enter the database username, which you created in step 3.
- Password: Enter the password for the database username, which you created in step 3.
- Database Name: Enter the database name, which you created in step 3.
- Table Prefix: This is used to add to all of database tables. If you want to host many Joomla sites on a single database. You should leave the default value.
- Old Database Process: If you have any existing databases. You can select "remove" or "backup" any existing data. You should leave this option "Backup" since it is the safest choice
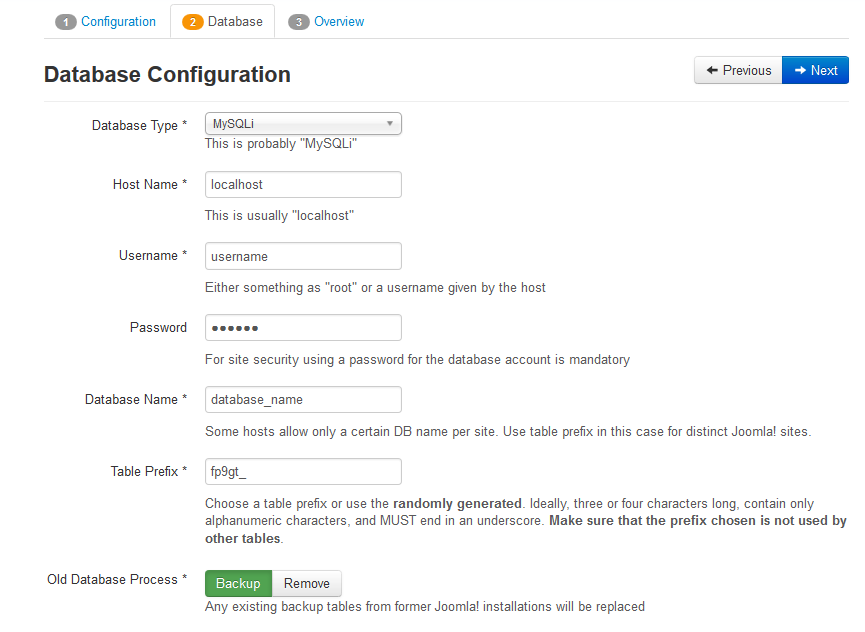
Click "Next" to proceed installation.
The next screen you will see is "Overview". In the first part, you can specify if you want install sample data on your server. We recommend you to choose the Default Sample data option, which helps build your actual website cloning JV Pet Store Demo.The second part of the page will show you all pre-installation checks.

Click "Install" to start the real Joomla installation.
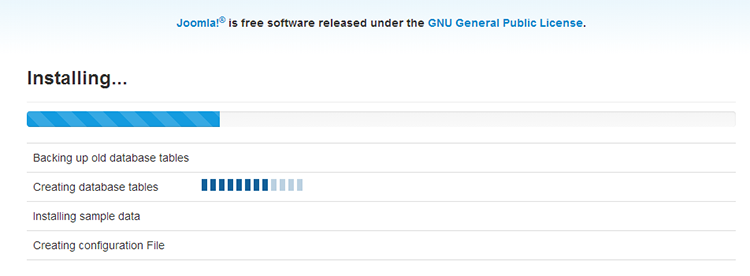
In the next screen, you will see Joomla Web Installer is installing....
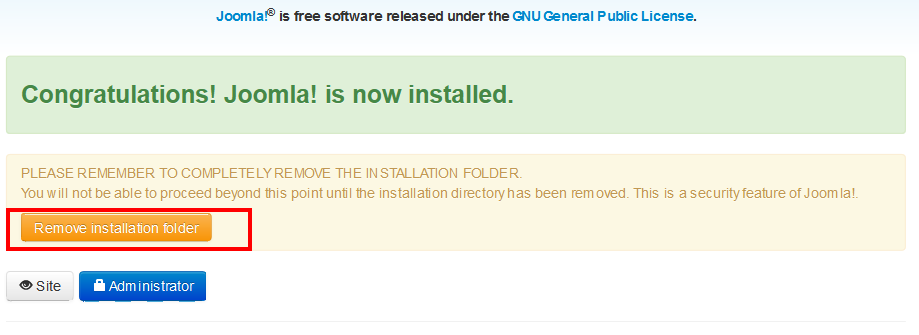
On the last screen of the installation process you need to press Remove installation folder button or you can rename the installation folder. Note that you can't use your site unless you remove this folder completely!
After finishing this quickstart installation, you only need to edit content, text, logo, product images and information, menu,.. in the back-end administrative area. Note that you can delete all sample articles, menus, etc. at any time.
Install JV Pet Store on your existing Joomla site
Another way to build JV Pet Store is installing each separate part: JV Framework 3.3, JV Pet Storetemplate, Extensions, and then add new default Joomla! and custom HTML modules to your site.
To install JV Pet Store on your Joomla, take the following steps:
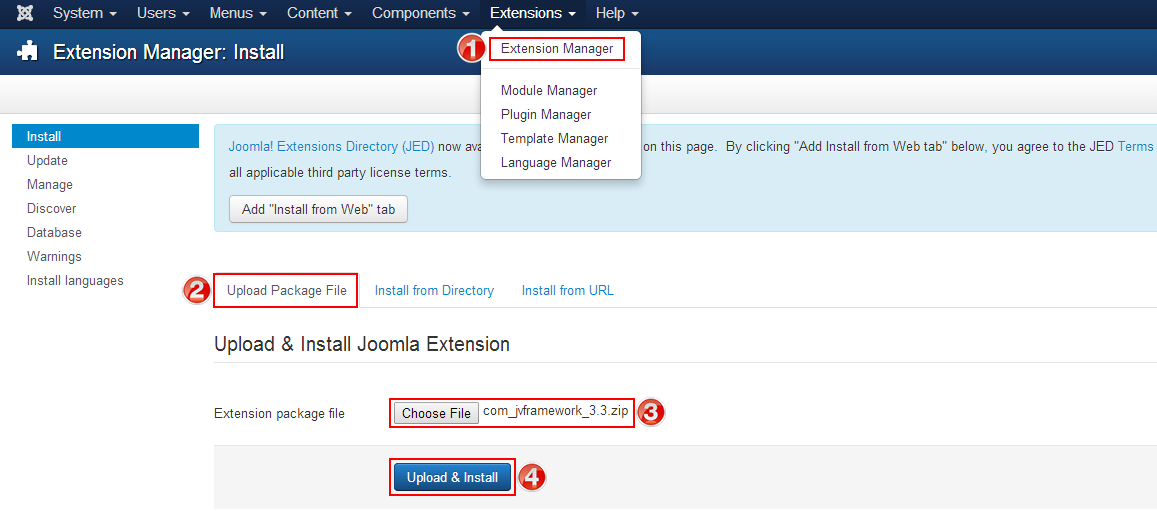
✔Step 1: Install JV Framework 3.3 component by selecting Extensions >> Extension Manager, browse JV Framework 3.3 zip package and click upload and install as shown in the picture below:
✔ Step 2: By the same way, install JV Pet Store template and other extensions on your Joomla!
Please view the following guide to know in details how to install new extensions (template, components, module, plugin) on your current Joomla site.
✔ Step 3: Once you have JV Pet Store template installed. Go to Extensions >> Template Manager, set JV Pet Store as default for front-end
✔ Step 4:
Next step you need to do is install all extensions, create and config menus, modules...