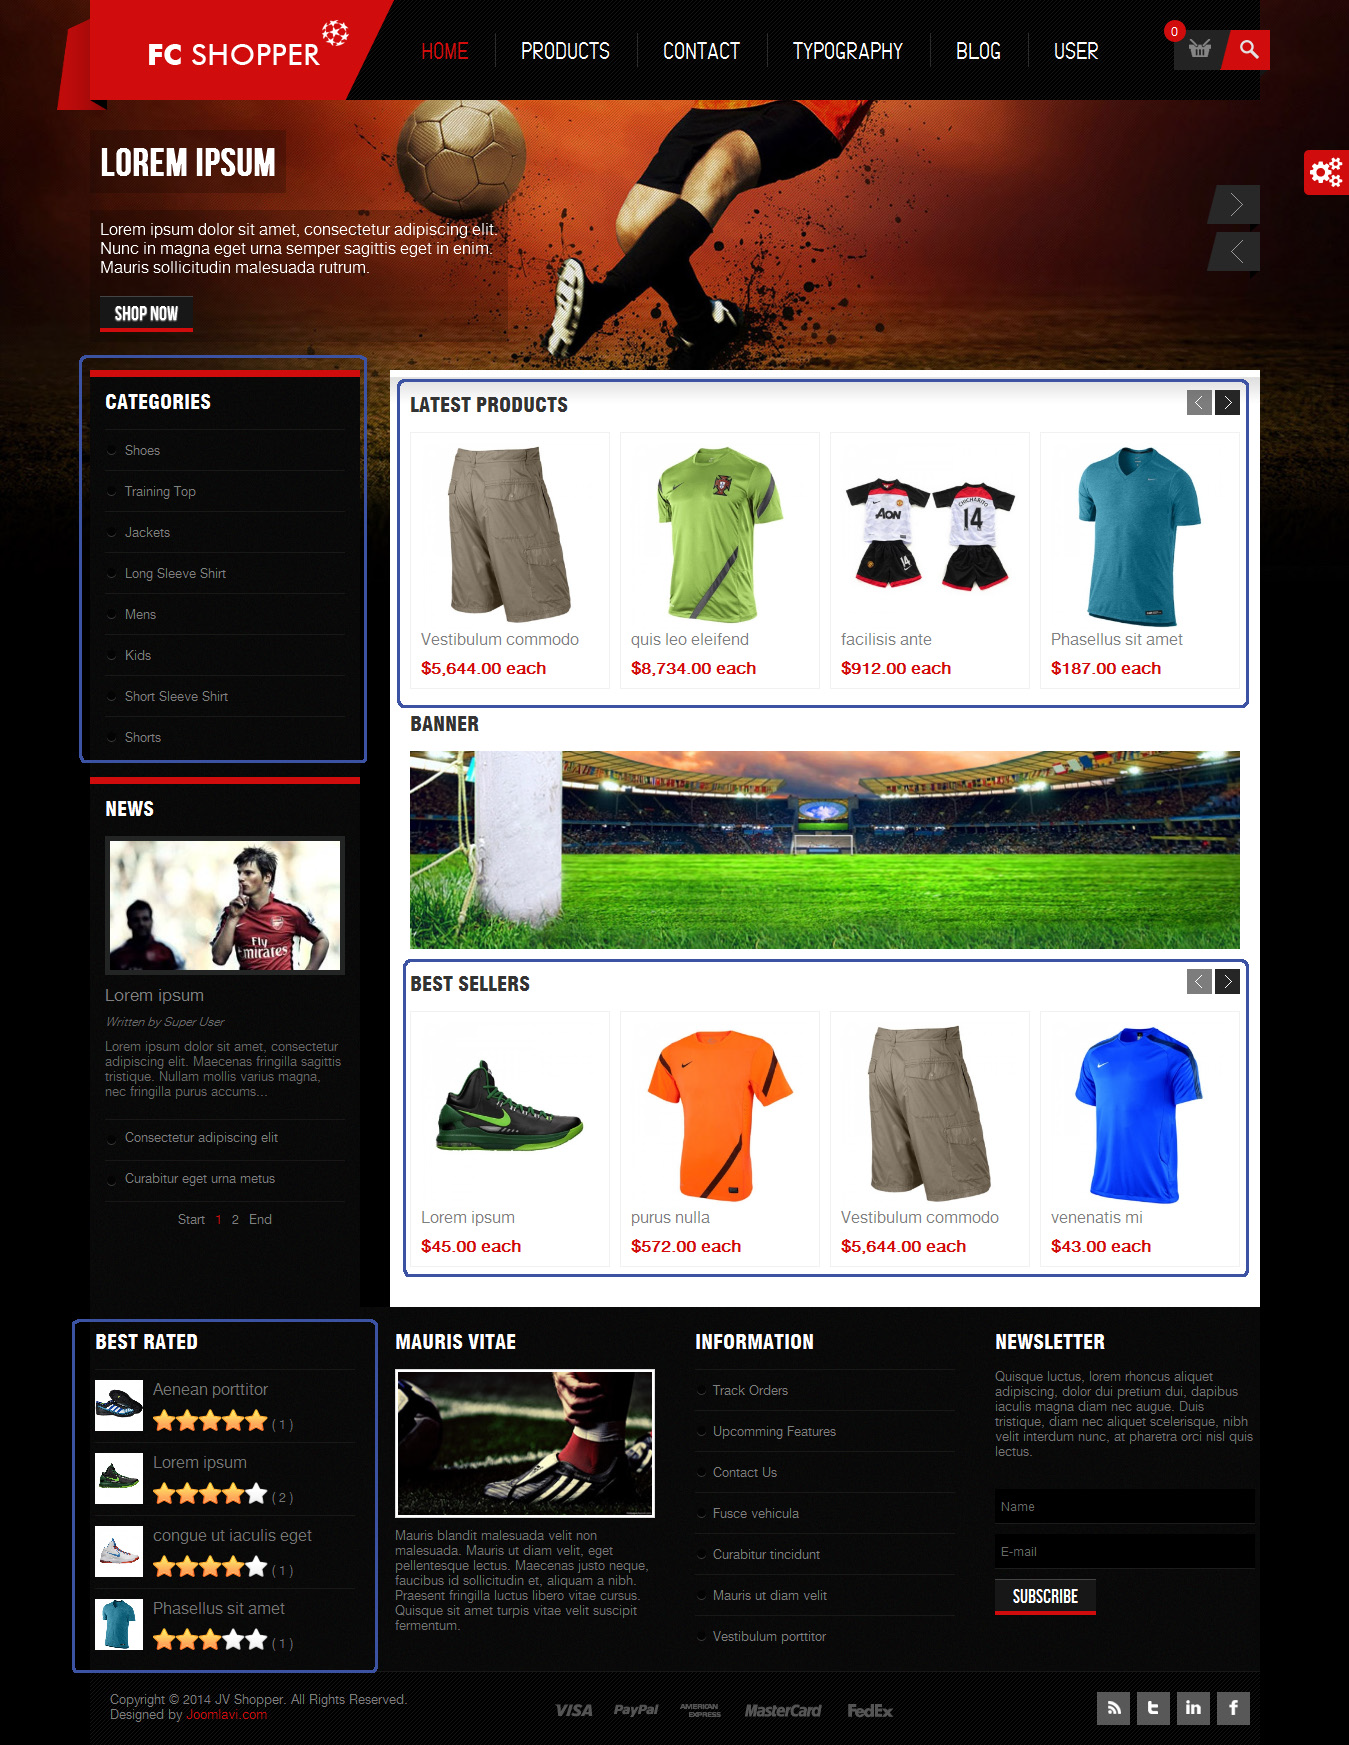
Downloading
You might have taken a look at JV Shopper overview to have an overall understanding of the template. From there, you can see Joomla version supported, main features, included complimentary extensions. You can also link to Live Demo, Download area and Documentation.
To download JV Shopper, click download in JV Shopper overview page.
Download the Quickstart package if you are planning to make an entire new site with all included extension. The new site will be almost identical to demo site. All you need to do is to replace the demo content with yours.
Download the Extension package if you've already had an existing site and do not want to replace it or you only want to install the template without extensions or style. Installing with theme version will give you template without any extra extensions or data loss.
Installation
1. Installation with Quick-start version
Quick-start installer will create an entire new Joomla site with JV Shopper, data and all related extensions installed, essentially a replication of JV Shopper’s demo site. This installation procedure is the best choice for those who are new to Joomla. Please check the following to know how to install JV Shopper with Quickstart package.
2. Installation with Template version
This installation procedure allows JV Shopper to be installed on an existing site (instead of creating entire new site). However, this method will not install included extensions, making it look different from the demo site
To install a Template version of JV Shopper, take the following steps:
✔ Step 1: The first thing you need to do is to download Extensions Package for JV Shopper (download Extensions for Shopper 2.5 if you are using Joomla 2.5 and Extensions for Shopper 32 if you are using Joomla 3.2). The Extension Package file contains JV Framework 3.0, JV Shopper template & Extensions supported.
✔ Step 2: Once you have Extension Package file downloaded on your computer, extract the file you will have JV Framework 3.0 zip file, JV Shopper template Zip file and extension zip files. Login to the administrative area of your Joomla website and Upload & Install JV Framework, JV Shopper template, Extensions through the Extension Manager (Extensions -> Extension Manager). The process is the same for templates, modules, plugins and components.
If you are not familiar with Extensions (templates, modules, plugins and components) Installation, please check the following guide:

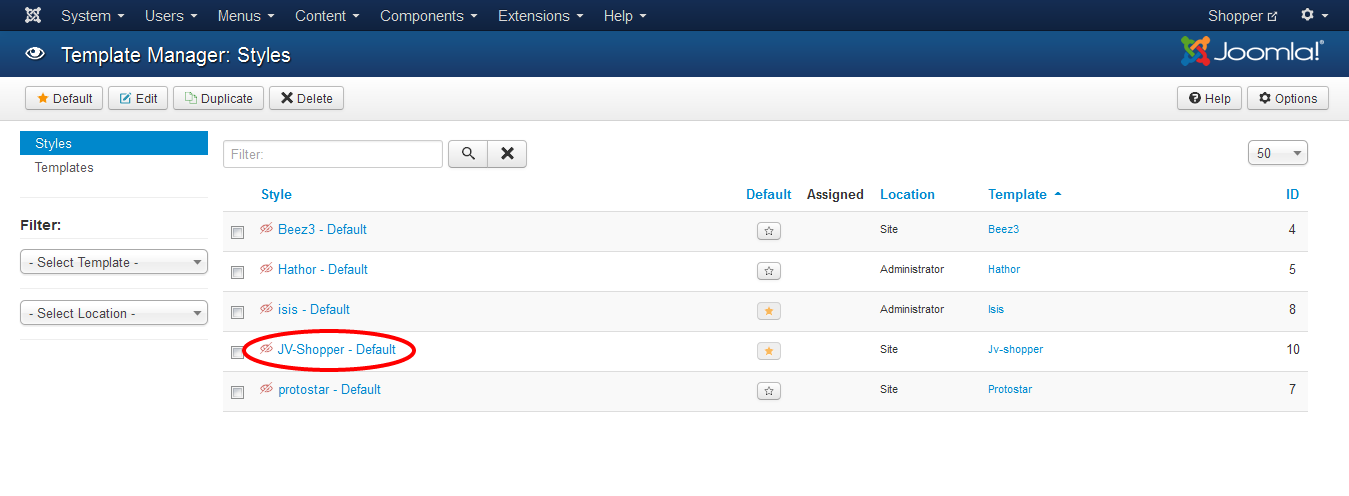
✔ Step 3: Once you have JV Framework 3.0 and JV Shopper Template installed .Go to Tab Extensions -> Template Manager -> Make JV Shopper default
Layout & Module Positions
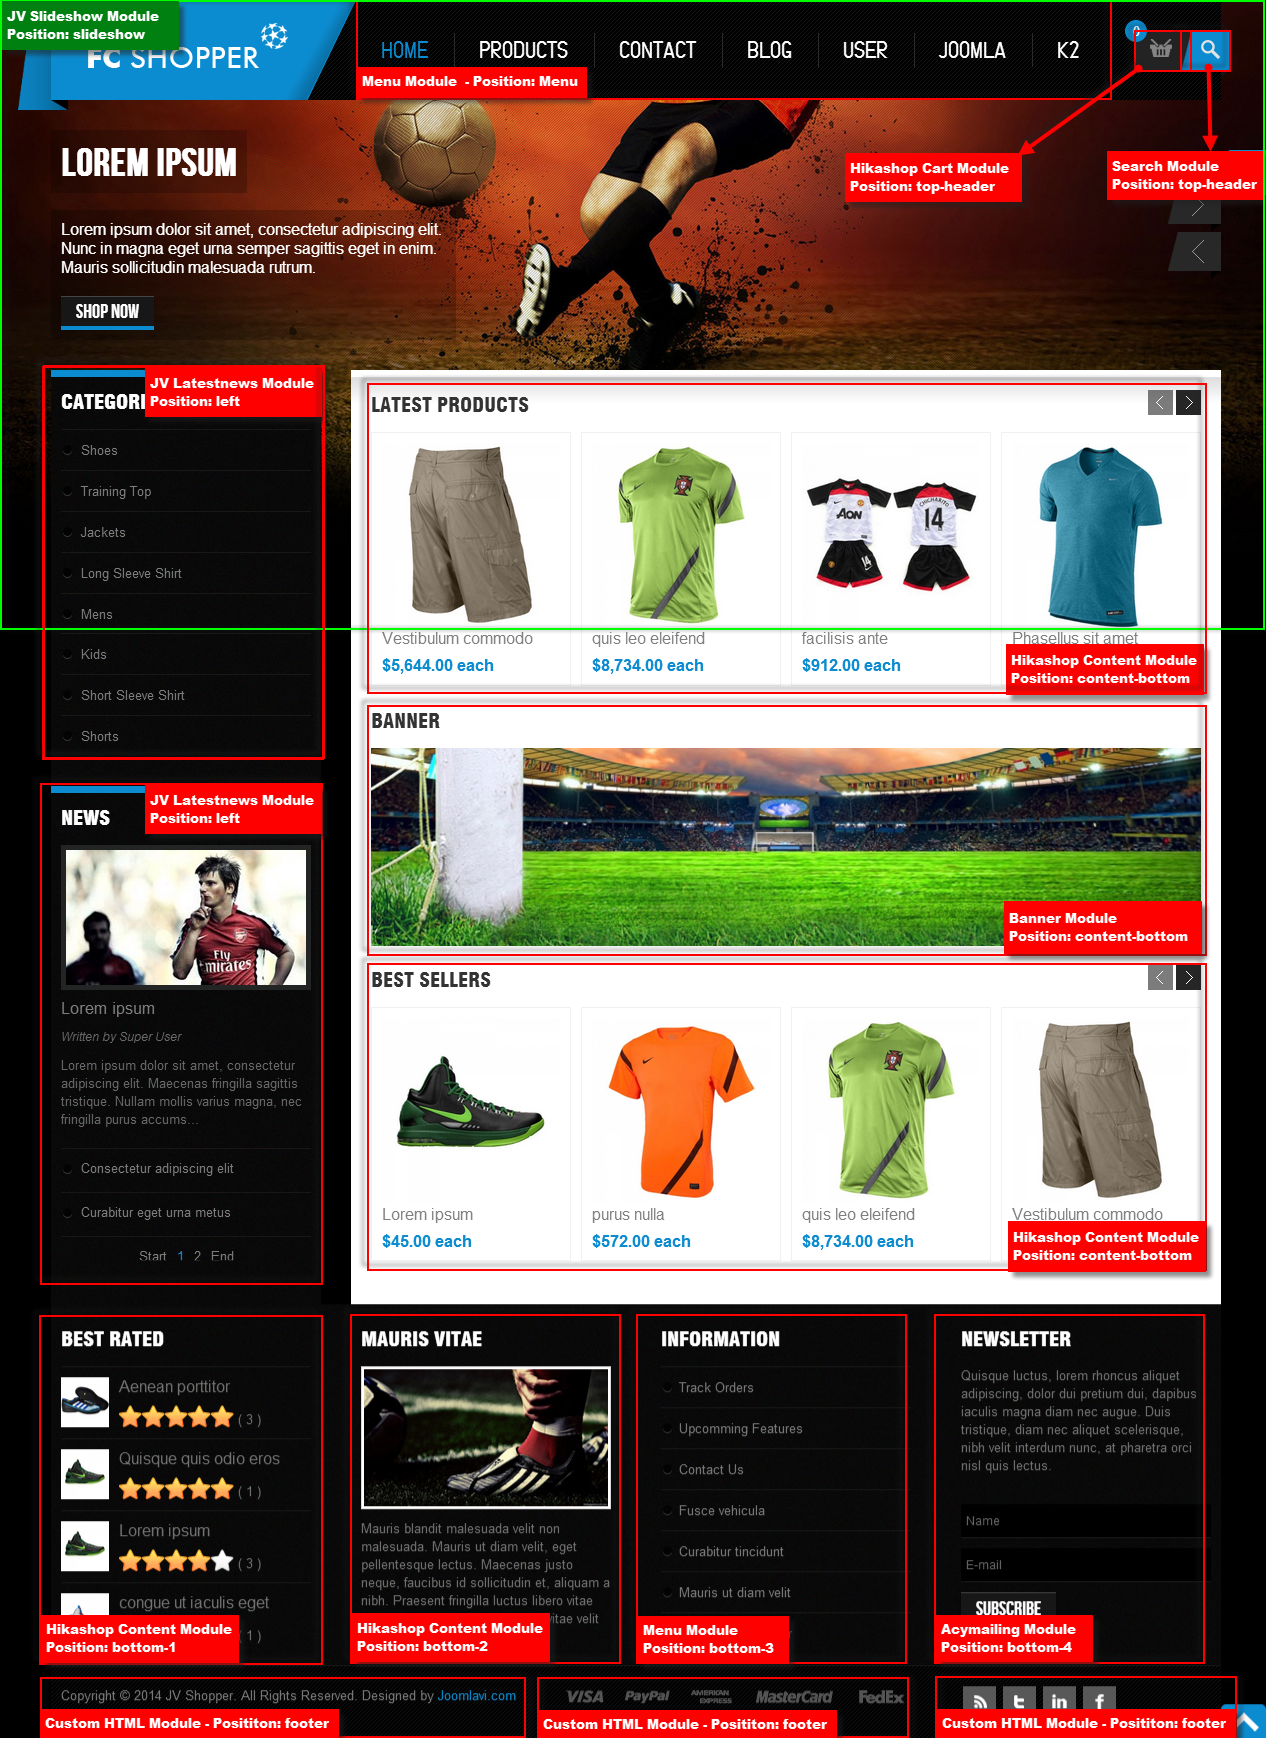
You need to know the structure, layout and modules positions of JV Shopper. The image below is our JV Shopper 3.2 Demo, you can manage the modules like editing title, choosing position, changing content, images etc... You will know more detail in K2 & Extension Configuration Parts.
Managing JV Shopper
Note: this guide does not cover everything about how to use Template Manager, nor does it cover all the parameters and features of JV Framework.
Unlike older versions, JV Framework utilizes Template Manager instead of an independent Style Manager. This was to make the framework friendlier toward new users.
1. Style Edit
To edit a style, simply click on its name in under the style section in Template Manager.
The defaults tabs found in this page are:
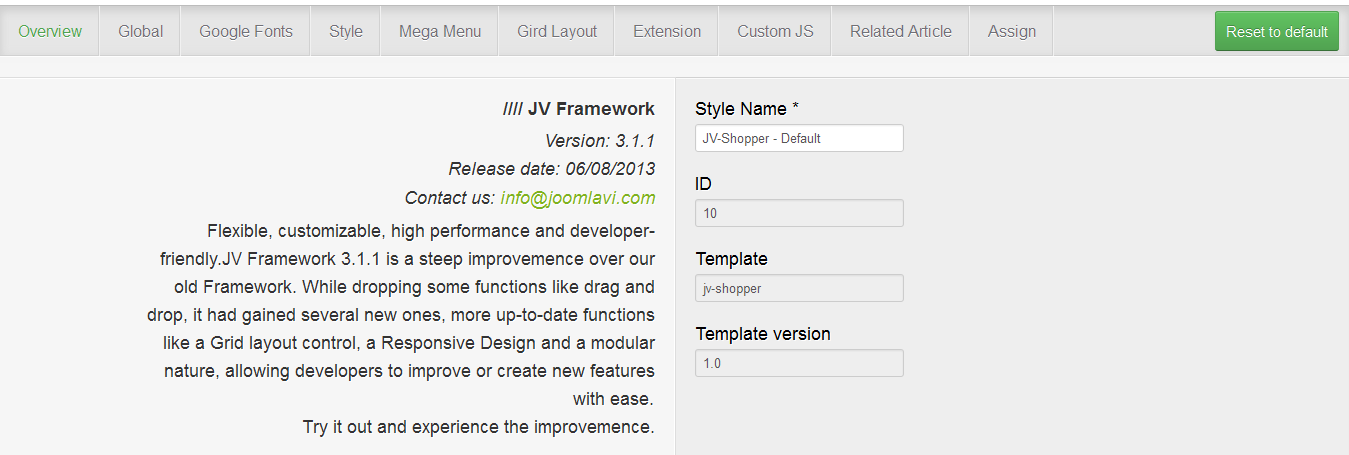
✔ OVERVIEW:
This tab contain the info of the style being edited.
✔ GLOBAL
This tab contains a collection of general parameters that affect the entire site.
The sets of parameters that can be found in this tab are:
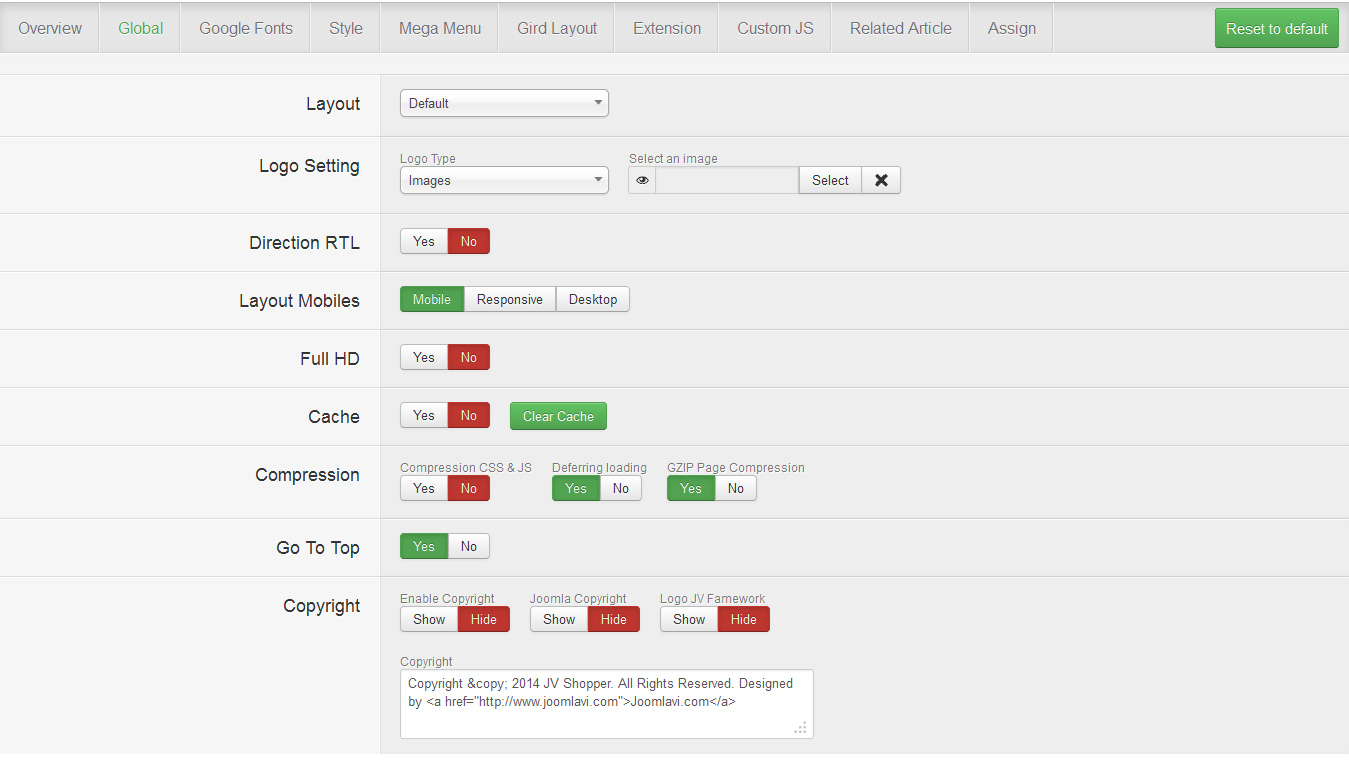
- Layout: Allow you to select the layout for page being affected by this style.
- Logo Setting: With this set of parameters, you can set an image or text logo for the site
- Direction RTL: This is where you set whether your site should be read from
- Layout Mobiles: Allow you to select the type of layout that will be used when accessed from a mobile device
- Full HD: Enable/disable Full HD.
- Cache: This is where you enable/disable the cache function for JV Framework’s extensions or clear the cache.
- Compression: Allow you to optimize the site loading time by utilizing various type of compressions.
- Go to top: Enable/disable Go to top button
- Copyright: Allow you to enable/disable and modify copyright.
✔ GOOGLE FONT
This is where you can add and refresh Google Font

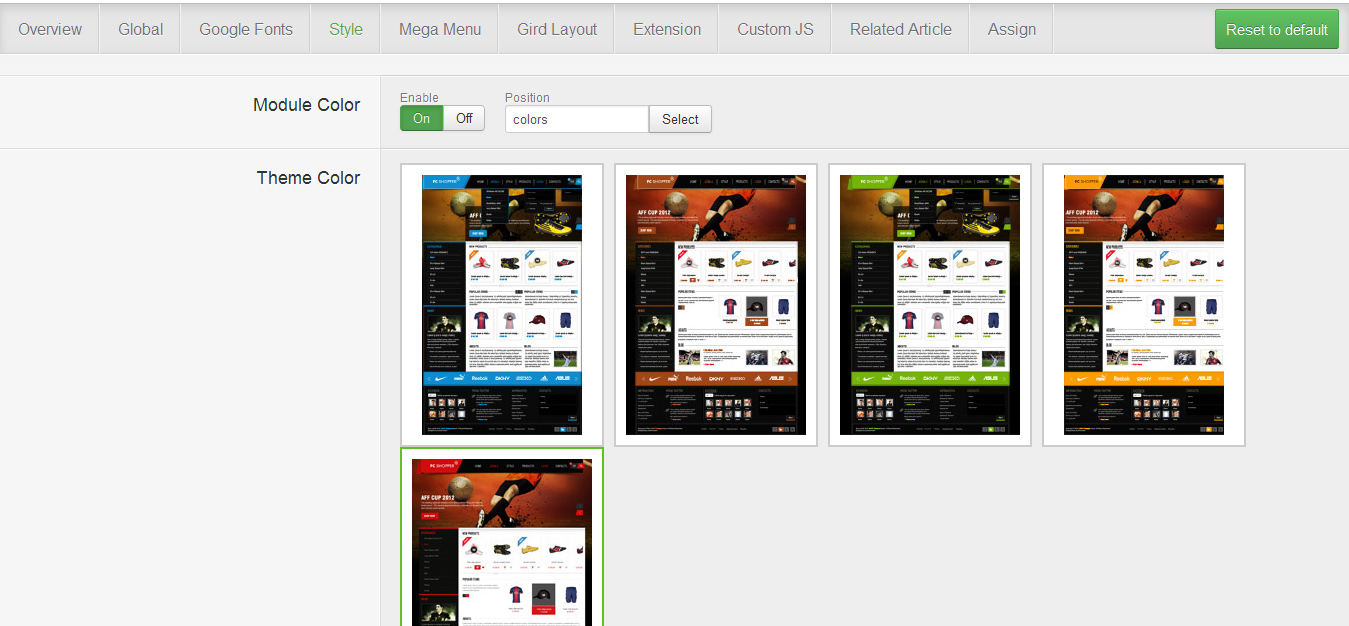
✔ STYLE
This tab allows you to choose the theme color and turn the color selector on/off
✔ MEGA MENU
This tab allows the user to configure the Megamenus and their sub-menus used in JV Shopper, as well as the menu responsive

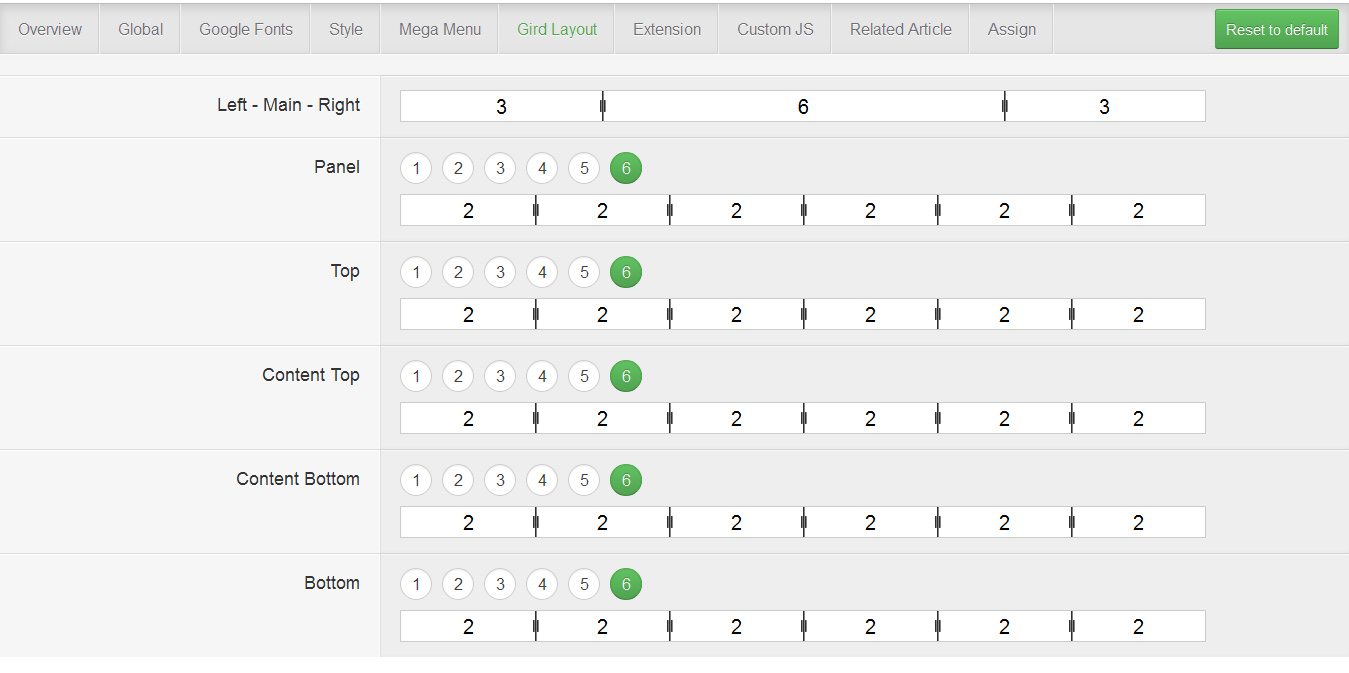
✔ GRID LAYOUT
This tab allows you to adjust the size ratio of the grid layout.
✔ EXTENSION
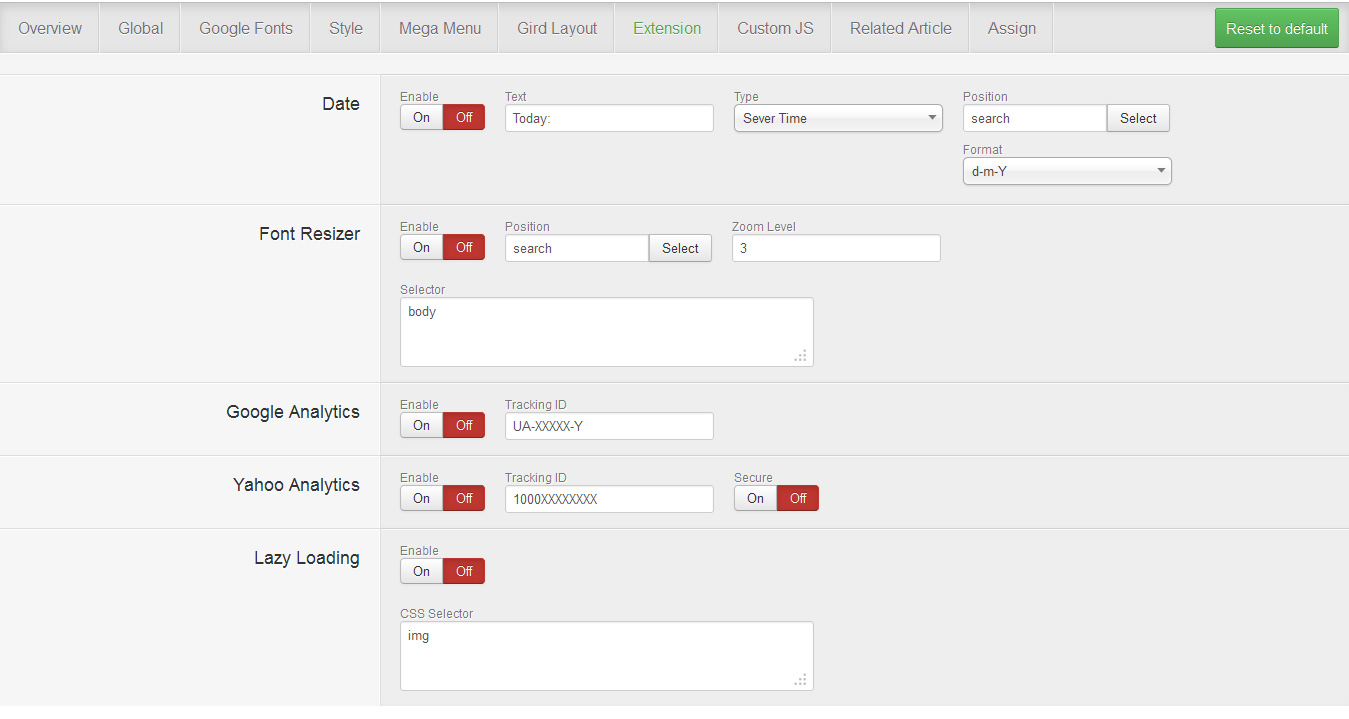
This tabs contains several sets of parameters that enhance or support the Framework .
- Date: This is where you can enable/disable the date indicator, as well as configure it.
- Font Resizer: This is where you can enable/disable the font resizer.
- Google Analytics: This is where you can enable and disable Google Analytic.
- Yahoo Analytics: This is where you can enable and disable Yahoo Analytic.
- Lazy Loading: This is where you can enable/disable lazy loading mode.
✔ CUSTOM JS
This is where you can add custom JS to certain part of the site using class or id.

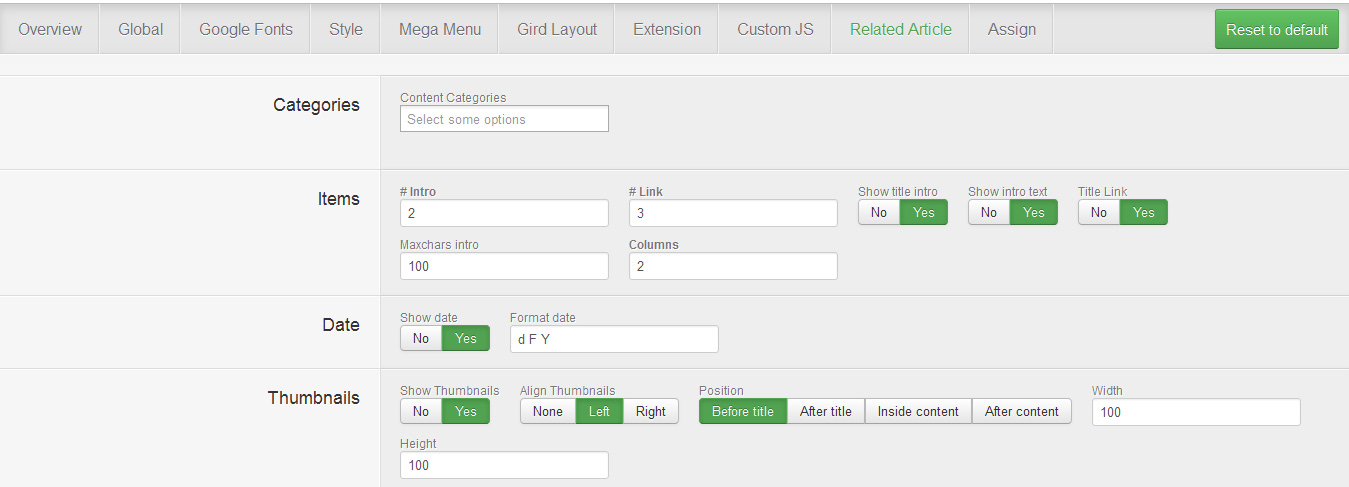
✔ RELATED ARTICLE
This tab allows you to configure the Related Article features (show related article underneath the one being read).
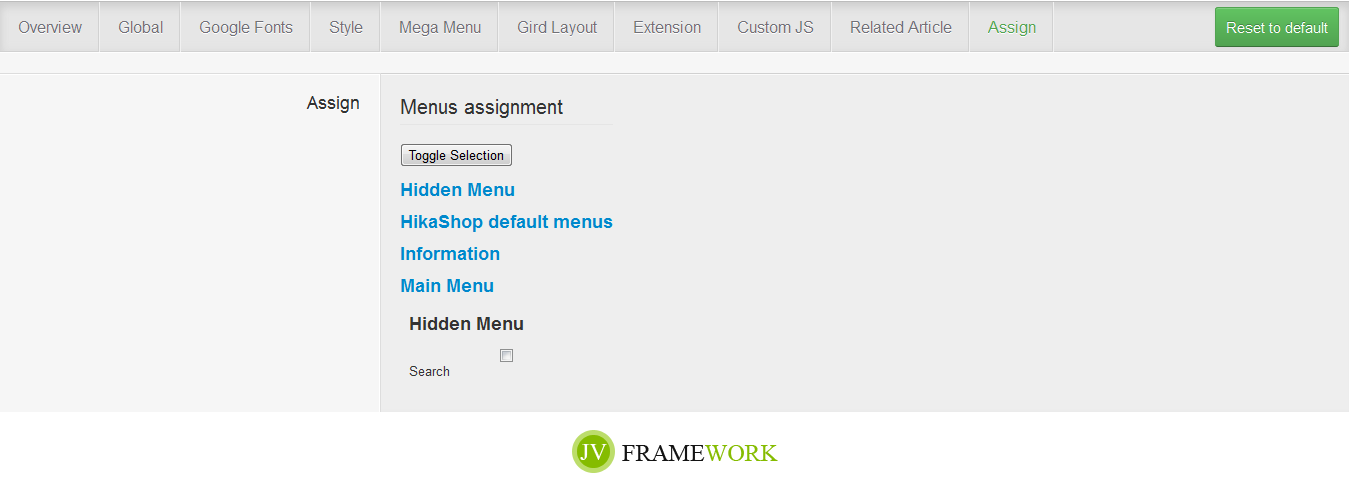
✔ ASSIGN
If this style is not the default one, this is where you can assign which page will utilize this style instead of the default style.

2. Template/Template Edit
With the Template Edit provided along with JV Framework, you will be able to edit, delete, create and upload files and folders easily.
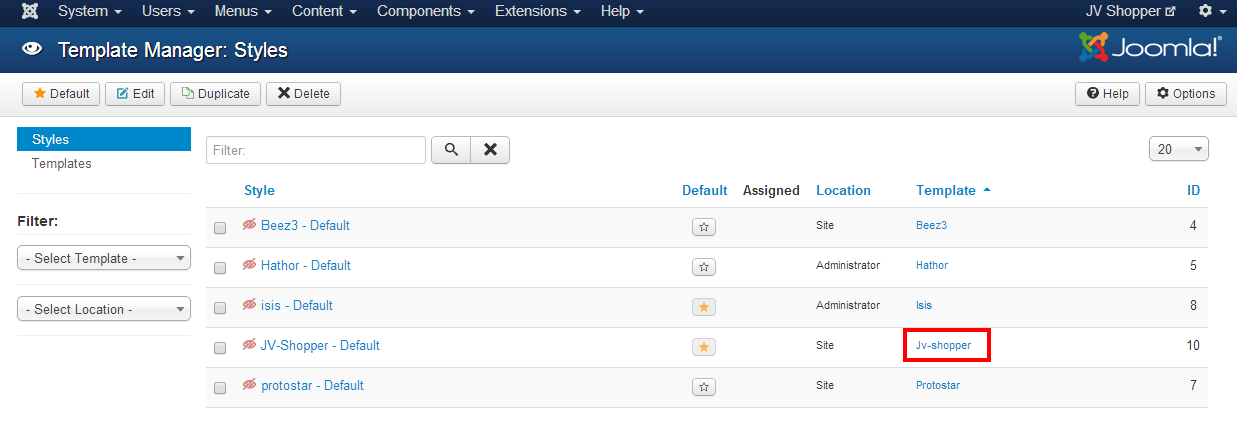
To open template edit page:
In template manager, click on JV Shopper’s name in the “Template” column

K2 Style
JV SHOPPER is fully powered by K2, a powerful awarded content extensions for Joomla! with more than 1.2 million downloads so far.
✔ INTRODUCTION & INSTALLATION
========================
If you are new to K2, please read the following guide:
✔ GLOBAL CONFIGURATION
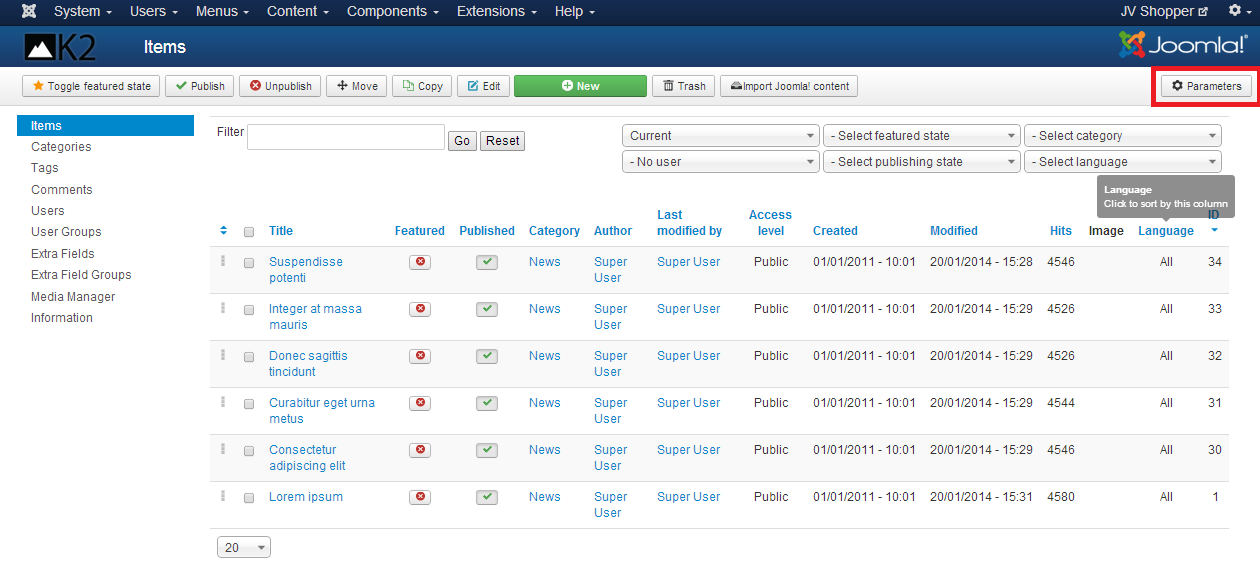
Go to Administrator => Component => K2
Click on Parameter button at the top right corner to set parameters for tabs in the screenshot below: Layout & View, Content, Images, Social, Comments, Frontend Editing, Advanced, Permissions
✔ CATEGORY CONFIGURATION
========================
Go to Administrator => Component => K2 => Categories
Here you can see categories and sub-categories.

Click New button to add a new category.
Click on any category you want to edit

Extensions
1.Slide pro
✔ INTRODUCTION
JV Slide Pro is a Joomla photo slide module. You can check the JV Slide Pro overview to know more
✔ SETTING UP JV SLIDE PRO
Simply upload the images you want to use to a folder on the site’s host, then select them in the “Slide source” inside Module configuration.
Assign the module to position ‘slideshow’ on home page and set the “Slide config” as followed:

The result of JV Slide Pro, from front-end

2. Acymailing
✔ INTRODUCTION
AcyMailing is a Joomla!® component allowing you to maintain real communication with your contacts via e-mail marketing, newsletters, follow-up autoresponders, marketing campaigns, etc.
✔ WHERE TO FIND
Acymailing and its documentation can be found at: https://www.acyba.com/
✔ SETTING UP ACYMAILING
After installing Acymailing, create a module using module type “Acymailing module” and name it “Newsletter”.
Enter the intro you want and assign the module to the position ‘bottomb-4’ on all pages .
Acymailing module on front-end:

3. JV Contact
✔ INTRODUCTION
A joomla contact module developed by team Joomlavi. Beside normal contact messages, it also features functions like social buttons and google map.
✔ WHERE TO FIND
JV Contact can be found in JV Contact Overview page
You can also get JV Contact from the extension package of JV Shopper.
✔ SETTING UP JV CONTACT
This part will show how JV Contact module was setup in the quickstart version, so that those who weren’t quick-start users can make their site as close to the demo as possible.
To set up JV Contact:
To set up JV Contact:
- Create an article named “Contact”, which contain the code: <div</div>
- Create a menu item using ‘Single Article’ type in Main menu and name it “Contact”, then link this menu item to article “Contact”
- Create a new modules using module type ‘JV Contact’. You can also make use of the module that was created upon installation
- Rename the module “Contact Content”. In this module:
Fill the various text fields in “Basic Options” with your info and the desired texts or messages.
In Form and Fields, set “Show Form” and “Title in Field” to ‘Yes’. Create 3 text fields called “Name” (Name type field), “Email” (Email type field) and “Subject” (Subject type field). Then add the text area that has “Message” as both its name and title.
In Captcha, enable Re-Captcha if you want.
Assign the module to the position ‘contact’ on all page
Front-end appearance:
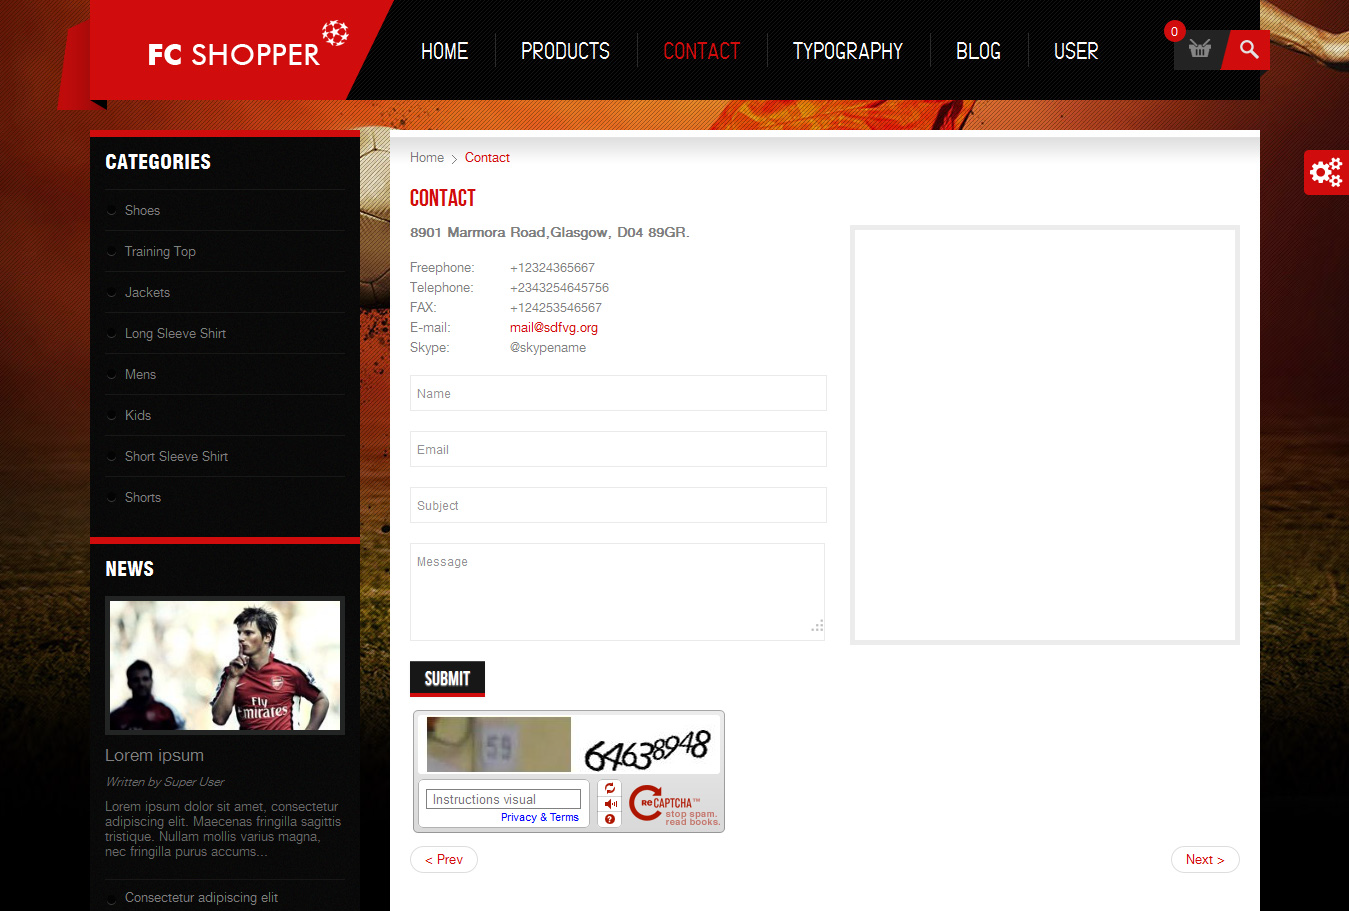
4. JV Latest News
✔ INTRODUCTION
A joomla extension developed by team Joomlavi, JV Latest News
✔ WHERE TO FIND
You can get JV Contact from the extension package of JV Shopper.
✔ SET UP
Create a menu using JV Latest News module type. You can also use the default module created upon installation.
Rename the module “News” and assign it to the position ‘left’ on all pages.
- In “Content Categories” of “Module Parameters”, select the categories you want.
- In “Intro setting” of “Module Parameters”:
Set “CSS Bootstrap” to ‘no’
Set “# Intro” to 1 and “# Link” to 2.
- In “Content” of “Module Parameters”:
Set “Type Content” to ‘Featured and Article’
Set “Show Date” and “Show Read more” to ‘no’
- In “Thumbnail” of “Module Parameters”, set both “Width” and “Height” to 0
- In “Pagination Setting”, set “Show Pagination” to ‘yes’ and “Auto Play” to ‘no’.

5. Hikashop
✔ INTRODUCTION
HikaShop is an E-Commerce extension for Joomla 1.5, 2.5 and 3.x. It is built for simplicity and flexibility.
HikaShop also has a wide range of marketing tools, but also powerful statistics displayable on your HikaShop dashboard to help you manage your store.
✔ WHERE TO FIND
Hikashop can be found on:
https://www.hikashop.com/
✔ SETTING UP HIKASHOP
To learn how Hikashop component works, please read Hikashop documentation at: https://www.hikashop.com/support.html#hikashopdoc
To replicate the demo site:
- Create the categories and products you need in Hikashop and adjust the Hikashop menu/categories according to what you need.
- In Main menu, create a menu item called “Products” by using the type ‘Hikashop > Categories’ with Hikashop Options as followed:
- In “Products”, create a sub menu item called “Products listing” by using the type ‘Hikashop > Products’ with Hikashop Options as followed:
- In Main menu, create a text separator menu item called “User”. Inside it create a sub menu item called “User Control Panel” using the type “HikaShop » user”
- Create a HikaShop Cart type module and assign it to the position ‘top-header’ on all page.
- Create 5 HikaShop Content type modules and name them “Categories”, “Random products”, “Latest products”, “Best seller”, “Best rated”
- Assign “Categories” to the position ‘left-1’ on all pages, then open “Hikashop Options” and configure the module according to the following screenshot.

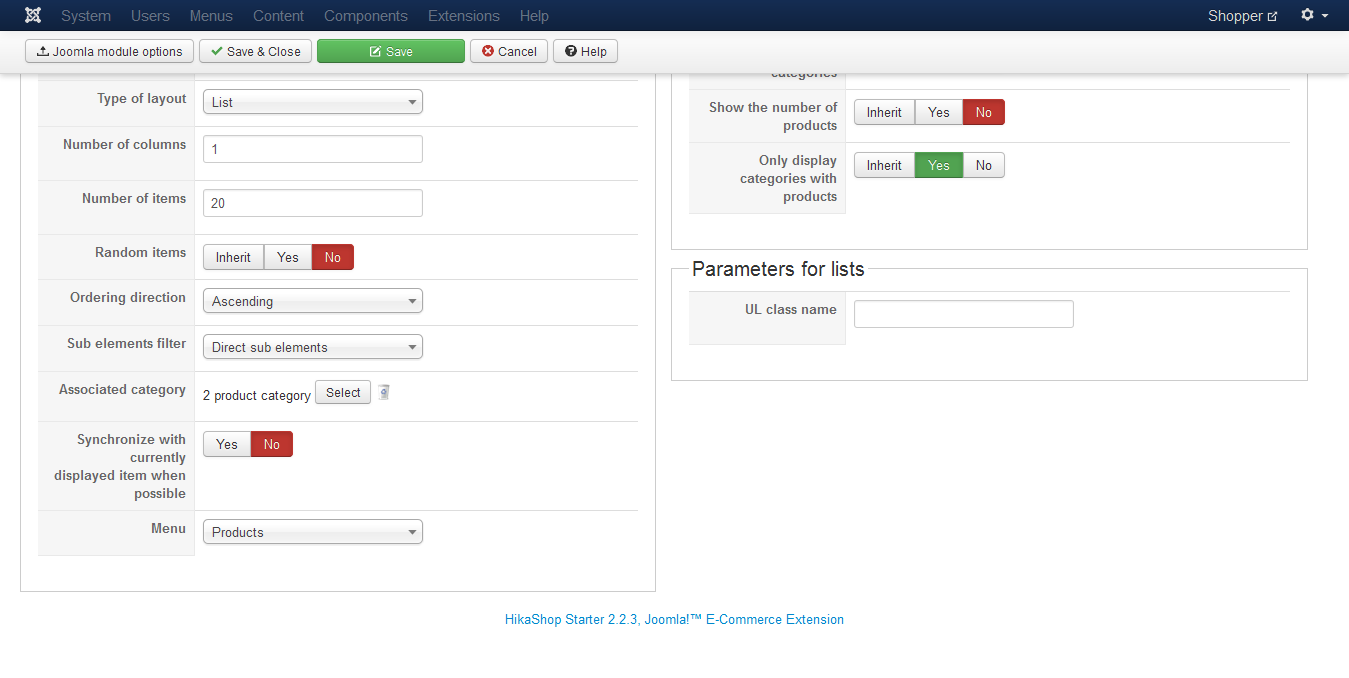
- Assign “Random products” to the position ‘position-7’ on all pages, then open “Hikashop Options” and configure the module according to the following screenshot.
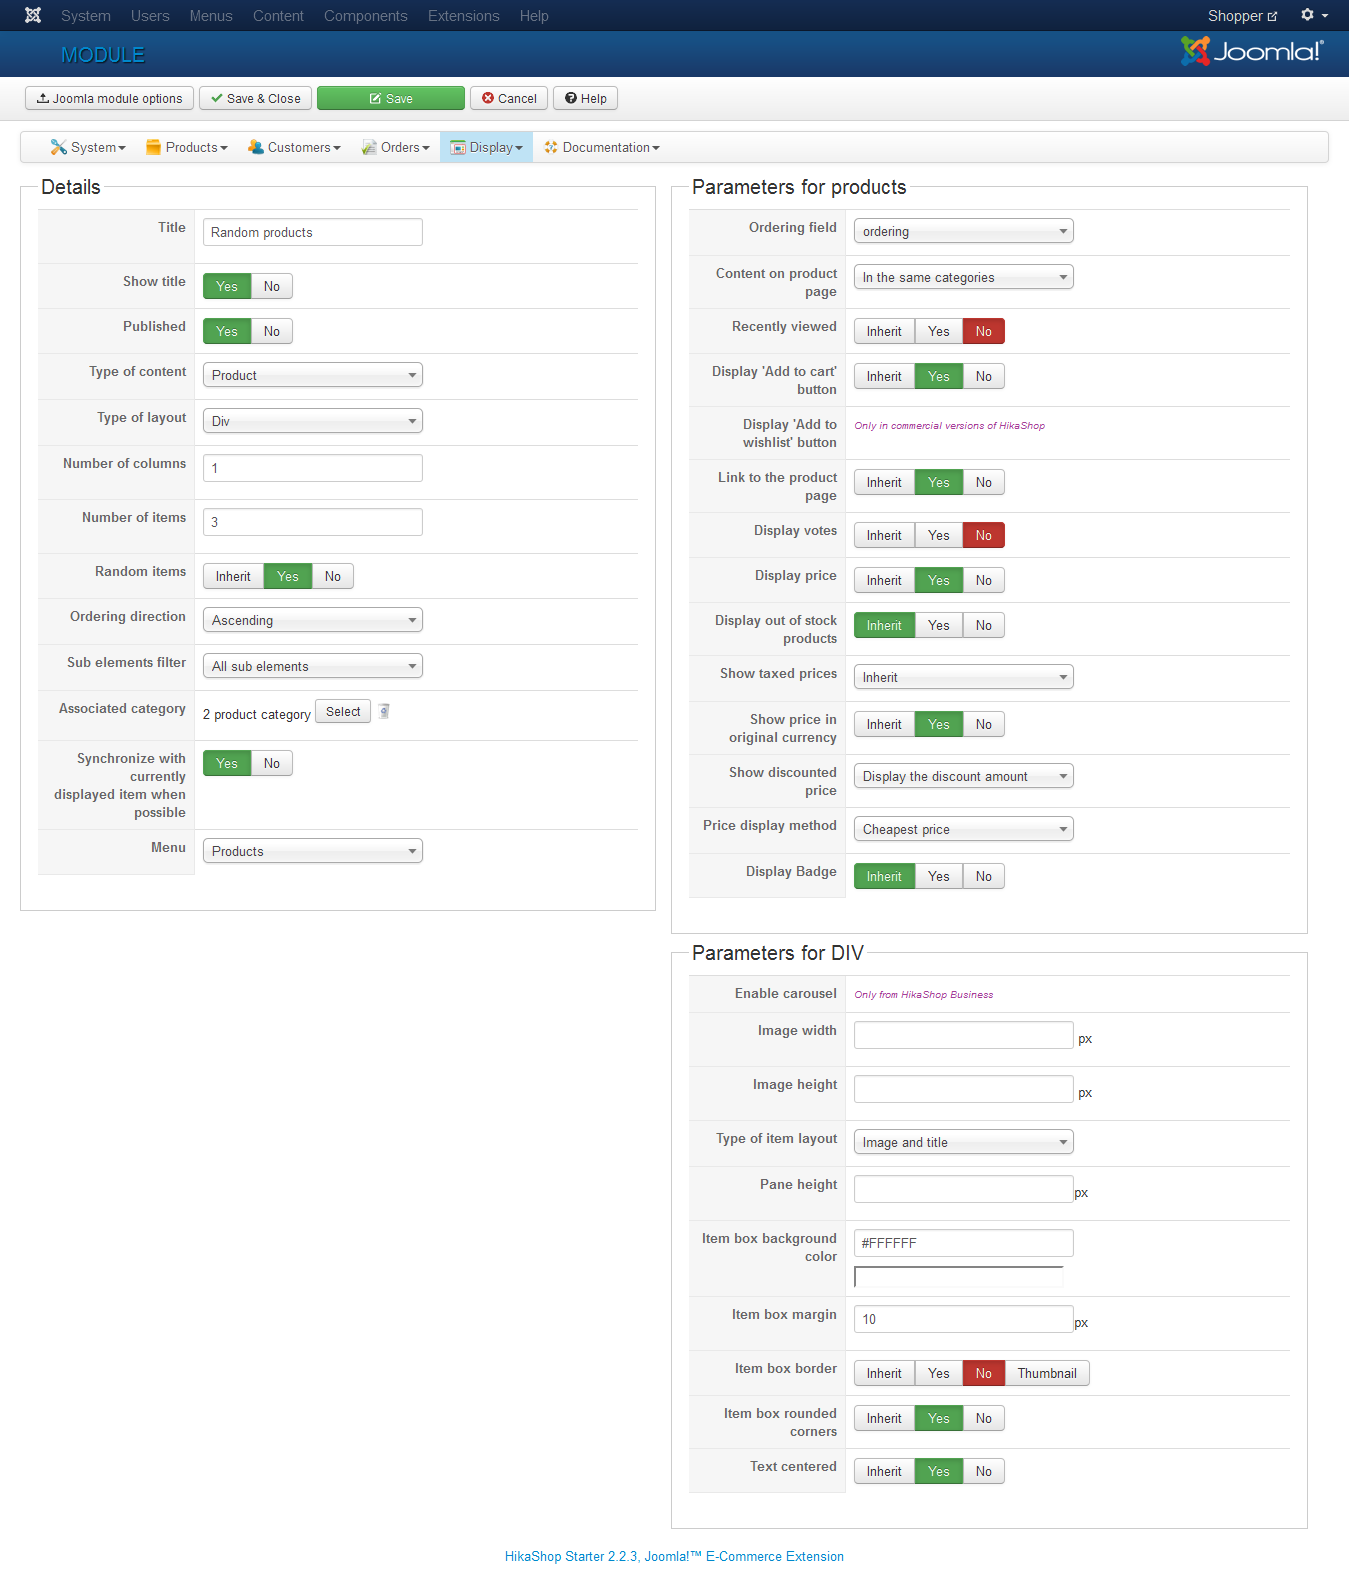
- Assign “Latest products” to the position ‘content-bottom’ on homepage, then open “Hikashop Options” and configure the module according to the following screenshot.
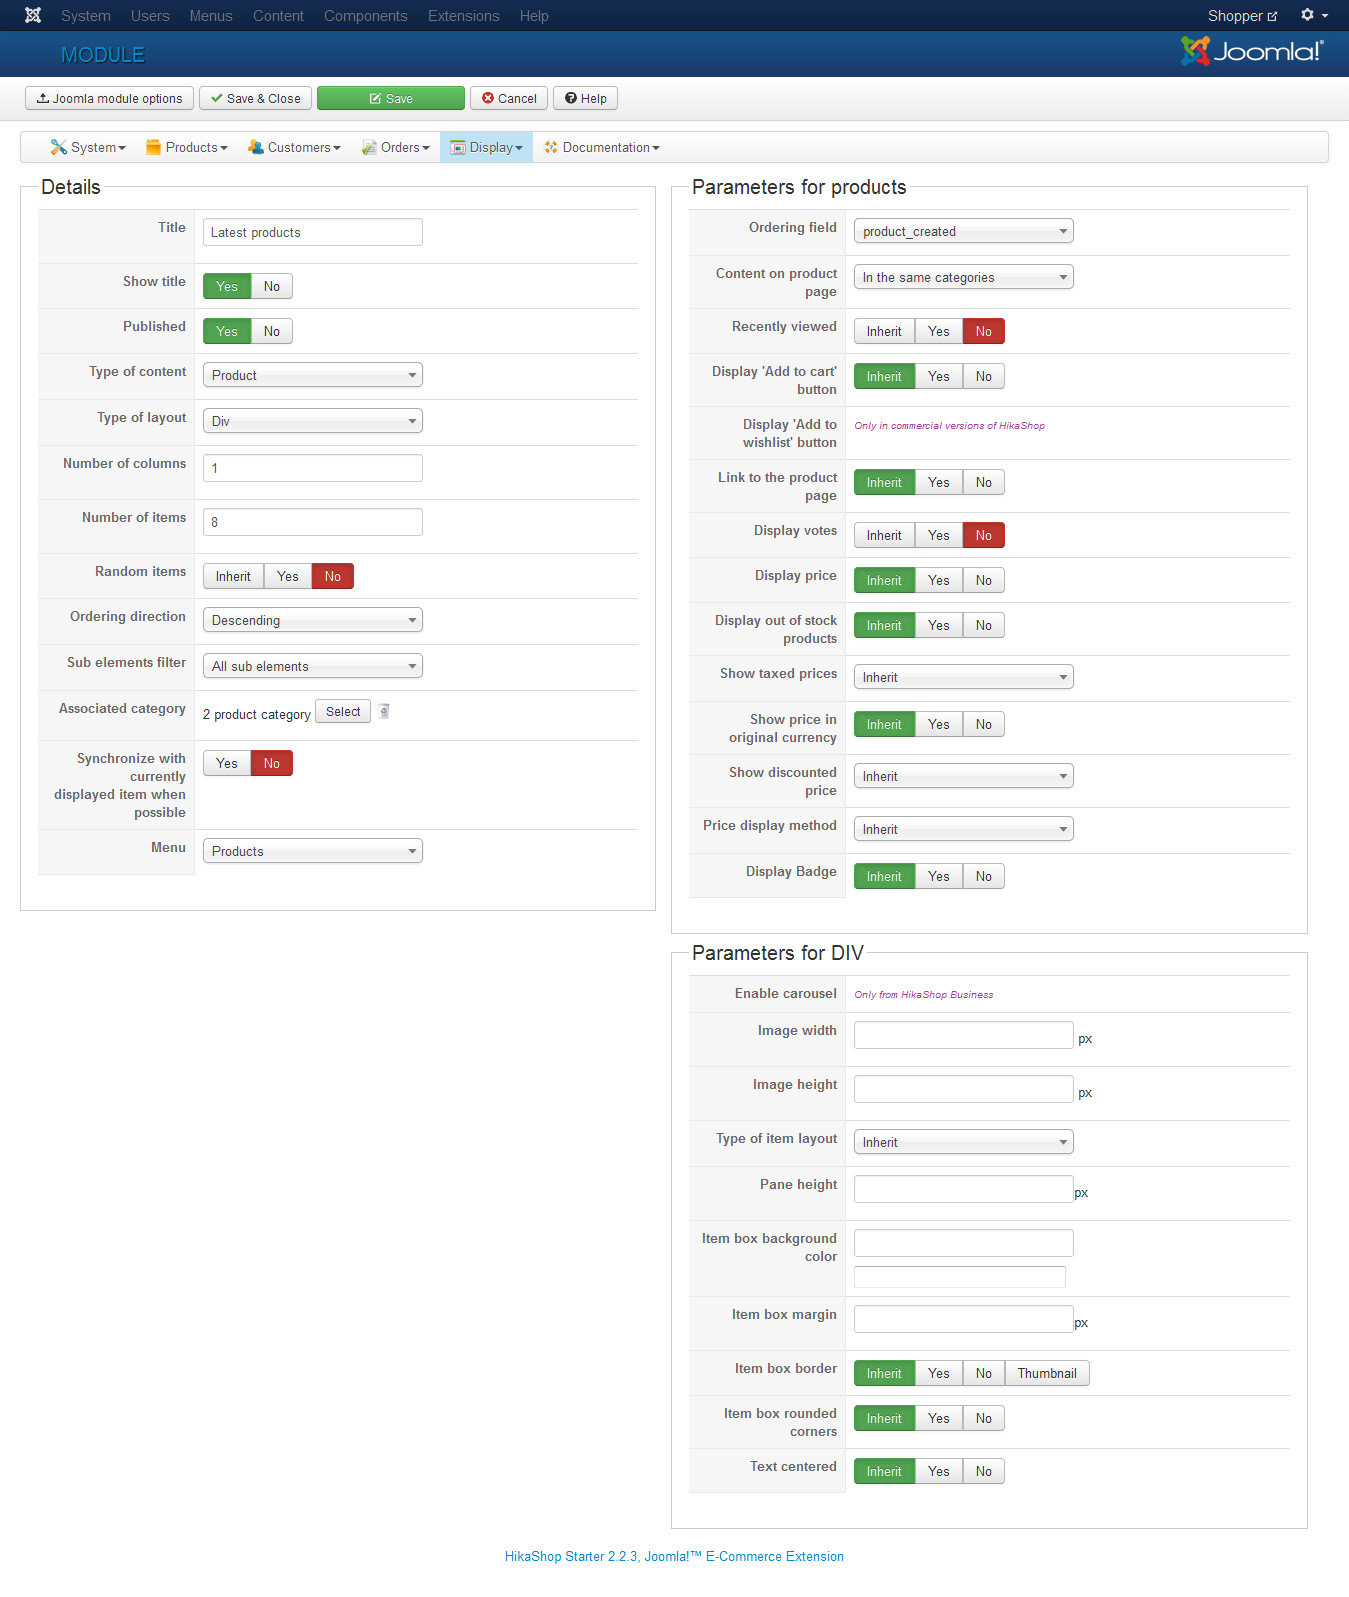
- Assign “Best sellers” to the position ‘content-bottom’ on homepage, then open “Hikashop Options” and configure the module according to the following screenshot.
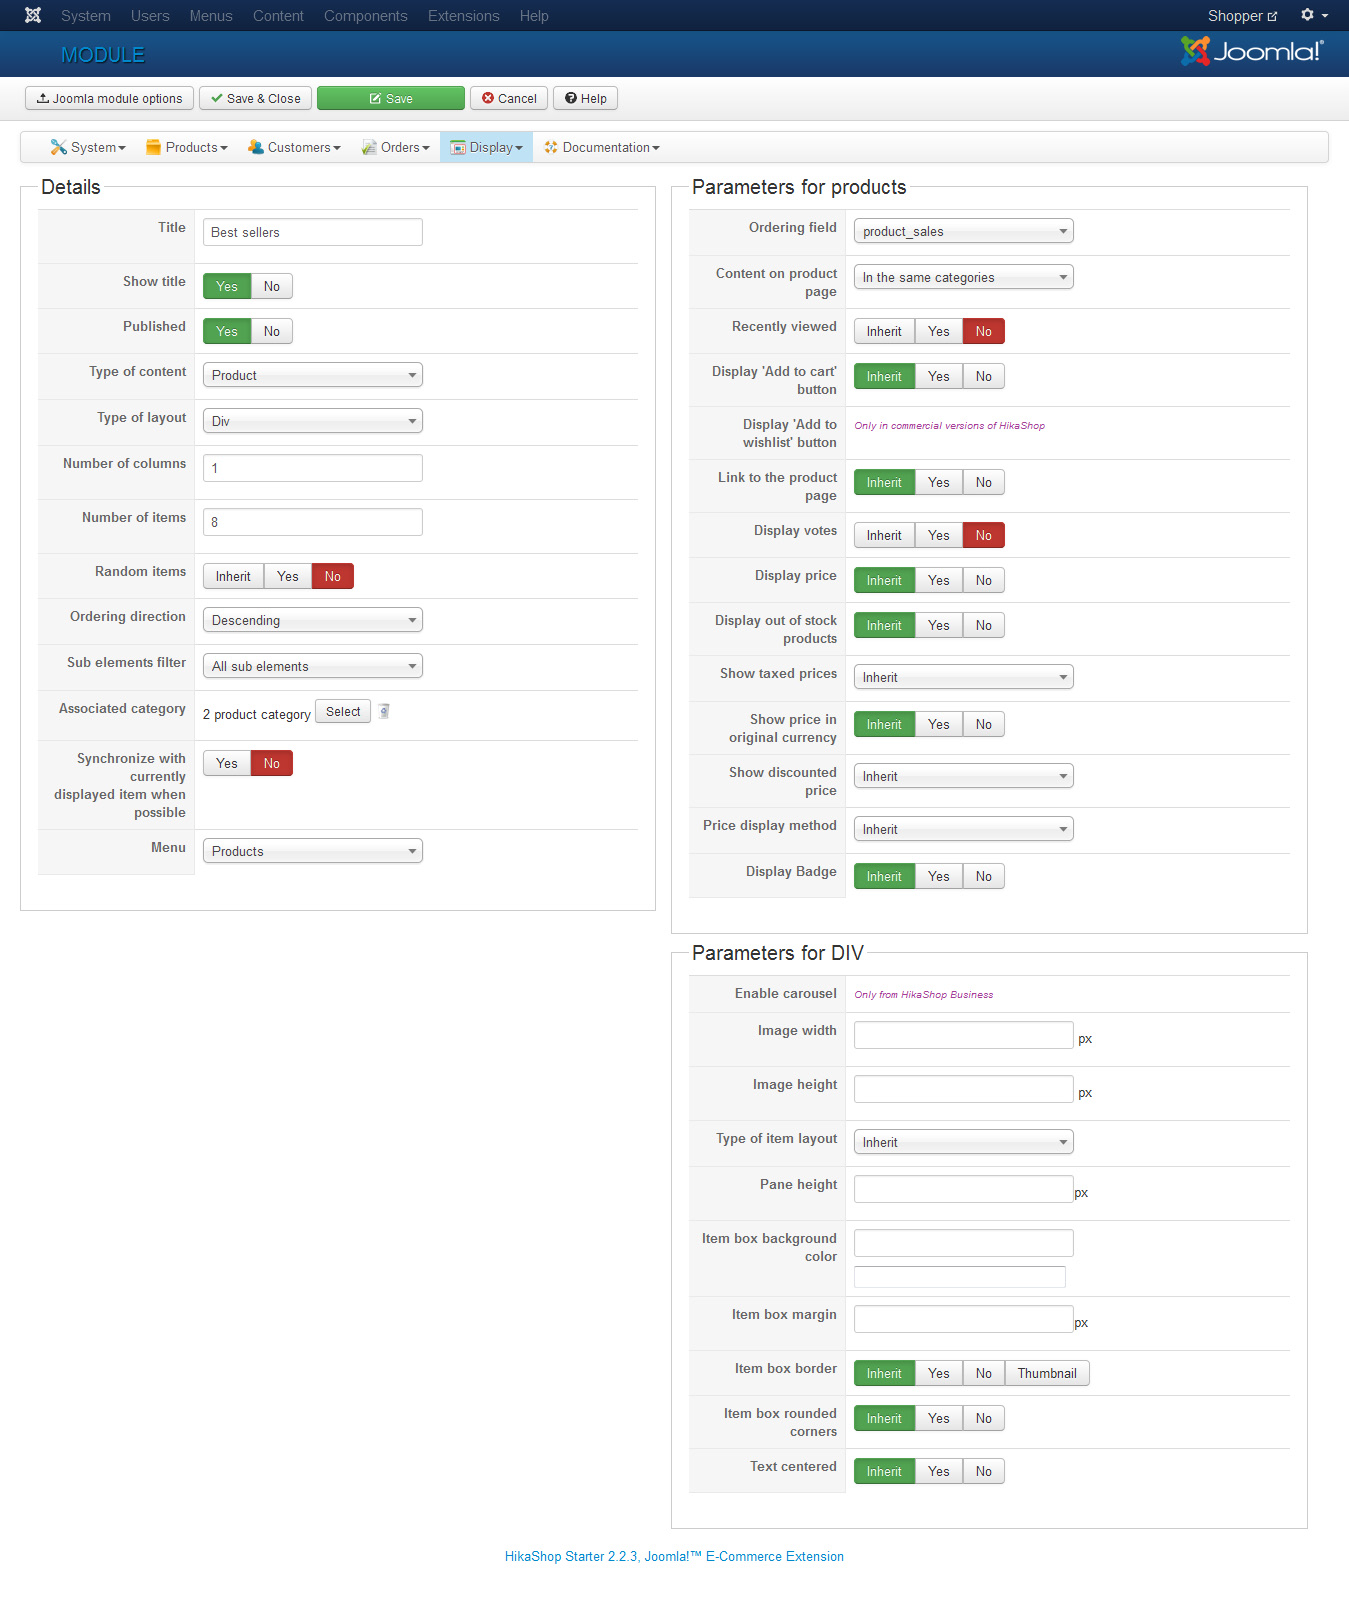
- Assign “Best rated” to the position ‘bottom-1’ on all pages, then open “Hikashop Options” and configure the module according to the following screenshot.

Hikashop modules, as seen from front-end (highlighted in blue)
